Remodeling Guides
Architecture

8 Great Ways to Use Beadboard
Grooved Paneling Works Wonders on Backsplash, Bookshelf, Ceiling or Tub

Have you ever worked with beadboard before? If yes, then you know it's insanely versatile, easy to work with and can be a lifesaver, aesthetically. If no, well, you need to get on the tongue-and-groove bus; beadboard can inexpensively overhaul anything from a ramshackle room to a lackluster ceiling or piece of furniture.
If you're teetering back-and-forth with which house project to tackle next and how to do it, take note of these eight common B-word updates. Whether your style is traditional, transitional, country or cottage, this chameleon-esque grooved paneling may be right up your four-walls-and-a-ceiling alley.
If you're teetering back-and-forth with which house project to tackle next and how to do it, take note of these eight common B-word updates. Whether your style is traditional, transitional, country or cottage, this chameleon-esque grooved paneling may be right up your four-walls-and-a-ceiling alley.
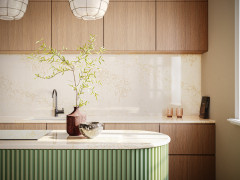
Start small: Consider a beadboard backsplash. Some DIY skills are necessary, but if using a chop saw isn’t in your deck of handyman cards, bring your backsplash measurements to the home improvement store and have an employee cut 4x8 sheets of beadboard to size for you. Many stores offer free cuts or charge a small fee for doing this. How much does it cost? Who cares? It’s totally worth the peace-of-mind not having to work with scary saws.
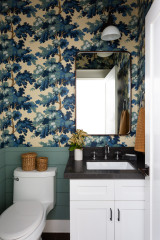
While beadboard works well as a backsplash, it's also a great option for a kicksplash. Again, you can have this pre-cut at the store if you're saw-phobic. Just keep in mind that in order to have a finished corner, you'll need to box in the ends with strips of trim. I find that 1x3 MDF works best as it's perfectly flat and easy to paint. Pine works as well but it's not gonna look as sleek once finished.
Beadboard paneling added to the back of prefab or one-of-a-kind bookshelves creates a custom look without the custom cost.
Tip: Choose unfinished 1.5-inch sheets versus pre-finished, white 2-inch sheets for bookshelf back panels. They’re about 30 percent less in price and can be given a custom update with a quick sanding and two coats of semi-gloss paint. Why spend the dough if you don’t need to? Says the man who eats out six nights a week.
Tip: Choose unfinished 1.5-inch sheets versus pre-finished, white 2-inch sheets for bookshelf back panels. They’re about 30 percent less in price and can be given a custom update with a quick sanding and two coats of semi-gloss paint. Why spend the dough if you don’t need to? Says the man who eats out six nights a week.
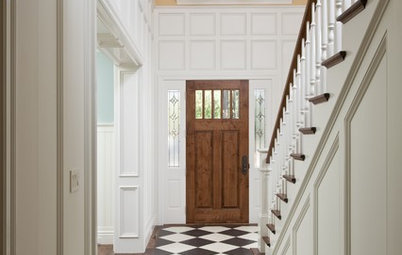
While beadboard walls ain't exactly new and groundbreaking, but installing 4x8 sheets horizontally is a bit more unexpected. To do this in your own home, keep in mind you'll need a strip of vertical trim between each 4x8 sheet for it to look right.
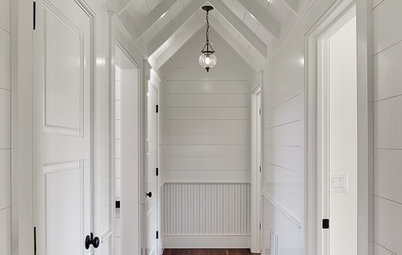
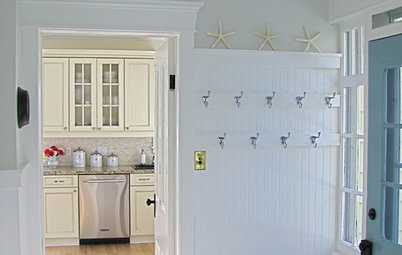
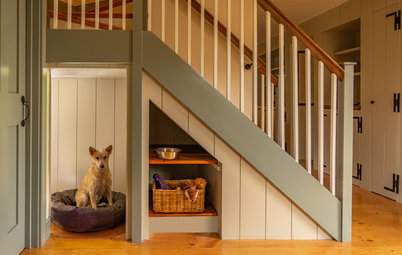
Beadboard works wonders on the ceiling, especially between joists that may otherwise sport unsightly stippled or popcorn ceiling treatments. Go directly over the existing ceiling with furring strips and screws (see the lower half of this post for what I mean).
Sunrooms and patios are fantastic places to start with beadboard on the ceiling. Commitment-phobes can fall in love with it between naps on the porch, then introduce it inside later on. I also recommend playing with color on sunroom and porch ceilings. Color often helps accentuate the crisp, smooth lines of the tongue-and-groove style. Ultra-white and bright, high-energy colors work best.
When it comes to kitchen cabinets, many retailers offer beadboard-style door fronts. If you’re not in the market for brand new cabinets, consider cladding your existing door fronts with beadboard, then simply changing up the hardware. Even if you’re not super in love with it, consider it a temporary facelift until you’ve got the cash to go all out. I’ve done this — twice.
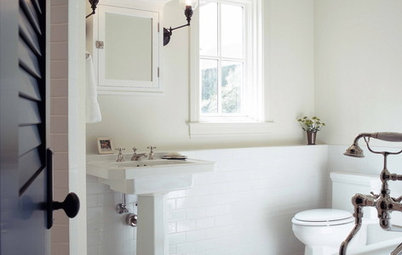
Oooh, I just did this too! Beadboard and 1x3 is an amazing way to give contractor-grade tubs a built-in, designer look. The big trick here is making sure you seal, seal, seal. This ensures no water leaking which can lead to rot. Paint the back and the front of the beadboard with semi-gloss paint, then add a bead of silicone along the edges of the trim.
See more beadboard projects and share yours below!
Next: Add substance and style with wainscoting
See more beadboard projects and share yours below!
Next: Add substance and style with wainscoting