


Waterlox Smell
sbcichocki
14 years ago
Featured Answer
Sort by:Oldest
Comments (35)

rococogurl
14 years agolast modified: 9 years agoRelated Discussions
OSMO Polyx-Oil vs. Waterlox
Comments (5)hi there, on the Waterlox side, I just refinished two rooms using both Waterlox and low-VOC Waterlox. Unfortunately I can report that I and my fellow workers in my house found the Waterlox to be to pungent to be around comfortably. (Ironically, and the company confirmed this, the low-VOC formulation smells even worse than the regular.) I wound up finishing with a polyurethane product just to avoid the odor. That said, the Waterlox makes a really gorgeous finish, it deepens your wood color and its re-touchability is what attracted me in the first place. The original finish/sealer is quite high-gloss, just fyi if you go that route. As always, your results may vary. Good luck, and hopefully someone can report in on the OSMO, which interests me too for future floors....See MoreFavorite Wood Counter/Butcher Block Companies?
Comments (55)So, I priced a 12 x 18 x 1.5 Walnut cutting board... Hardwood Lumber Company $47.52 + shipping John Boos $105 (shipping included) A rather substantial price difference that will be magnified when you're talking in terms of island countertops. (Depending on how far you live from Ohio where HLC is located regarding cost of shipping.) For those of us on tight budgets and who don't mind investing a little sweat equity, it is a good thing to have lower priced alternatives....See MoreWaterlox or tung oil?
Comments (25)Beg to differ. My mom's waxed barn board table has regularly rebuffed hot pots, boiling water, even fallen candles. Why? The damaging element melts a couple layers of WAX, not a volatile finish. Know the phrase "That'll buff right out"? Uh, actually true, in this case. Poly (I don't want it in my house), waterlox etc, no. You could theoretically spot sand, TRY to match (if the whole table didn't scorch or make a white spot, or shrivel) but good luck matching the depth, the stain, the level, and not raising the grain. (And I have, in the past, refinished furniture with poly. I'm making up for past sins.) You'd really have to be a professional. Anyone can do wax. And it feels good and looks really lustrous. Now, as to will wax encapsulate lead paint, I can't give you an answer on that, because I don't think anyone has done the science. Your state or county health department's lead abatement program might have answers, but they will undoubtedly take the most conservative course, which will be, "are you crazy? You can buy a nice plastic kids table at walmart for 99 cents! why would you do that?". The lead issue is not one to be attacked from a single object in a home. You need to look at the whole picture. Say the word lead and everyone freaks out. That makes it very hard to get real answers. The safest course? This may not be the best use for those particular boards. But someone else might do it, let their kids use it for 10 years and have no detectable lead levels, if the boards and the rest of the house are clean. (Lead is not considered to pose the same kind of health hazard for adults, so making a table for adults might be better.) Sorry, no easy answers. Do your own research and make your own decision....See MorePictures of finished 'budget' remodel - go Ikea!
Comments (26)We waited 10 years to find the right cabinets at the right price. Most "custom cabinets" cost more than they are really worth. Most are 1/2inch particle sides with shoddy drawer slides unless you "upgrade". I worked at our local home improvement kitchen design center and even with my discount the cost for our 11 by 15 foot kitchen was going to be over $8,000 without adding new appliances. I found IKEA and fell in love. The size options are bit limited but there so many ways to accommodate. The sides are better grade 3/4inch particle using lower fume glues, fully extending drawers made of metal with drawer dampers, and standardized peg holes inside every cabinet to accommodate your customizing needs. Where we had a 5 to 6 inch gap between cabinets, we put in a wine cubby. Good for dishcloths too. I wanted the microwave down below the countertop so we just bought a 30 inch wide cabinet frame (no doors) and ordered extra parts to customize it. We bought an extra shelf for the microwave. We also brought an extra 15 inch door (turned sideways) and some heavy drawer slides to make a drawer underneath the shelf. We had to drill a few holes (with a template provided for the other drawers) to make the drawer but it was so easy. IKEA didnt offer a trash can drawer with a wood cabinet door front so we made that too. We made the two doors of a 24 inch lower cabinet into one by attaching them together with flat metal on the back side. We drilled the holes at the bottom of the doors for the drawer slides (the same template as before). Reinforced (just to be safe) using bent flat metal from the back of the drawer to the back of the doors. With handles like all the other doors, no one even knows itÂs a trash can drawer. Best yet, I can release the drawer slides and remove the whole drawer a couple times a month to get what has possibly fallen behind everything. We needed to fill an upper space 42 inches wide. They donÂt make anything like that so I put two 21 inch cabinets next to each other and made the door open opposite of each other. The cabinet above the sink I call the garage door cabinet because it opens horizontally. It is 39 inches wide and stays open on its own once the hinges are adjusted properly. Great for the mugs and glass stemware. Lastly, we installed a breakfast bar but needed to fill in the last 24 inches at the wall end on the outside. Because the bar has the overhang to sit under, we could not use the drawer at the top of the cabinet. It didnÂt pull out far enough with the overhang. So we flipped it and moved the drawer to the bottom of the cabinet and the doors to the top. The drawer is the "junk" drawer and the doors open up 153 degrees to an interior heavy duty drawer (up to 110 pounds) with the appliances I do not use everyday. You must use the larger opening hinges to get the doors open wide enough to pull the drawer out from inside. Also, the cabinet needs to be away from the end wall by a few inches to accommodate the extra wide opening doors. All in all, even with my husbandÂs doubts, everything went up quite fast. We spent $4,000 with shippng. All the uppers done in 30 minutes thanks to the rail system they mount on and the lowers in another day, leveled using the adjustable legs. The finishing work (crown and bottom moulding as well as removable kickboard) was more precise (45 and 22 1/2degree angles) but looks fabulous. I would recommend these cabinets to anyone who knows how to use a screwdriver, hammer, and drill. Good Luck!...See More
pharaoh
14 years agolast modified: 9 years ago
Stacey Collins
14 years agolast modified: 9 years agogrowlery
14 years agolast modified: 9 years agoccoombs1
14 years agolast modified: 9 years agorhome410
14 years agolast modified: 9 years agomom2lilenj
14 years agolast modified: 9 years agomom2lilenj
14 years agolast modified: 9 years agolovlilynne
14 years agolast modified: 9 years agorosie
14 years agolast modified: 9 years agogrowlery
14 years agolast modified: 9 years agosbcichocki
14 years agolast modified: 9 years agorhome410
14 years agolast modified: 9 years agoccoombs1
14 years agolast modified: 9 years agorococogurl
14 years agolast modified: 9 years agomom2lilenj
14 years agolast modified: 9 years ago
Circus Peanut
14 years agolast modified: 9 years agoplants4
14 years agolast modified: 9 years agorococogurl
14 years agolast modified: 9 years agosbcichocki
14 years agolast modified: 9 years agotimber.j
14 years agolast modified: 9 years agosbcichocki
14 years agolast modified: 9 years agotimber.j
14 years agolast modified: 9 years agomuscat
14 years agolast modified: 9 years agopbrisjar
14 years agolast modified: 9 years agosbcichocki
14 years agolast modified: 9 years agopbrisjar
14 years agolast modified: 9 years agotimber.j
14 years agolast modified: 9 years agoci_lantro
14 years agolast modified: 9 years agoplants4
14 years agolast modified: 9 years agobruc
14 years agolast modified: 9 years agomuscat
14 years agolast modified: 9 years agoh2olox
14 years agolast modified: 9 years agoChristopherF
10 years agolast modified: 9 years ago
Related Stories
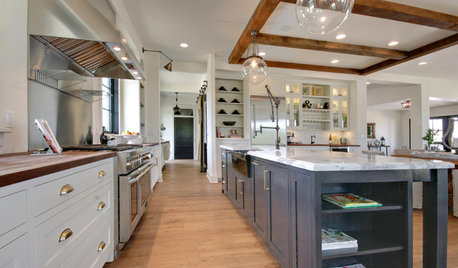
KITCHEN COUNTERTOPS10 Countertop Mashups for the Kitchen
Contrast or complement textures, tones and more by using a mix of materials for countertops and island tops
Full Story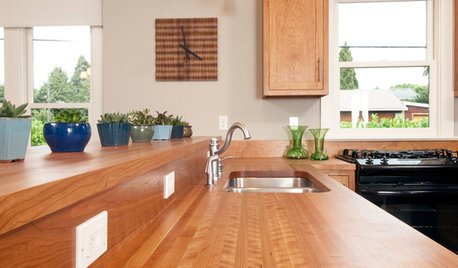
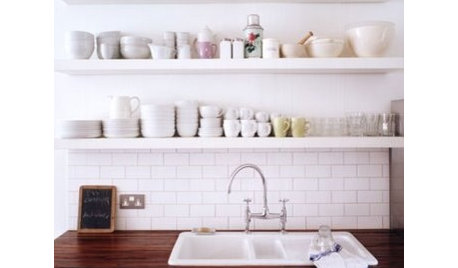
KITCHEN DESIGNWonderful Wood Countertops for Kitchen and Bath
Yes, you can enjoy beautifully warm wood counters near water sans worry (almost), with the right type of wood and sealer
Full Story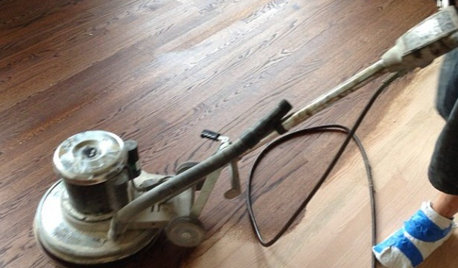
GREAT HOME PROJECTSWhat to Know Before Refinishing Your Floors
Learn costs and other important details about renewing a hardwood floor — and the one mistake you should avoid
Full Story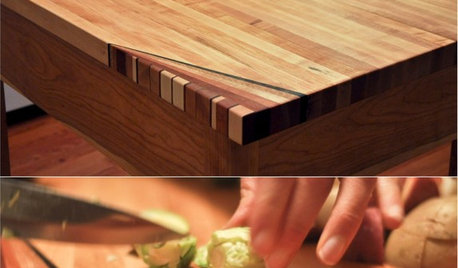
WOODWORKINGHow to Clean and Care for Your Butcher Block
Keep butcher block counters and boards looking sharp as a knife — and sanitized for safe food prep — with this advice from a pro woodworker
Full Story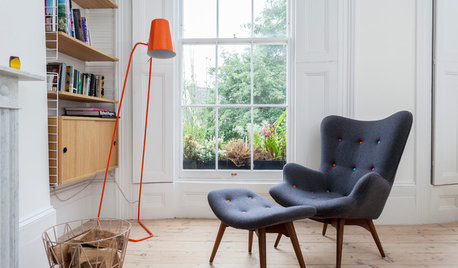
FLOORS10 Ways to Make the Most of Your Home’s Original Floors
Save yourself the cost of replacing your old floorboards with these tips for a new finish
Full Story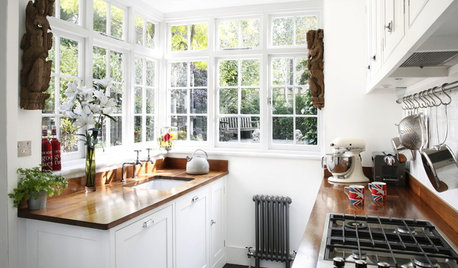
SMALL KITCHENS10 Things You Didn't Think Would Fit in a Small Kitchen
Don't assume you have to do without those windows, that island, a home office space, your prized collections or an eat-in nook
Full Story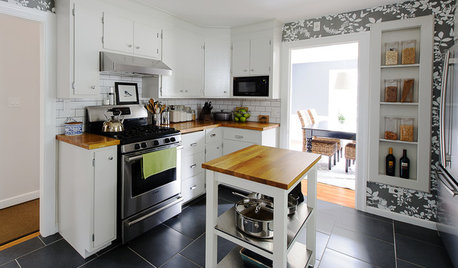
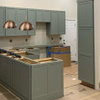
KITCHEN DESIGNKitchen of the Week: A Budget Makeover in Massachusetts
For less than $3,000 (not including appliances), a designing couple gets a new kitchen that honors the past
Full Story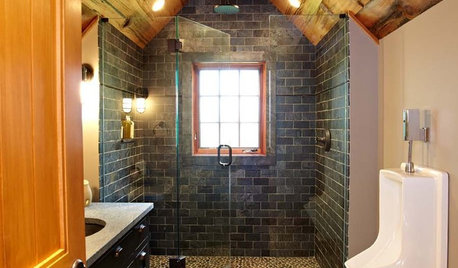
BATHROOM DESIGNWood in the Bathroom? Absolutely!
Wet places and wood can be a match made in design heaven — see great examples and get tips for sealing and installing bathroom wood here
Full Story
ccoombs1