


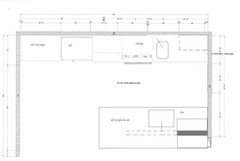
Layout Gurus: 2 sinks in small galley kitchen?
socalsister
11 years ago

Featured Answer
Sort by:Oldest
Comments (21)

rosie
11 years agosocalsister
11 years agoRelated Discussions
Layout of Small Galley Kitchen - Image 2
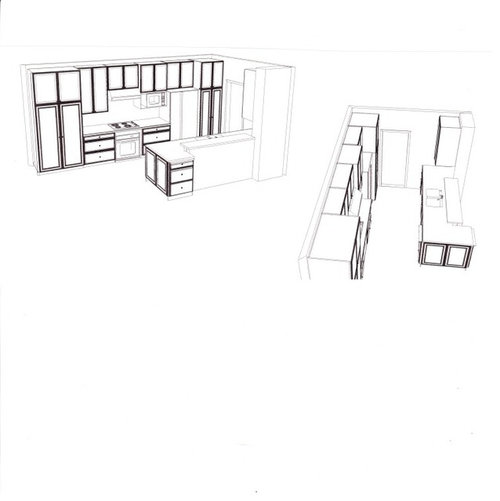
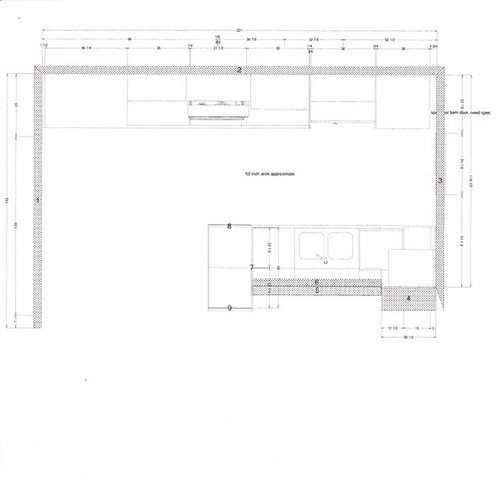
Comments (0)Here are the elevations! THANKS THANKS THANKS! Image link:...See MoreSmall Galley Kitchen layout help
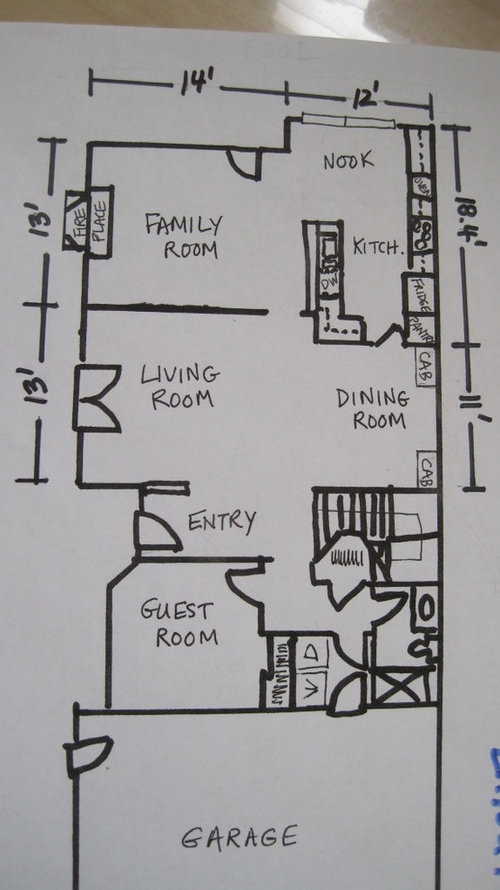
Comments (9)My cooktop is at the end of the run, sort of. There's not a wall, but there's a 12" deep floor-to-ceiling pantry cab, then there's an opening that leads around the corner to a side door. Your idea, to have counter on both sides of the stove, is best. A KD will tell you you should have landing space on both sides of the stove if you can. But you don't have to actually center it, it could be shifted over so you'd have, starting from the wall, maybe 9-12" of counter, then the 30" stove, then a bigger swath of counter, then the 24" fridge. You could even fit in a 30" fridge, and they aren't very expensive. The reason I suggest shifting over the stove a little is that I don't think I'd like to have my stove directly across from my sink. OTOH, my kitchen is less than 8' across, and you have 10' here, so the aisle is much wider. I saw the end of a basement remodel to create a rental apartment on HGTV recently, and they pointed out that the DW they installed would make a renter so happy because it is, it seems, uncommon. So adding one would make your unit more desirable. Since it's a rental, and I don't know if a renter would be happy about buying new cookware, induction might not be best for this application....See MoreCritique this Layout of Small Galley Kitchen
Comments (12)fridge behemoth is the big thing ; choose its place first. Easier said than done! What spot is best in your house? I dunno. I can't think of any advantage gained by putting the fridge on that wall and having a larger pantry. There are massive amounts of storage in frameless base drawers. AND, you could use your basement for a little bit of overflow storage if you bought in bulk and needed a temporary holding spot for a little while. Your storage goal is to keep turnover going so nothing gets stale dated, not to store food indefinitely. You don't need more and more and more. Things expand to fill storage available. Have a temporary storage holding spot in the basement, to encourage you all to acquire better habits instead of letting things disappear into "unlimited" storage. Since you are so appreciative, I'll give you my theory of how to lay out a tight galley in a few minutes. First, choose the behemoth sacrifice location. Fridge goes there. Or, go with a drawer fridge under the countertop and HIDE the real fridge somewhere off-site. Second thing to do: make base cabs all "ideal" in an idealized run without thinking of the sink. For bases, frameless is best. For drawers, frameless is best. Third: rejig to accommodate the sink if need be, by moving the cab sides 6" in one direction or the other (and, since these are all wide cabs you can invert 36" and 30"cabs to get the cab sides to where you want them to be). Or daringly plunk the sink into the middle of two cabs (which will force you to install deep drawers under the sink in both cabs. About drawer "height" or true depth in the vertical: don't use the ikea standard drawer sizing. Go deeper. Know that anyone can do this. Blum allows this. From an ikea hardware store, Blum is what you are truly buying, not anything ikea-ey. Ikea is the supplier of Blum thingies. Blum allows you to install the drawer front as you wish, without wasting space under the drawer. Ikea sells a kit which would have your drawer fronts overhang down past the drawer bottom (by a large space). I got rid of that wasted overhang space and nobody risked dying in the process, and no danger has been built in either. Blum tech support people are good to talk to if you need an official voice to hear all this confirmed from an official source. Don't believe anything you read from one guy: double check everything. I also removed the bottom panel of the cabs because it is only needed when the cab is a door fronted storage box, and unnecessary for drawers because drawers only need sides to hold them up. Reinforcing the cab so it remains square is another question that can be answered on another day. Fourth thing to do: understand that there are three situations where you don't need a full new electrical circuit with two 20A and its outlet: one is where you will have a 12" piece of counter between a sink edge and a wall / wall panel / finishing panel. This is f.y.i. if you choose to follow the newest and latest requirements of the electrical section of the building code. It is important if you want to spend less on upgrading electrical, or just to have fewer outlets. I have a few inches more slightly larger piece of countertop without an outlet. Nobody complained! Right next to a sink we didn't want electricity in the corner. Besides, I can always add a circuit in the future because I have a wall / wall panel there, because it's a corner. Another thing: wherever you install a "garage" you have the possibility to play with the outlets more than with a countertop where you are required to ensure there is a double 20A outlet within 24" of any countertop surface. Fifth: put the induction cooktop anywhere without regard to cabinet sides. You can have it straddle sides and be assymetrical too. You can have shallow drawers underneath the cooktop. I did this and many others have done this too. Nobody reports ever that there is a heat or air problem underneath the cooktop. Again, a 12" piece of counter between the wall and the cooktop doesn't require a whole new outlet, but a larger piece of countertop does, by code, so if you disregard that requirement you are technically not following code. Good to know before it becomes a panic decision. Sixth: for the "uppers" on the wall, I'd make one long long long shelf unit. Continuous shelves. No partitioning. Yes, it could have doors on it too. This can be "FACE-frame" built, instead of frameless. For wall units faceframe is best because you get to have continuous shelves. Reach in at any point and your arm can go sideways to grab stuff that is a 5" to 10" beyond the border point that would be there if the door represented a cabinet side. Also, another advantage is that your large objects are not forced to bump against sides. This "packing" advantage is the same reason why large drawers are so much better than narrow drawers. Light up the "uppers" from the inside and you will have made the potentially overpowering wall weight seem light and airy. In planning drawer width, think of the ikeas sizes. In planning drawer height, idealize the sizes you want. These are my steps for extremely small galley kitchens. Hth Here is a link that might be useful: ikea as a parts store...See MoreKitchen Layout Gurus--Please take a look at my plan
Comments (51)Hi everyone. I've been trying to get paying work done (I freelance), but I've had more ideas bouncing around my head. I'm liking what we all came up with for the island/table configuration. But, I really want to move the wall. I think it just opens up many options for the kitchen. I talked to the engineer today and am setting up an appt for him to evaluate next week. I also talked to a framer that a full-service firm who didn't want my small job referred me to. He does nothing but framing for builders and remodelers. He told me "realistically anywhere from $1500 to $3k" and he knows about pouring new footers if needed and building temp support walls on all 3 floors while the new support is being built. IF it is under $5k altogether to move the walls, then I'll do it. Our cabinets will come in at under $5k, so I figure for the $10k lots of folks in our neighborhood spend on cabinets at Home Depot, I'm getting the layout I really want. So here is my latest plan (number 472 I think ;-) Janet--I got you some landing space for the ovens! Which is now also a beverage center outside the main work space, so I think that is good placement for kids to grab something and for adults at parties. All my wine glasses can go in the cab above. The micro is there as well. The micro might be better inside my L space, but this way, it's pretty convenient to getting heated stuff to the table. And we use it mostly for steaming veggies or heating up leftovers, so things usually go from micro to table. Plus there is more storage space with that unit. I appreciate the feedback on the corner, but I like this cabinet versus the 36" lazy Susan (which I think should be renamed the "go-getter Susan" ;-). I don't like the piano hinge door on the Susan cab--I can see my kids banging it around and scratching up the cabinets around it will get banged up too. That IKEA corner unit has a door and it is just two half moon shelves that swing out. It may not hold as much, but I found it pretty handy to use. Plus, it gives me a drawer right there by the cooktop which the Susan doesn't have. Another thing I realized is that the DR door shouldn't be centered on the wall--it needs to stay near where it is now. Even though I think it looks more aesthetically pleasing to be centered, that door is a direct pathway into the kitchen and we don't need to be maneuvering around the dining room table. LavenderLass--you may have missed this in my earlier verbose posts, but I already have most of the appliances in the basement. They were a great deal from a fancy appliance store that went out of business. So, it's putting the cart before the horse, but I'm trying to work it all in. Thank you for helping me out on the window--I'm definitely going to find out the costs on that one. It would look much more upscale. I'll check in after I've met with the engineer and get more precise bids on the wall. Keep your fingers crossed. Thanks to everyone for your encouragement and suggestions so far. Susan Layout number 472: View of the DR wall for this plan:...See Morewagnerpe
11 years agoherbflavor
11 years agoblfenton
11 years agocakelly1226
11 years agodavidro1
11 years agosocalsister
11 years agowagnerpe
11 years agobellsmom
11 years agobellsmom
11 years agodavidro1
11 years agoCavimum
11 years agomarcolo
11 years agoshedthechrysalis
11 years agochiefy
11 years agodavidro1
11 years ago
bmorepanic
11 years agopricklypearcactus
11 years agolalithar
11 years ago
Related Stories
KITCHEN DESIGNSingle-Wall Galley Kitchens Catch the 'I'
I-shape kitchen layouts take a streamlined, flexible approach and can be easy on the wallet too
Full Story
KITCHEN DESIGNKitchen Layouts: A Vote for the Good Old Galley
Less popular now, the galley kitchen is still a great layout for cooking
Full Story
SMALL KITCHENSKitchen of the Week: A Small Galley With Maximum Style and Efficiency
An architect makes the most of her family’s modest kitchen, creating a continuous flow with the rest of the living space
Full Story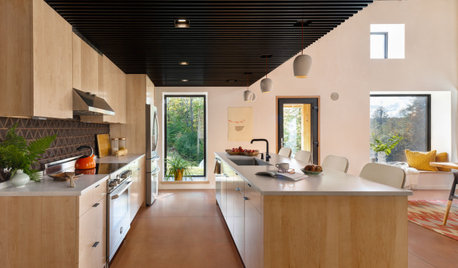
KITCHEN DESIGN10 Tips for Planning a Galley Kitchen
Follow these guidelines to make your galley kitchen layout work better for you
Full Story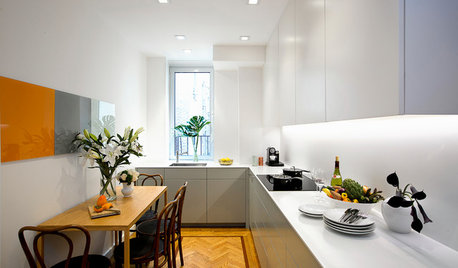
SMALL KITCHENSKitchen of the Week: Space-Saving Tricks Open Up a New York Galley
A raised ceiling, smaller appliances and white paint help bring airiness to a once-cramped Manhattan space
Full Story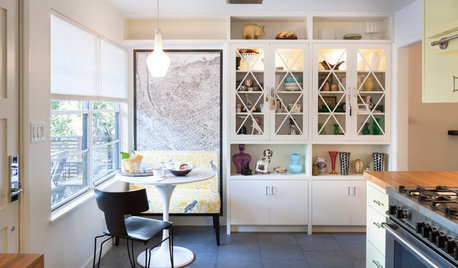
KITCHEN DESIGNKitchen of the Week: An Austin Galley Kitchen Opens Up
Pear-green cabinetry, unusual-size subway tile and a more open layout bring a 1950s Texas kitchen into the present
Full Story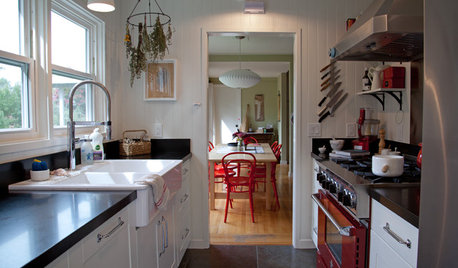
KITCHEN DESIGNKitchen of the Week: A Galley Kitchen in Wine Country
Smart reorganizing, budget-friendly materials and one splurge give a food-loving California family more space, storage and efficiency
Full Story
KITCHEN LAYOUTSThe Pros and Cons of 3 Popular Kitchen Layouts
U-shaped, L-shaped or galley? Find out which is best for you and why
Full Story
KITCHEN DESIGNKitchen of the Week: Galley Kitchen Is Long on Style
Victorian-era details and French-bistro inspiration create an elegant custom look in this narrow space
Full Story
KITCHEN DESIGN8 Good Places for a Second Kitchen Sink
Divide and conquer cooking prep and cleanup by installing a second sink in just the right kitchen spot
Full StorySponsored
Columbus Area's Luxury Design Build Firm | 17x Best of Houzz Winner!

wagnerpe