


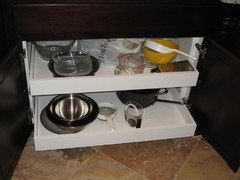
When I say 'All Drawers,' they're chuckling at me????
rainidame
18 years ago
Featured Answer
Sort by:Oldest
Comments (37)

Jon1270
18 years agoUser
18 years agoRelated Discussions
They're cute when they're not eating your hostas!
Comments (15)I still love the deer, they are so beautiful, especially the babies. We put up a deer fence along the woods and now they leave me alone. It is heartbreaking to go out and find your hostas mowed down, been there. Sometimes they are so smart, they come in through our driveway. What I did notice is they only bothered the old solid green junk hostas. Couldn't figure out why, then I thought maybe because all of my good hostas and roses get the Bayer 2 in 1 applied every 6 weeks or so. Maybe something in that makes them taste bad....See Moremy listing agent says they're too busy to attend showings
Comments (20)I think it's a regional thing. In Alabama, it's very unusual for the listing agent to be present. The Buyer's agent handles the whole showing. The exception could possibly be the upper bracket homes where the showing isn't even allowed unless there is some sort of a prequalification for the potential buyer. They want to keep the looki-lous out. As Graywings said, you can always list with another agent who says he/she will always be present at a showing. But then you're dealing with one other person when scheduling a showing. Many times showings are on short notice. If your listing agent is across town, in a closing, showing another house, at the dentist, etc., she simply can't drop everything to be at a quick showing for you. So you miss out on that showing for a buyer who might already be in the neighborhood looking at houses similar to yours. Maybe there is a real estate "team" in your area that could be closer to what you want (though still no guarantee). A husband-wife-daughter type of thing where they all work together on the same listings....See MoreOT: Medium Wedgwood Blue Pots - someone says they're too bright?!
Comments (10)Just got back from a circuitous journey, distracted in turn by Jacques Majorelle's currently rather unfashionable art, his father Louis's Art Nouveau furniture, and Yves Saint Laurent's 'Love' card series from the 1970s and 80s, as byways in my search for a good link to post here to the Majorelle Garden - only to find StillAnn had found the excellent one above... If a shade of blue could ever be described as hot, this would surely be it - it simply sizzles! I think, as Ingrid said, it's very much a matter of personal taste combined with how this colour works with the colours and degree of brightness of the surroundings, and the general ambience you wish to create... One possibility, if the colour of the pots does appears to 'shout' a bit too loudly, might be to connect it in with its surroundings by painting something else a little way away in the exact same shade - e.g. an archway/arbour, a little fence or gate, an obelisk/tuteur or some garden furniture; or perhaps create a little mosaic feature like a birdbath or edging for some steps (I'm sure you were longing for another crafty project!). Or, as some garden designers around here were doing a while back, simply by 'planting' a few painted posts and/or bunches of sticks as arty/funky vertical accents, in a little group or wavy line for example. Sorry I don't have a picture to illustrate. Love to see some photos, it sounds very pretty... Comtesse :¬)...See MoreHelp with mudroom design...it seems like they're all too small!
Comments (38)oh man Renee - yes welcome to the north! lol! I have more coats than my kids but I have work coats, and walking/running coats of varying weights, windjackets, snowblowing coat (old), lighter weight fleece coat, etc. I use them all weekly with the crazy weather around here and the different activities I do. Summertime which is a very short 3 months - it's a lot less congested but still more than one jacket with the weather swings. cevamal-I agree on double or triple hooks. I hate having to unload the hook to get to the coat on the bottom and I'm the Mom. My kids would just let it fall on the bench... We also have a place for our boot dryer to plug in and on any given day there are gloves sitting on the vent to dry out. I also like a side mudroom/closet because of all of the wet that melt off produces. We don't wear shoes in the house and when I walk down that hall I do not want to be walking in puddled water. The mudroom off of the hall solves that issue as well. The backpacks make their home in the mudroom, lunchboxes live there over the weekends and breaks or hot lunch days (so you are right they unload in the kitchen and stay their for re-packing for the next day). They take their binders out when they need to do homework. I do not want the backpacks sitting in the kitchen where I have to work around them. Homework is often done at island counter but whether it's the binder of the whole pack, back to the mudroom it goes when they are finished. It's all right in one spot when we are trying to get out the door in the morning. But that's just how we do it. I was tired of the kitchen clutter so when we built and incorporated a mudroom it all resides there where I don't have to step over and around it or work over and around it. But now instead of papers my kitchen counters hold electronic devices - go figure!...See Morerainidame
18 years agoUser
18 years agorainidame
18 years agotom999
18 years agochiefneil
18 years agorainidame
18 years agoJon1270
18 years agorainidame
18 years agoJon1270
18 years agorainidame
18 years agorainidame
18 years agochuckr30
18 years agoolphart
18 years agorainidame
18 years agorainidame
18 years agoolphart
18 years agoolphart
18 years agorainidame
18 years agoabnorm
18 years agoJon1270
18 years agorainidame
18 years agoolphart
18 years agoolphart
18 years agorainidame
18 years agoolphart
18 years agorainidame
18 years agoolphart
18 years agorainidame
18 years agorainidame
18 years agosusan6
18 years agokitchenobsessed
18 years agocookiemonsterdh
18 years agotalley_sue_nyc
5 years agotalley_sue_nyc
5 years agolast modified: 5 years ago

Related Stories
FUN HOUZZSurvey Says: We’re Scared of Being Home Alone — and Spiders
A new Houzz survey reveals that most of us get spooked in an empty house. Find out what’s causing the heebie-jeebies
Full Story
DECORATING GUIDESHow to Decorate When You're Starting Out or Starting Over
No need to feel overwhelmed. Our step-by-step decorating guide can help you put together a home look you'll love
Full Story
DECORATING GUIDESSay 'I Do' to Beautiful Wedding Memory Displays
You'll love and cherish these creative vignettes, artwork and more that keep the happiness of your special day at hand
Full Story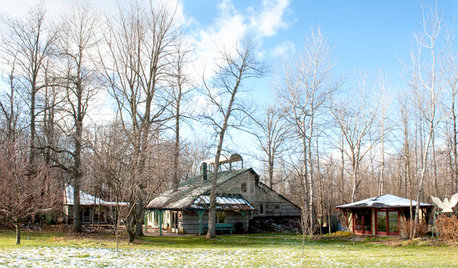
LIFEWhen You're Suddenly Solo at Home
Whether you stay in a home alone or move on, these strategies from professional organizers can help you with the process
Full StoryTREESHow to Protect Your Trees When You’re Remodeling or Building
Will your home be undergoing construction this year? Be sure to safeguard your landscape’s valuable trees
Full Story
DECORATING GUIDES12 Decorating Scenarios When You Should Do Nothing at All
By embracing the positives of negative space, you can strategically highlight key furnishings, give the eye a rest and create focal points
Full Story
BATHROOM DESIGNHouzzers Say: Dream Features for the Bath and Closet
Universal design, clever storage and convenience top the list of dream-house necessities
Full Story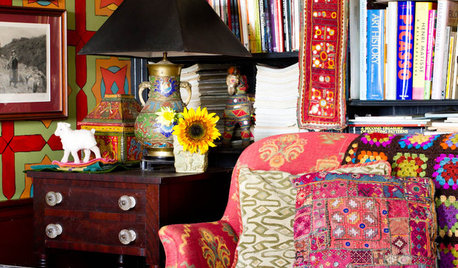
ECLECTIC STYLEBeautiful Clutter? These 13 Rooms Say Go for It
No need to haul cartons to Goodwill for a picture-perfect room. You can have a well-decorated home and all your stuff too
Full StoryHOUSEKEEPINGAll Together Now: Tackle Home Projects With a DIY Co-op
You're in good company when you pair up with a pal to clean, organize, repair and replace
Full Story
KITCHEN DESIGNCooking With Color: When to Use White in the Kitchen
Make sure your snowy walls, cabinets and counters don't feel cold while you're riding white's popularity peak
Full Story


chiefneil