


Nail ball (with rudimentary instructions)
mosaicwench1
17 years ago
Sort by:Oldest
Comments (15)
Related Stories
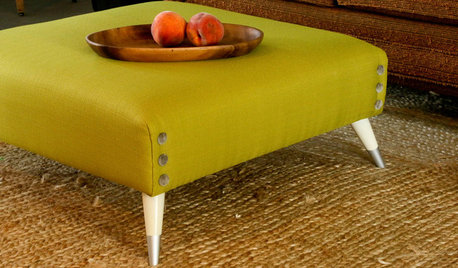
DIY PROJECTSTurn a Shipping Pallet Into a Stylish Ottoman
Get the step-by-step instructions for upholstering your own mod living room centerpiece
Full Story
DIY PROJECTSLace Goes Modern in an Upholsterer's DIY Pendant Lights
Bring romance to a room with delicate pendant lights you can make yourself
Full Story
DECORATING GUIDESDecorating Secrets: Picture-Perfect Way to Hang Art
Save your drywall with these easy steps for hanging framed pieces
Full Story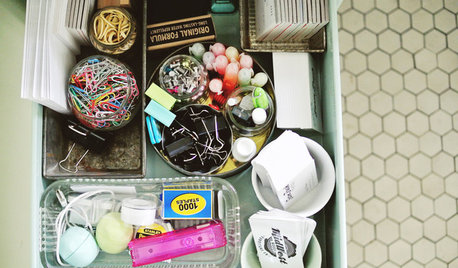
MOST POPULAR8 Ways to Get a Handle on the Junk Drawer
Don’t sweat the small stuff — give it a few drawers of its own, sorted by type or task
Full Story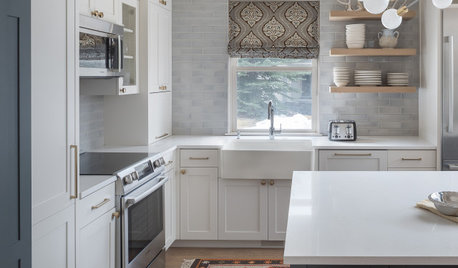
ORGANIZING7-Day Plan: Get a Spotless, Beautifully Organized Kitchen
Our weeklong plan will help you get your kitchen spick-and-span from top to bottom
Full Story
HOLIDAYSShine Up Your Holidays With DIY Mercury Glass Globes
Get expensive-looking decorations for the cost of paint and glass, with blinged-out orbs you can make at home
Full Story
EDIBLE GARDENSHow to Grow Your Own Sweet Summer Crops
This guide will help any gardener get started on growing the freshest warm-season veggies and berries for summer
Full Story
CONTRACTOR TIPSYour Complete Guide to Building Permits
Learn about permit requirements, the submittal process, final inspection and more
Full Story
MOST POPULAR15 Remodeling ‘Uh-Oh’ Moments to Learn From
The road to successful design is paved with disaster stories. What’s yours?
Full Story
REMODELING GUIDES8 Lessons on Renovating a House from Someone Who's Living It
So you think DIY remodeling is going to be fun? Here is one homeowner's list of what you may be getting yourself into
Full StorySponsored
texaswild
LinLee
Related Discussions
Planting a rose
Q
Food processor - Instructions for Idiots?
Q
Bowling Ball Beginner Needs Help
Q
My Stupidest Gardening Mistake - or- We Were Once All Newbies
Q
toomuchglass
mosaicwench1Original Author
daylilyfool
joyy
nicethyme
favesis37
mosaicwench1Original Author
nicethyme
coppertop367
tasymo
chickeemama
jynja
ladyronnie