


Considering not installing a Garbage Disposer?
murphysf
11 years ago
Featured Answer
Sort by:Oldest
Comments (8)

emma
11 years ago
sushipup1
11 years agoRelated Discussions
$2000.00 to install garbage disposal? HELP
Comments (6)The problem isn't bolting this to the drain. The problem is that your wall drain is too high. Often, when people get new counters and undermount sinks, their sink is much deeper than the old one. As a result, your drain stub from the wall is still set for your old sink. Adding a GD to the new lower drain makes it even lower! So, you need to run a new drain line from the vertical stack in the wall, which is often mounted several feet away because we all like kitchen windows. I'd live w/o the kitchen disposal, or do most of it yourself. I'm not a plumber. But you can do most of this yourself--it just takes time. And your plumber will do it all for 110 an hour......See MoreDual sink with garbage disposal install
Comments (3)The drain line from the dishwasher is fine but I see three code violations on the sink & disposal drain lines. 1. The two drains are connected by means of astandard sanitary tee. Code requires a baffled tee. 2. The P-trap is too low, which resulted in installing an 1-1/2" vertical offset on the fixture arm. Code requires a 1/4" per foot downward pitch from the trap weir to the vent. 3. No cleanout. Code requires a cleanout on the upstream end of all drain lines. If you have a removable trap removing the trap will serve as the cleanout but when the trap is glued in you must install a cleanout on the line. I can certainly understand why he installed the unit in that manner, but there is a much simpler solution. First off, get a "disposal type" end waste or center waste kit. When installing a disposal type kit you begin by discarding the 1/4 bend (90 deg elbow) that is supplied with the disposal unit. The disposal type waste kit will have a cross tube that has a flat flange on the end. That tube is then installed on the disposal in the same manner as the 1/4 bend, but the line will no come away at the same elevation as the disposal discharge port. You then shorten the length of the tailpiece on the opposite sink and connect the two lines together with the "Baffled Tee" that is supplied in the disposal waste kit. In this configuration the tee is higher permitting the P-trap to remain at the correct height to provide the required pitch to the fixture drain line. In the configuration in the photos it would probably be best to install a disposal type center waste kit. This would then put the tee midway between the two sinks. You would then have to cut the fixture arm near the wall and install an 1/8th bend (45deg sanitary elbow) and extend the fixture arm out towards the center where it will meet the P-trap tail piece. It is important that you extend the fixture arm from the wall to reach the trap. Code prohibits adding an extension tailpiece on the P-trap. I have prepared an illustration that will show you how the disposal type kits are configured....See MoreInstalling an outlet for garbage disposal on a 120V/240 multi cir
Comments (3)Odds are you don't need to have the disposal on a GFCI circuit and you probably don't want it there. I understand that a motor can cause GFCIs to trip, you can read up on that somewhere and find out for sure. Or, what the heck, you're an Engineer, we use the scientific method, try it out and see for yourself if it works or trips, it is easy to switch it from on to the other. The two GFCI circuits you are considering tapping could be your required 2 kitchen small appliance circuits, if that is so you can't put the disposal on either circuit, not allowed by the NEC. In fact the disposal may be required to be on its own 20A circuit, I'm a little hazy about that but I think it is so, your inspector will let you know. If this is an extra circuit and a dedicated one isn't required then I would tap off the LINE side of the GFCI. You will need 12/2 wire, one black, one white and one bare copper, run that to a switch and then from the switch to the disposal. If you want the disposal to be ground fault protected connect to the LOAD side of the GFCI. When I say side I really mean the top pair of screws or the bottom pair of screws, they will be labeled LOAD and LINE. You can do this yourself, it is a lot easier than calculus. Just make sure that the current is off, turn off the breakers and use your meter to double check, and don't let anyone turn it back on while you are working on it. The 12/3 circuit might have a double pole breaker but it probably has 2 separate breakers, make sure you turn them both off. And while you are at it make sure the red and black wires are connected to breakers on different busses in the breaker box. The voltage in the busses are 180 degrees out of phase so if on opposite busses the currents cancel in the white wire and it never gets more than 20A, if on the same buss the the currents from the red and black ADD and you can get 40A in the white and a fried wire and maybe a fire. There are lots of little mistakes that can be made and some can lead to problems, so read a lot, get a book on home wiring, ask questions but don't trust the answers until you check them out. A lot of people sound like they know what they are talking about, they even believe they know but they don't. I might be one of them. Good luck. Here is a link that might be useful: wiring kitchens...See MoreConsidering not installing a Garbage Disposer?
Comments (37)No garbage/trash pick-up for OUR tax dollars. Instead, we have to pay for a dump (oh excuse me "Recycle and Transfer Station," aka "Recycling and Disposal Facility" in the town next door) sticker for each individual car in the family, as well as carrying ID and the RTS "card," which they do check. Then, we have to buy bright yellow "pay-per-throw" bags to use at the said RTS. Last weekend, it took ten minutes to get out of the RTS AFTER dropping off the trash, because it was so crowded, because everyone in the town has to go there to drop off trash, and its hours are limited. A policeman was there directing traffic. SO, things that are too icky or that I don't trust the GD to handle, I freeze. Otherwise, I shove every little particle/peel/rind/etc. down that GD that I possibly can....See Morenancylouise5me
11 years agograinlady_ks
11 years agoemma
11 years agototsuka
11 years ago
Tiffany, purpleinopp Z8b Opp, AL
11 years ago
Related Stories
HOUSEKEEPINGHow to Fix a Stinky Garbage Disposal
No plumber’s fee or even a trip to the hardware store is required with these easy solutions
Full Story
KITCHEN ISLANDSWhat to Consider With an Extra-Long Kitchen Island
More prep, seating and storage space? Check. But you’ll need to factor in traffic flow, seams and more when designing a long island
Full Story
GREEN BUILDINGConsider a Salvaged Sink
Add character, save money and help the environment with one on-trend design move
Full Story
REMODELING GUIDESContractor Tips: How to Install Tile
Before you pick up a single tile, pull from these tips for expert results
Full Story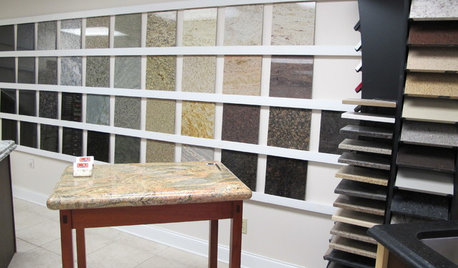
KITCHEN COUNTERTOPSWalk Through a Granite Countertop Installation — Showroom to Finish
Learn exactly what to expect during a granite installation and how to maximize your investment
Full Story
HOME INNOVATIONSConsidering Renting to Vacationers? Read This First
More people are redesigning their homes for the short-term-rental boom. Here are 3 examples — and what to consider before joining in
Full Story
GREEN BUILDINGConsidering Concrete Floors? 3 Green-Minded Questions to Ask
Learn what’s in your concrete and about sustainability to make a healthy choice for your home and the earth
Full Story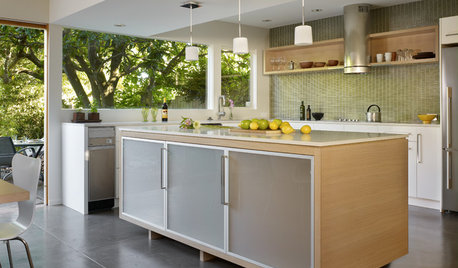
REMODELING GUIDESWhat to Consider Before Starting Construction
Reduce building hassles by learning how to vet general contractors and compare bids
Full Story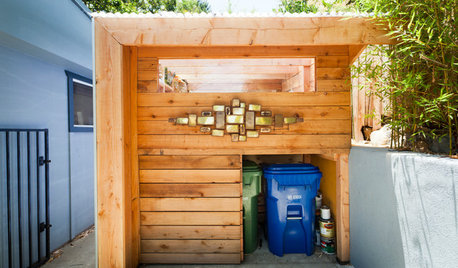
CURB APPEALHouzz Call: How Do You Hide Your Trash?
No one wants to see those trash and recycling bins. So where do you stash them while you wait for the garbage truck? Show us your designs!
Full Story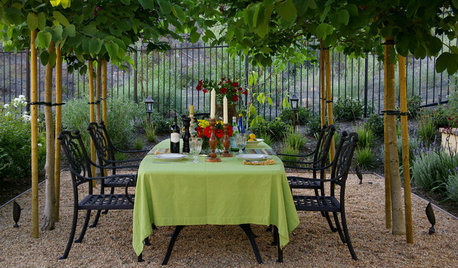
LANDSCAPE DESIGNEnjoy the Romance of Dining in a Classic Gravel Garden
Here’s what to consider when it comes to installing, styling and maintaining a DIY-friendly gravel patio
Full StorySponsored
azzalea