Earlier this year K8orlando asked if I would do the occasional tutorial on various aspects of quilting. Here is the first, on making row or bar quilts. This is NOT about quilting row by row as you sew your quilt together.
"Each row uses simple blocks that will increase your piecing skill but won't bore you by stitching dozens of the same block. Each row is like a mini quilt and each row urges you on to the next row. If you stitch one row per evening by the end of the week you have a quilt top! For the advanced quilter these quilts are easily put together from your fabric stash and the "instant" gratification is fabulous! Use any theme fabric and try the fusible interfacing method to personalize the quilt top for that special someone. I have also included a block index for designing your own row quilt.
General information on row (bar) quilts:
~ This type of quilt can be adjusted depending on what size quilt you want to end up with and the amount of fabric you have available. You can make it wider by adding more blocks or you can make it longer by adding more rows.
~ Each row is a small quilt within itself. Using one theme fabric for each row showcases the fabric without requiring lots of yardage.
~ Row quilts can stitch up quickly! By doing one row each day, at the end of the week you will have a quilt top.
~ Row quilts offer you the chance to try new piecing techniques and new blocks and you can practice your hand or machine applique.
~ You will not get bored making dozens of blocks! Each row is something new and different.
~ Row quilts are very forgiving! Doesn't matter if the seams match from one row to the next. If a row is short, just add some spacers.
~ Row quilts are great for the serious fabric collector and are very fat quarter friendly.
~ Row quilts can be easily sized for a crib quilt, lap quilt, wall quilt or any other size you need - especially those narrow or awkward spaces."
From Row by Row, by Terry Martin
Teresa's additional info:
~ For most projects I recommend using smaller blocks; 10" or 12" blocks may be too big and look out of place.
~ Sidewalks and roads can be made with a solid strip of fabric or a checkerboard of 4-patches.
~ Conversational prints can add color, movement and interest when used just by themselves in a long row between pieced/appliqued rows.
~ Row quilts can be constructed with vertical rows if that is your preference.
~ It is probably a good idea not to join the rows together until all the rows are completed. It's fun to play around with the order of your rows. Some rows will look great together, others may need small pieced rows or narrow sashing rows to separate them.
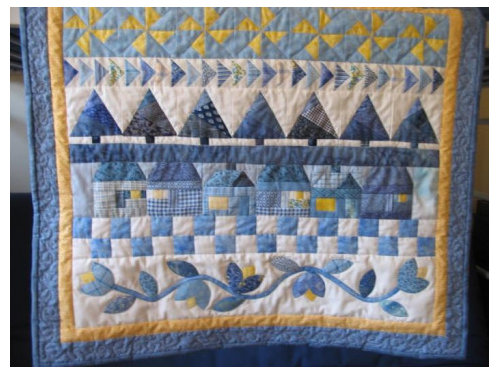
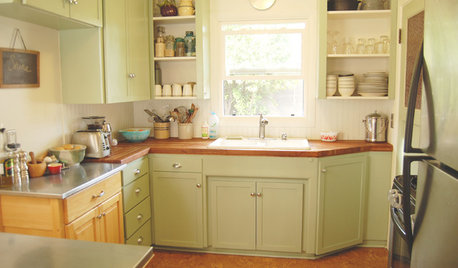
For my own projects, you will notice I like sidewalks and picket fences toward the bottom of my quilts and the stars/sky/sun/flying geese up at the top. I tend to think logically. ;o) I also like to build a row quilt around a theme or a person's favorite things. The blue and yellow kitchen quilt was made (years ago) for the time when my kitchen would be newly painted in blue and yellow. You can choose your fabric colors according to your own preferences, rust, gold, and brown for fall; pastel yellow, pink and periwinkle for spring; rich green, red, blue, purple, and orange for summer; icy blue, silver, and white for winter, or colors suitable for the area where your row project will hang.
blue and yellow kitchen wall quilt
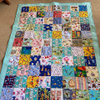
My Cottage Garden quilt done with our round robin qroup
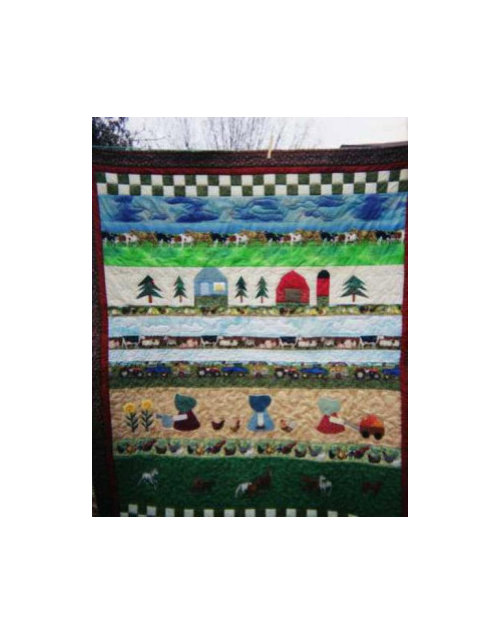
quilt for Brittany who lives on a farm
I will try to add some more images as I find them. The link below has lots of good ideas for row quilts.
If you have any questions, I'll be glad to try to answer them for you.
Teresa
Here is a link that might be useful: Google search for row quilts


nanajayne
luvtosharedivs
Related Discussions
Tutorials for the quilts with tubes I have made...
Q
How to sew quilt squares & rows together plz?
Q
Quilt Doodle Doodles mystery row quilt
Q
Charms on Point Quilt Tutorial
Q
vasu_texas
grammyp
murphy_zone7
day2day
bev2009
teresa_nc7Original Author
faintheart