


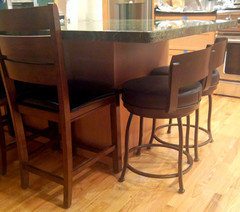
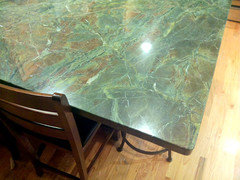
Seating Overhang - 12' vs. 15'
kammererk
12 years ago
Featured Answer
Sort by:Oldest
Comments (15)

la_koala
12 years agocarybk
12 years agoRelated Discussions
Those with 12 in. overhang on island...
Comments (18)Now, ask if someone used to have 12" but now has 15"... If you don't have anything to compare with, it will seem fine... But, we have friends w/a 12" overhang (counter-height) and I find it uncomfortable to sit at. My DH won't sit at it at all b/c it's too little. I'm 5'10" and DH is 6'5"....but my DD is 5'11" & DS is approaching 6'6". So, I wholeheartedly agree w/the National Kitchen & Bath Association's (NKBA) recommendation of minimum overhangs... Table-height (30"): 18" Counter-height (36"): 15" Bar-height (42"): 12" I have found the NKBA minimum recommendations for various things to either be right on or too little, but never too much. NKBA Kitchen Planning Guidelines with Access Standards Contains NKBA updates that haven't made it to the website yet: BH&G Kitchen Design Guidelines...See More15" overhang on end of peninsula - where do I put the outlet?
Comments (5)Mounting it in the overhead cabinets would be acceptable if it's not more than 20" above the countertop. Also, there is no "24 inch" rule for peninsulas or islands (like there is for wall countertops) The only requirement is that the peninsula be served by at least one receptacle (anywhere along it). The only 24 inch rule for peninsulas is that they don't required receptacles if they are shorter than 24"...See MoreIs 1.5 " overhang enough on kitchen island?
Comments (8)"...where there is seating he can keep it at 1.5" all the way around to keep it uniform, or go out a little farther..." What? Your seating overhang should be 15" (counter-height), not 1.5". 1.5" is standard for overhanging cabinets, not seating. So, the non-seating sides would be 1.5" and the seating side(s) would be 15". Note: Those 15 inches are clear/leg knee space; i.e., after accounting for the cabinets and the 1" for the decorative door/end panel on the backs of the cabinets. So, your island should be at least 41.5" deep - assuming you have seating on the back of the island. 1.5" Overhang in the front + 24" Deep cabinets + 1" Decorative Door/End Panel on the back of the cabinets + 15" Seating overhang = ============ 41.5" deep island...See MoreFAQ: Aisle Widths, Walkways, Seating Overhangs, Work/Landing Space etc
Comments (3)Workspace, Landing Space, Other Items . Work Zones…There are three primary work zones: Prep Zone (70% or more of kitchen work/time) Cooking Zone (10% of kitchen work/time), and Cleanup Zone (20% or less of kitchen work/time) Of these, the Prep & Cooking Zones work best when either next to each other or across from each other. The Cleanup Zone usually works best if it's separated from the Prep & Cooking Zones. Sometimes that means different parts of the kitchen (usually with a prep sink in the Pep Zone); other times it means the only sink in the kitchen separates them...Prep & Cooking Zones on one side of the sink and Cleanup Zone with DW on the other side of the sink. [See the FAQ thread "Kitchen Work Zones, What Are They?" for more information about work zones.] . Trash & recycle pullout...works best in the Prep Zone, near the Cooking Zone, and, if only one is possible, near the Cleanup Zone. Far more trash & recyclables are generated while prepping and cooking than while cleaning up. So, if you have to choose, put the trash & recycle in the Prep Zone instead of the Cleanup Zone. [That's the biggest mistake I made, I put it in the Cleanup Zone across a 6' aisle from the Prep Zone...it's my biggest regret by far in my kitchen.] Prep sinks...should have an interior size of no smaller than 12" x 12"...and bigger is better - I recommend no less than 15" in each direction, 18" would be better, IMHO. Anything smaller is not very useful for prepping. Those smaller sinks are often called "bar sinks" because they're really only big enough for filling a glass with water or dumping a glass. They're not big enough to clean veggies/fruit or draining pasta in a colander. Zone protection...strive to protect the Cooking Zone from traffic - both through-traffic as well as in-kitchen traffic. While cooking, you are dealing with very hot pots/pans/food and you don't want to be tripping over or dodging traffic, open DW doors, etc. This usually means putting the Cooking Zone in the most "secluded" area...but not always, it depends on the workflow in your design – but keep it in mind when designing. After the Cooking Zone, the Prep Zone should be protected. In general, no major traffic patterns should cross through the primary work zones. If you must put the Prep Zone or Cooking Zone on a major thoroughfare, then consider extra wide aisles so people can give the zone(s) a wide berth when someone is preparing a meal . Work/Landing Space...Be sure you have adequate work and landing space near/around appliances and in zones. Note that sometimes combining work & landing spaces is required when it's a small kitchen. [The following items are from the "NKBA Kitchen Planning Guidelines With Access Standards"] Prep Zone...36" continuous counterspace at least 24" deep for the prep zone workspace and be immediately adjacent to a water source. [We recommend at least 42" of continuous counterspace.] Cooking Zone...See Cooktop/Range Cleanup Zone...See "Sink (Only or Cleanup Sink)" Sink (Only or Cleanup Sink)...At least 24" of counter frontage to one side of the primary sink, and 18" on the other side (including corner sink applications) with the 24" counter frontage at the same counter height as the sink. The minimum allowable space from corner to the edge of the primary sink is 3". Sink (Prep)...At least 3" of countertop frontage on one side of secondary sinks, and 18" on the other side (including corner sink applications) with the 18" counter frontage at the same counter height as the sink. [We generally recommend at least 12" on one side and 42" on the other side. This minimizes splashing on the floor and accidentally knocking things off the counter.] Refrigerator...At least 15" counter space on the latch side of the refrigerator or on either side of a side-by-side, or at least 15" of landing space no more than 48" across from the refrigerator. If an oven is next to [the] refrigerator, [the] refrigerator should be the one placed next to available countertop. Ovens (Wall)...At least 15" of landing space, at least 16" deep, next to or above oven if it opens into a primary traffic pattern. If it does not open into a traffic area, at least 15" x 16" of landing space needed [(i.e., it can be across or next to it). We do not recommend putting an oven where it's in a major traffic path.] MW...At least 15" of landing space, a minimum of 16" deep, above, below, or adjacent to a microwave oven Cooktop/Range... Open-ended kitchen: at least 9" of counter space on one side of the cooking surface and 15" on the other, at the same counter height as the appliance. [We recommend at least 18" on the open end for safety reasons.] Enclosed kitchen: at least 3" of clearance at an end wall protected by flame retardant material; 15" on the other side of the appliance, at the same counter height as the appliance. [Be sure there is sufficient space for elbow room and pot/pan handles on both sides – we recommend at least 9".] Island or peninsula: Countertop should extend a minimum of 9" behind the cooking surface, at the same counter height as the appliance, in any instance where there is not an abutting wall/backsplash. [We recommend 18" to 24" behind the cooktop/range for safety and aesthetic reasons] Combined countertop for 2 adjacent locations...For two adjacent work centers or landing spaces, determine the longest of the two required lengths and add 12". NOTES on cooktop/range spacing: Experiences here have shown some of us that the above is actually too little for an island or peninsula setup or when the cooktop/range is at the end of a cabinet run. For safety reasons, you need at least 18" on each side. This does not include workspace -- 18" is far too little for workspace. For behind the cooktop/range in an island or peninsula, there should be a minimum of 18" behind if there is no seating behind the cooktop/range and 24" behind if there is seating. For functionality, at least 24" on each side is better, regardless of location of cooktop/range. This space can be shared with the Prep Zone on one side; if it is, then there should be at least 48" on the side shared with the Prep Zone. [36" + 12" = 48"; 36" for the Prep Zone + 12" for the overlap with the Cooking Zone. See above about "combined countertop for 2 adjacent locations".] In the case of a range/cooktop next to a door or wall, check your local Codes, they may dictate more space b/w the door or wall and cooktop/range....See More2LittleFishies
12 years agotaggie
12 years agomydreamhome
12 years agomydreamhome
12 years agozartemis
12 years agohottois
12 years agoStaceydux
12 years agojscout
12 years ago
Debbi Branka
12 years agobreezygirl
12 years agozartemis
12 years ago
Nileen J
5 years ago
Related Stories
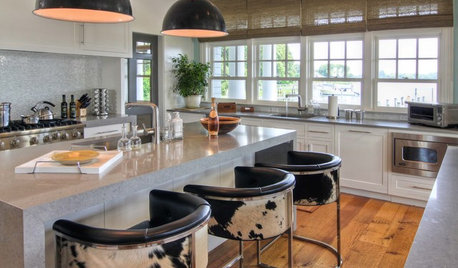
KITCHEN DESIGNHot Seats! 12 Great Bar Stools for All Kitchen Styles
Seek some hide, go backless, pick a swivel or a footrest — these stools let you belly up to the bar or island however you like
Full Story
STAIRWAYSTrending Now: 15 Staircases Making Houzzers Swoon
Stair runners, reclaimed wood, seating and storage are featured in the most popular stairway photos on Houzz
Full Story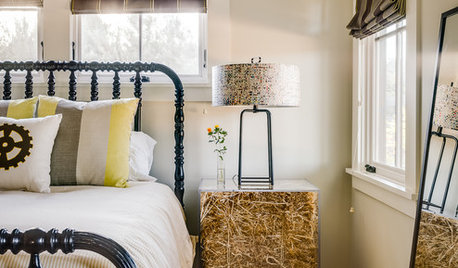
BEDROOMS15 Nightstands That Are Not Your Average Bedside Tables
Take another look at that unusual antique or flea market find. It could have a new life next to the bed
Full Story
BATHROOM DESIGN14 Design Tips to Know Before Remodeling Your Bathroom
Learn a few tried and true design tricks to prevent headaches during your next bathroom project
Full Story
MOST POPULAR15 Remodeling ‘Uh-Oh’ Moments to Learn From
The road to successful design is paved with disaster stories. What’s yours?
Full Story
KITCHEN DESIGN12 Breakfast Bars With Coffee Shop Appeal
Give even a small kitchen a sociable vibe by inserting a stylish seating post
Full Story
GREAT HOME PROJECTSHow to Add a Window Seat
Get a comfy, cozy spot with a view — and maybe even extra storage too
Full Story
STORAGE12 Built-In Storage Solutions for Small Spaces
Check out an architect’s guide to some inspiring ways to build in extra cabinets, shelves and cubbyholes at the start of a project
Full Story
KIDS’ SPACES15 Bright Ideas for Kids’ Bathrooms
Splash on the color and have fun with decor to make a child’s bathroom a cheerful place
Full Story
LIVING ROOMSHow to Decorate a Small Living Room
Arrange your compact living room to get the comfort, seating and style you need
Full Story
Buehl