SHOP PRODUCTS
Houzz Logo Print
2ajsmama

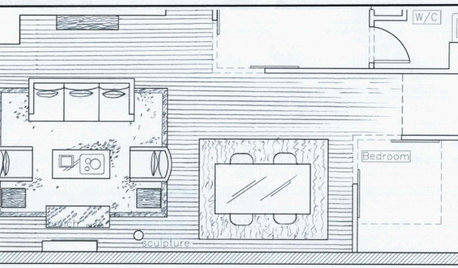
Before I start cutting fabric...

2ajsmama
14 years ago

Sewing forum is a little slow and I want to get started on this rainy day, so I'm asking here.

I prewashed the fabric (after seeing what dry cleaner charged for one cotton sweater!), so I can wash and air dry my porch cushion covers. It did shrink along the length, though not along the width. The blue stripe said 100% poly but then again all the Job Lot fabric had the same sticker - I actually think it's cotton (did the burn test and it was orange flame, smelled to me like burnt marshmallows but the fabric burned completely, no hard black sticky ash). That changes things a little - I can't return it now, and I still love it, but it won't be as suitable for outdoor use as I thought unless I can waterproof it somehow (spray?). It also was going to be tight to have enough fabric to make all the cushions, now I don't think it's possible at all unless

Option 1) I make knife-edge cushions rather than box cushions (this would save some on seam allowances, though I might even still have to do the bottom in solid color since I'm not sure I really have enough to wrap around all the cushions)

Option 2) I use the (polyester?) solid color on the bottoms of box cushions, might or might not do welting on the top edges but no welting on the bottom (wrap the boxing around, cut the bottom a little smaller so bottom seam is actually under the cushion). Would look similar to knife-edge above but shaped pretty much like the test cushion here since the bottom fabric doesn't show much - just imagine it in the blue stripe

Or

Option 3) I could make the cushions reversible, like this, with solid-color welting (I bought 3/8" clothesline with 3 strands so I guess I'd have 1/8" cording and use the "canvas" or the cotton from the test if the canvas was too stiff to cover it), but the stripe would show on the front (if anyone saw the Hood's porch, first picture, in latest Southern Living they have a striped front edge with a solid color top cushion). I didn't do burn test but after washing this "canvas" still is stiff and water still beads up before eventually - minutes later - soaking in.

That also gives me enough fabric to make throw pillows out of the blue like above shown with the test cushion (though the "canvas" is a little yellower than the cotton test fabric).

Well, maybe that leads me to Option 4) Make some cushions all striped (even bottoms?) and some solid? Which ones? I have 4 chairs and 1 settee, 2 chairs will be grouped with the blue table, 2 rockers will be grouped with the settee and 2 different tables that may only have painted legs (may stain the tops to match mahogany front door?).

Little blue table now where the dark table was - just didn't take new pic

BTW, here's the blue table I painted to go with the blue stripe (I may paint a larger table this color, I was just testing paint technique).

Votes? I'll check back after cutting the templates for the seats. Thanks.

Comments (37)

  • bronwynsmom
    14 years ago
    last modified: 9 years ago

    I love that blue stripe...very classic and simple. Lovely!
    I would make knife-edge cushions and stitch up the corners from the inside to make them square. Do you know what I mean by that? Then you can install the zipper (or the velcro, if you prefer) along the back edge, and you have a nice boxy cushion that's easier to sew. It's also easier to match the stripe, if you use welting, or you can just wrap it around the front as in your photo.

  • 2ajsmama
    Original Author
    14 years ago
    last modified: 9 years ago

    So take the template for the seat (top), cut the fabric about 3.75" bigger all around for a 3" thick cushion (maybe more in the back for Velcro), then "pinch" and pin 1/4" around the template to make a "faux seam", stitch? Gives 1/2" seam allowance for bottom (use solid color), 1/4" for faux seam? That would save me 3/4" SA vice making a true box cushion with 1/2" SA on top piece and 1/2" on gusset. That 3/4" on each cushion *might* be enough to let me make the bottom the same fabric as the top - I'd have to measure. I have the width (stripes run the length), that's 54" and my settee is 40.5 in front, the only thing is I don't have *quite* enough to fit 3 seat cushions side-by-side with seam allowance, definitely not if I wrap the sides, but I have plenty to wrap front and back. I have 114" length to work with, most of the seats are 18" deep though the one I made the test cushion for is 19" so I used 20" fabric for 1/2" SA on that. Since I have plenty of width, I'm almost wondering if I could make better use of the fabric by cutting the boxing strips from the selvedge edge running the 114", the stripes would be running the wrong way to use on the fronts, but just wrap the fronts or cut 18" x 4" strips of the width for those and use the long strips (I'd probably cut only 30" or so in one length, not the whole 114") to wrap around the sides where the stripes *would* actually line up then, and the backs that wouldn't show? Wrapping each cushion entirely (or just top and sides) might result in more waste.

    Kind of like Centsational Girl did here, but I like the looks of a seam b/t the front and the top so I'd have to "pinch" and sew a faux seam from the wrong side of the front "flap" at the same time I was sewing the (1 long rectangle, not 2 separate rectangles) on the sides? Just harder to put welting on if there's not an actual seam there?

    Or are you talking about just pinching, pinning, stitching vertically up the front 2 corners to make it look like the front edge was a separate piece of fabric from the sides? But top would still fold down around the front and the sides? I guess I don't know what you mean by "corners"?

    Sorry, kind of thinking "out loud" here. And DD will be home soon so I'm not going to start cutting today!

    Here is a link that might be useful: Centsational outdoor cushions

  • Related Discussions

    Butterfly Bush Stem Cuttings, where do I start? (lots of pics)

    Q

    Comments (3)
    I have been rooting butterfly bushes for several years(i've moved twice) and I never do anything more complicated than sticking the stems in potting soil. I take about a 5" piece, strip all but the top two sets of leaves, and plunk it in a 4" pot of pot. soil. If it is a bit flimsy, I'll poke a hole with a stick first. I keep the soil moist and pinch out any flowers that try to come for a few months. Looking back in my gardening journal, in 2005 I took 4 cuttings from my blue and 6 from my white on June 23rd and had visible roots at the bottom of the pot on July 11th. I've done this with abelia, spirea, gardenia, oakleaf hydrangea, and hardy verbenas. I'll repot them in progressively larger pots once or twice and then in the ground they go. Mere
    ...See More

    I better start posting before they start roasting

    Q

    Comments (11)
    Thanks for your comments...and now to answer some questions. Ellie, yes that is Niobe clematis with Graham Thomas rose. I love the deep, saturated purple of it with the yellow. Mantis, the gold/yellow rose in photo #13 is 'Caramella'. Other roses: Photo #5/cream-colored rose is 'Rokoko'. Photo #8 coral-pink rose is 'Lafter'. Purple rosebush in photo # 11 is 'Charles de Mills' the old gallica rose. Photo #12 (pale pink) is 'Mayor of Casterbridge'. Next-to-last photo of pale cream rose is 'Windermere'. Thanks so much for all your comments everyone! Celeste
    ...See More

    Researching before I get started...Need advise please~

    Q

    Comments (6)
    I think you can use a clear plastic container if you keep it covered completely, like nested in a slightly larger opaque container. Most Rubbermaid bins come in different colors, but identical, nestable shapes and sizes. This way, the worms can remain in the dark 99% of the time, but if you want to show your grandchild the layers, you can pull out the clear tub to check on the worms in not-very-bright light, and then nest them again easily. You'll notice that once you put them into the light, they'll quickly burrow away from it. Honestly, I'd start with a reasonable-sized Rubbermaid container. I'm guessing that you'll enjoy vermicomposting so much that you'll want to keep on going after April 22nd, and the worms will multiply rapidly within a couple of months, so I'd set it up with room to grow in the first place. The only concern would be not making it too heavy if you're wanting to lift it out of a nesting container to show him. Perhaps wrapping it with a cut-open black plastic garbage bag could keep the light out, make it easy to check on, and negate the necessity of lifting a fully-loaded bin. Just some ideas - take what you like and leave the rest. Into your container you'll want to put in shredded newspaper or cardboard that has been dampened - soak it in water, but then squeeze it out like a sponge before putting it into the bin. You can bury some defrosted or already-rotting fruit and veggie scraps in the bedding. I'd also throw in a handful of grit or dirt from the yard - this gives the worms some grit for digestion, but also jumpstarts the microbes in the bin to start breaking down that food. If you want to see the worms in action, I'd bury the food next to the bin wall. Good luck, and let us know how it goes!
    ...See More

    Before I start...Want to get it right

    Q

    Comments (4)
    We can answer you here, or at John's forum-- either way. You can leave the sheetrock, if you're just going to paint it. When installing the board, what kind of moisture barrier, etc should we use? Two of the walls are exterior walls. Does this go under the hardibacker? You can either use 15 pound tar paper or 6 mil polyethlene behind the CBU, or a roll on waterproofing over the top of it. Either way, you want to cut slits in the vapor barrier that's already on the exterior walls to avoid trapping moisture between the two vapor barriers. When installing the hardibacker and taping the seams, dh used modified thinset over the top of the seams, correct? That's fine, now that it's done, but it would've been easier to apply self adhesive mesh tape, and then thinset it in when spreading the thinset for the tile. That way you wouldn't end up with the "speedbumps" that you probably have now. Oh, when installing the hardibacker, what do you do around the tub flange? Does the hardibacker go behind the flange, in front of it, setting on the tub? What about the barrier? Set the edge of the CBU on TOP of the flange. In other words, you should see about a 5/8" gap between the top of the tubdeck and bottom of the CBU when installed. If you have a vapor barrier behind the CBU, bring it thru that gap, and cut it off flush with the face of the CBU. You can then fill that gap with stiff thinset so you don't have a weak spot behind the bottom of the tile. Once the hardibacker and barrier is done, then you tile as usual, correct? Yup. We will not have any niches but do have a couple of premade corner shower shelve inserts. Any tips on installing them? When installing them, the easiest way to do it is to set them on top of the edge of a full course of tile, and then cut in the next row to it. Even though you've spread the thinset on the wall, you still want to "gob" a little on the back of the shelf and push it in, making sure you've got a real good bond. Under normal circumstances, the edge of the tile should be MORE than enough to hold the shelf up. But God forbid anyone using the shower slips and grabs the shelf to keep from falling, you want that thing to be rock solid. This'll do that for you. And then clean the thinset out of the joints afterward.
    ...See More
  • bronwynsmom
    14 years ago
    last modified: 9 years ago

    No, I didn't mean that you would make horizontal seams to mimic a box...I meant that, once you have made the flat cover, you turn it wrong side out, fold each corner so that the seam runs right up to the point, and stitch across the corner, so that the stitching is the base of the triangle. Then when you turn right side out, there is a vertical seam at each corner, and the joining seam runs along the center of the cushion edges.
    The bench cushion in my kitchen window seat is made that way. This one is just a big slab of sturdy foam, because it gets a lot of use, but softer cushions also look very nice this way.
    Here are a some photos of that cushion:

    Does that help?

  • 2ajsmama
    Original Author
    14 years ago
    last modified: 9 years ago

    But you used the same fabric for both top and bottom. I'm not sure how that's going to look if I use 2 different fabrics, if I made the seam in the center on the edges I'd *always* have two colors (stripe and solid) showing. I think I'd rather have the option of having all stripes showing, not even sure I want reversible. I do understand now that you fold the corners in on the wrong side and do vertical seams (rather than cutting "flaps" and then folding the front over the sides).

    I think I'm back to the idea of making box cushions with the solid color fabric on the bottom. So, reversible (with stripe showing on front edge even when seat is solid color) or not (hide the solid), solid-color welting, striped welting (if I have enough to make bias strips after cutting), or no welting?

  • ruthy1
    14 years ago
    last modified: 9 years ago

    I think browynsmom sews like a professional! ajsmama - I wonder if you are more at my sewing level?? Zippers & sewing in welting scares me! I really like the pillows on the link - Centsational. Those pillows look very nice. If you make the pillows like your sample pillow - you are going to have to match up your stipes. If you made them like Centsational did, you would not have to match the stripes in the front of the pillow. Wonder if you could then use a solid blue for the sides? That's a bummer not to have enough fabric. Makes your job more difficult. If I were going to use solid blue with your blue stripe, I would use the stripe on the settee and on the 2 chairs to the right of your front door. I would use the solid material for the 2 chairs that you have on either side of the settee. Good luck with whatever you decide.

  • cheri127
    14 years ago
    last modified: 9 years ago

    Can't advise on the cushions but I love your painted blue table. It looks great!

  • 2ajsmama
    Original Author
    14 years ago
    last modified: 9 years ago

    Oh, I'm definitely a beginner. I can't find a solid blue to match the blue stripe - closest I could come was to the off-white. I *think* I could handle welting - if I can make it, I can definitely sew it on. Velcro closures are easy - and I can make them any length I want, I couldn't find long enough zippers to really make it easy to stuff the foam into the settee cushion. Even the 22" zippers I did find aren't as long as I'd like for the chairs (I want to hide the ends under the arms so they have to wrap about halfway around the sides, not just a little past the back). Matching the stripe in the front shouldn't be a problem - at least on the first few cushions. Might be harder to get the side/back seams where I want them *and* match the stripes as I start running out of fabric, so it might actually be easier to make the edges 4 separate pieces instead of 2.

    My "test" cushion was made to fit one of the rockers (the low one) in the settee grouping so if I'm using the solid color on that, one down LOL! Except that that fabric is 100% cotton, not water-resistant at all, unlike the "canvas".

    Thanks for the kind words about my GW table.

  • bronwynsmom
    14 years ago
    last modified: 9 years ago

    Oh, ruthy1, I have led you astray...I didn't make that one. My upholsterer did. But I have made similar ones using the technique with cushions that are softer and more forgiving.
    ajmama, I thought (mistakenly) that you had enough material to make knife edge cushions in the stripe, but not enough for separate box sides or welting.
    You are absolutely right that, with my scheme, you'd see two different fabrics all around. So....never mind! I'm sorry I dragged you around the track!

  • 2ajsmama
    Original Author
    14 years ago
    last modified: 9 years ago

    I was asking for help from more experienced seamstresses, didn't know whether knife-edge cushions would use less fabric and *maybe* allow me to use all the same fabric, but thinking about it, since the fabric is wider than my widest seat, *and* all the seat templates take up a little more than half of the length so I can't just fold over the length and wrap it around, make the bottoms out the same fabric, I think I might be better off making box cushions and making the bottoms out of a different fabric, cutting the sides out of what's left on the side after cutting out the tops, plus the app. square (54" x 55" or so, depends on how much SA I want) that's untouched. Plus then I have some extra for bias strips and throw pillows.

    So, still have the question, should I make these reversible or make the bottoms a little smaller and the sides a little bigger (so seam is under) and hide the solid color bottom? Or make some cushions all stripes and some all solid (didn't try laying that out, but I have more than enough fabric with app. 3 yds of each), in which case I *could* make them knife-edge? I do think I would like welting though, since if I make two chair cushions out of the solid I will have enough stripe to do bias strip, what do you think about making the welting on the solid-color cushions out of the striped fabric, with striped back cushions/throw pillows, and the welting on the striped cushions out of the solid-color fabric? Or should I match the welting to the cushions and just let the throw pillows add the color to the plain cushioned chairs? I guess that might be more versatile, so I could change throw pillows in the future (means if the blue stripe didn't hold up to outdoor use, I'd only have to make 3 new covers next year instead of 5 LOL).

  • dekeoboe
    14 years ago
    last modified: 9 years ago

    How much fabric do you have? Bias strips take an incredible amount of fabric. I am not sure how you would make the bottoms smaller than the tops. Where would the additional fabric to make the bottom big enough come from and how would you handle the corners on the bottom?

  • 2ajsmama
    Original Author
    14 years ago
    last modified: 9 years ago

    I might have to just put the double wooden rocker and the white wood rocker that's near the door on the open end of the porch. I was already considering replacing the little blue table with a larger (heavier) one. They were placed approximately like this (with blue table where dark one was):

    We just heard a crash, here's how the wind rearranged them (not sure how the chair got moved *around* the table and the rocker, but the table was the last to go). The wind picked up the rocker just enough to move it off the runner that wasn't screwed on...

    *If* I'm keeping them and making new cushions for them, I'd use the solid color "canvas" material for the bottoms, cut the bottom pretty much to seat size and the side boxing/gusset pieces a little wider, so they wrap under. My test cushion is almost like that - can't really see the bottom seams when the cushion's on the chair.

    Not the neatest job, but here's how I did the practice cushion

    Top/front

    Back/side where Velcro is

    This shows more of the bottom (bunch corner and all) - I think my bottom piece ended up smaller than my top even though I folded the fabric, cut out the shape, then cut the fold. Maybe I used more in the seam on the bottom, but you can see that I do have the seam more on the bottom than on the sides.

    Here's a link to make bias strips from a small square of fabric - of course I haven't gotten to the point of measuring how much fabric I'd need, but I need about 24 yds of welting to do *all* the cushions, top and bottom, if I only did some cushions and only the top seams with the welting, then I'd need much less.

    I don't understand the question about "handling" the corners on the bottom?

    Here is a link that might be useful: Bias tape and cushion construction

  • dekeoboe
    14 years ago
    last modified: 9 years ago

    I quilt, so I understand about bias tape. You can use the method shown, just know that you will end up with a lot of seams and, especially if your fabric is heavy, they can be a PITA to deal with. Plus, they are difficult to work with if they end up in a corner.

    The picture shows me how you intend to deal with the corners on the bottoms if the bottoms are smaller. The bottoms do not have as sharp corners as the top and you gathered the side fabric.

  • 2ajsmama
    Original Author
    14 years ago
    last modified: 9 years ago

    How does the linked method end up with lots of seams? Looked like it was supposed to give one one long strip (kind of like peeling an apple in a spiral)?

    I figured it out and 8yds of welting should do the settee and 2 chairs, top seam only.

  • dekeoboe
    14 years ago
    last modified: 9 years ago

    See where her scissors are cutting across the seam? You cut across that seam every time you go around the circle. So the distance between seams is once around the circle.

  • 2ajsmama
    Original Author
    14 years ago
    last modified: 9 years ago

    Oh, I see, so half your original square (for her, app every 6 inches) - that *is* a lot. Of course, I could always just cut a strip along the selvedge and have one 114" long strip - it just won't be on the bias so will be all one color.

    Or I can live w/o the welting.

    But *now* given the wind, should I just sell those 2 chairs and use the 3 pieces of wicker on the sheltered end, wood on the open end? Or try to weight the chairs so they don't get blown around? It's windy up here on the hill, even with all the trees around.

  • dekeoboe
    14 years ago
    last modified: 9 years ago

    oops, I forgot about the first seam. You have two seams for every once around the circle.

  • dekeoboe
    14 years ago
    last modified: 9 years ago

    No, you do not want to do it on the straight of grain because if you do, it will not wear well.

  • dekeoboe
    14 years ago
    last modified: 9 years ago

    oops, I forgot about the first seam. You have two seams for every once around the circle.

  • seasandsand
    14 years ago
    last modified: 9 years ago

    I have sewn for my home for many years, including cushions, and I really think you have a lot of good advice here.
    May I make just 2 more suggestions: first, Scotch Gard makes a fabric protector that repels liquids and blocks stains. I think this would make your cushions weather proof to the degree that you need on a covered porch; and, secondly, if the thought of putting in zippers or velcro seems onerous-just hand stitch the openings closed. I have done this many times --as how many times do we really need to unzip or unvelcro the covers on any cushions! If and when you need to it is not a big task to rip and then restitch later. Good luck.

  • 2ajsmama
    Original Author
    14 years ago
    last modified: 9 years ago

    Thanks seaandsand. I can do the Velcro no problem, I just ordered/got 30 ft from Joann's. I'll have to look for the Scothcgard (I didn't think they made that any more?).

    Does anybody have any ideas about weighting the chairs so they don't get blown around, or should I just use the wooden rockers I have on that end? I *do* need to figure that out now b4 cutting since that's 2 cushions I might or might not have to make (wouldn't put cushions on the wooden rockers though it would be nice to have enough left over from doing the settee and 2 other chairs to make throw pillows or even a seat for my dream porch swing).

  • 2ajsmama
    Original Author
    14 years ago
    last modified: 9 years ago

    I'm going to post on Sewing too, but thought since we were talking about bias tape I'd bring it up here.

    To avoid the whole thing about not having enough fabric for bias tape, seams, etc. I just had an idea. Could I "cheat" a self-welting look by making the seam allowance on the top (and maybe bottom) piece(s) a little larger, then sewing in some 3/16" clothesline folded in on the inside, *then* sewing the gussets/boxing to the seat piece(s) on the outside of the clothesline so the (covered) clothesline is kind of pushed up, seam where pieces meet is under the clothesline? I'd do it on my test cushion cover but since it's already assembled it might be a little hard. But basically do the same thing as sewing in the welting before joining the top and side pieces (see tutorial I posted on making cushions with bias tape), except that I wouldn't actually be going through separate steps of making the cording and *then* sewing it onto the seat part, I'd be using the top edge of the seat fabric to cover the clothesline. Then follow her instructions for sewing the edge piece onto the seat piece using the welting as a guide.

  • bronwynsmom
    14 years ago
    last modified: 9 years ago

    I don't think you will like the results of the clothesline thing. Your seams would have to be absolutely perfect, and even then, the edges will likely go all wonky at the corners.

    The reason that welting is made from fabric cut on the bias is that it stretches, and can be stitched around the corners and eased without puckering, and because it wears better, having that little bit of flexibility. The cording used to make welting also flexes, and clothesline wouldn't.

    Have you considered buying ready-made welting in a coordinating color like navy blue or forest green? Making welting that is even and smooth takes a bit of practice. I hate for you to do all this work, and then have something that isn't up to the standards of your pretty porch and that nice furniture and the fabric you've chosen.

  • 2ajsmama
    Original Author
    14 years ago
    last modified: 9 years ago

    Oh, well, it was a thought. I just tried it on some scrap fabric (old napkin) I was going to make a pillow out of, there is no way to hide the stitches on the inside of the welting (other side of welting from edge). I guess the advantage to making separate piping and sewing it on then sewing on the gusset it that you can hide all the stitches on the wrong side of the fabric.

    But the 3/16" clothesline was pretty flexible - nicole had recommended it in place of cording. The corners were wonky b/c I had to fold the corners of the fabric in over the line, I think the clothesline would work if I used a separate piece of fabric (aka bias strip). I might use it to make the piping if I can figure out the best way to make the bias strips. It's hard enough to find bias tape around here (Walmart has some packages in only a few colors and very short lengths), can't find piping at all.

    I did find Scotchgard (don't know if it's the heavy-duty kind or just for spills) on Joann.com, so I might be ordering from there again - too bad I didn't prewash my fabric and find out the water-resistance was just from sizing before I ordered the Velcro. I can also check sporting-good stores - I think DH might have been looking (or even got some???) to treat DS's sleeping bag or somthing. Maybe I should check our basement!

  • sheesh
    14 years ago
    last modified: 9 years ago

    Don't make it any harder on yourself than you have to, Ajsmama; do as Bronywnsmom says and look for ready-made bias tape. It's not expensive and will save you hours and hours of work AND you'll get good looking welting.

  • sheesh
    14 years ago
    last modified: 9 years ago

    Oops - I meant piping, not bias tape, in my last post.

    I have forgotten most of this thread, but I think you want to make new knife-edge box pillows with welting for your chairs, right? Don't overthink this. Measure, measure again, cut and sew. Buy ready-made piping to insert in the seams. You can buy patterns with instructions, but you've already measured, so just start sewing. Simple! Insert the zipper or velcro on the back strip before you sew the strip onto the rest of the cover.
    Sherry

  • 2ajsmama
    Original Author
    14 years ago
    last modified: 9 years ago

    I know, don't overthink it LOL. I just haven't had a chance to start cutting fabric over the weekend with all the kids' activities. I practiced sewing with the zipper foot and tried different stitches with scrap material today. Then started experimenting with my "cheat" this afternoon and now something's wrong with the thread tension b/c the thread keeps pulling out of the needle (don't think it's breaking).

    I think I'm set on box cushions b/c I have the option to use a different fabric on the bottom w/o it showing if I cut the tops and don't have enough for the bottoms. Plus I can cut the side pieces from the extra width, whereas with knife edge if I wrap the fabric then I have to have enough to do sides, top, and bottom all in one piece.

    I'm not going to get to this in the next couple of days - have to take the Explorer to the dealer tomorrow while DD is in school, won't have much time before she gets back, and then have to pick it up Wed before taking DH to the airport then running home to meet DD's bus. Wed night is DD's baseball practice, Thurs night is DS's and also my aunt is going to help me cut and pin a PJ pattern out for DD. Friday while DD is at school will be spent sewing PJs. Maybe I can do this Sat (DD is spending Fri night at grandma's) after I drop DS off for his Scout trip, as long as my mom can keep DD for a good part of the day.

  • 2ajsmama
    Original Author
    14 years ago
    last modified: 9 years ago

    I just found this site. Instructions aren't the greatest, but I can see that the cord is sewn into the top and bottom edges of the boxing, not the seat pieces. Think this will work?

    Here is a link that might be useful: self-welted cushion

  • 2ajsmama
    Original Author
    14 years ago
    last modified: 9 years ago

    I took my damask napkin and a scrap of fabric, sewed the clothesline into the scrap like it was the boxing. The messy stitching at the top of the pic is from backstitching when I inserted the cord - the "right" side was the bobbin side and it's not pretty. Laid the damask down right side up, placed the "boxing" with the cord to the left , matched seam allowances, put the "right" (outside) of the scrap (boxing to the right of the damask edge. I put the zipper foot on the left, put the foot right on top of the cord and slowly sewed right along the cord. The stitching still shows on the boxing, but this got it close (bobbin side) to the seat.

    Then, just for giggles, after taking these pics, I went back and folded the free edge of the "boxing" over the cord again and stitched as close as I could, forming a fold on the underside (the part that will be inside the cushion).

    This hides the (double) row of stitching on the edge of the welting, but may catch dirt. Probably would look really nice pressed, but would be a bear to do on the second edge since by then the seat panels top and bottom would be attached and I'd be folding the entire (let's say bottom seat panel is the last to be sewn on, then I'd have to fold the top) seat cushion and boxing over to fold it. Maybe I would do this just on the top, and either do no welting, or let stitches show, on the bottom of the boxing? Only place anyone would see those stitches would be bottom edge of front gusset. What do you think?

  • bronwynsmom
    14 years ago
    last modified: 9 years ago

    I think this method will make your measuring very complicated, as you will have to figure both seam allowances. And your welting will not have its stripes on the bias.
    I still think you should buy welting in a solid color and put it in both the top and bottom seams of the box cushions. One of the reasons welting is used is to reinforce the seams, and create a strong point of wear on the edges, which is why it is traditionally found top and bottom. The welting on the bottom seam will also make the cushion sit squarely on the seat.
    I shut up now...

  • 2ajsmama
    Original Author
    14 years ago
    last modified: 9 years ago

    Oh, no, you don't have to shut up. I was just trying to make welting w/o making bias strips, since I don't have that much fabric and I can't find any pre-made bia strips or piping in color I like. Not to mention that to buy the "maxi-piping" (which looked skimpy to me in Walmart) for top and bottom seams would cost more than the fabric. Between the fabric, the Velcro, and the piping, it just wouldn't be worth making the cushions ($12 of 6 yds of fabric, $18 incl S/H on the Velcro, and $15 possibly PLUS $6 S/h on the piping if I found a color I liked at joann.com, less if I could find it locally) when I could buy (have them, just haven't returned them) cushions that fit fairly well at Target for $64 incl tax.

    Of course now I can't return the fabric, and I'd lose $6 S/H (plus return shipping?) if I return the Velcro.

    I agree that the self-welting complicates the measurements - esp. if I do the fold. Won't self-welting help reinforce the seams? Definitely want it on top for wear, but do I need it on the bottom? Maybe if I don't fold it to hide the stitching? I don't care about welting not having stripes on the bias. Thanks.

  • sheesh
    14 years ago
    last modified: 9 years ago

    AJ, Welting MUST be on the bias or it won't curve around the corners, so stripes are automatically on the bias instead of straight up and down.

    I'm afraid I cannot follow the instructions for self-welting...seems much more complicated than necessary. If I were you, I'd try to forget that the project may not be cost effective, and instead focus on getting it right and being proud of having done it. I can say this because I am a garment sewer who loves nothing better than making complicated garments that I might have been able to buy for less, but it's just the way I (or my dtrs or gdtrs) want the garment to be. I am a very frugal person on a limited income, but......

    How many cushions are you making? Perhaps you can find another couple yards of bargain fabric that coordinates well with what you have and use it for piping all the cushions. Piping is not hard to make, it just requires lots of fabric on the bias. Did you pay $12 for all 6 yds of fabric, or $72?

    Sherry

  • 2ajsmama
    Original Author
    14 years ago
    last modified: 9 years ago

    Oh, I paid $6 for 3 yards of the stripe and another $6 for 3 yds of the "canvas". I also have some cheap fabric (not outdoor) that I made the test cushion out of, got that at Goodwill. The "canvas" might be too heavy to make bias strips/welting out of, and I don't have enough of the stripe. I got the whole "self-welting" kick b/c of not wanting to make the bias strips (lots of work, lots of seams as dekeoboe pointed out) and thought it would be easier. Definitely cheaper than buying the maxipiping (that the cording part looked thin) even if I could find a color to match either the blue or the off-white in the stripe.

    Do you think I could/should make bias strips out of the lightweight cotton (muslin?) that I made the test cushion out of? It's similar to what Walmart calls "Osnaburg". I just don't know if it would be durable enough. I have a piece about 5ft x 54" wide, and the bottom that I cut out for practice is about 30" x 20". I think it looks easier to cut the square, split it into triangles, seam it, and cut continuous strips (esp. since it's a solid color) rather than cutting long strips (longest I could get would be 9ft) on the diagonal with the fabric laying on the floor.

    I'd love to find bias strips in a good color and long lengths (seems like they just sell them in 2.5 yd packages).

    What do you think would be best?

  • sheesh
    14 years ago
    last modified: 9 years ago

    You're on to something with the muslin - I think it would be fine. Bias and piping are almost always seamed, and it doesn't really matter where you put the seams on cushions or how many there are, so don't worry about that. It isn't hard at all to make the piping once you get over being confused by it. You should have seen me the first time I tried! You can make it like a mobius strip or just keep piecing all the lengths together.

    Will these cushions get a lot of use? I have to go until late tonight, but I'll check in later. Glad you're not in a hurry!

    Sherry

  • 2ajsmama
    Original Author
    14 years ago
    last modified: 9 years ago

    Oh, and if I do the top and the bottom of all the cushions I'll need 25 yds of piping/bias strips. I bought 100ft of clothesline for $3, cut maybe 6ft off for practice so I still have all I need of that but I don't know how much fabric I need to make the bias strips. Tutorial for the continuous bias strips/cushions (linked again below) says slightly over 1 sf (about 1.25 sf?) makes 3 yds, so I guess I'd need 10.5 -11 sf of fabric just for the bias strips? Don't know if it needs to be square, if 54" wide and 54" long (I have that in the "osnaburg") it's almost twice what I need, would I be working with 54" square instead of 13.5" square? Would minimize seams, but would make it harder to handle? I really don't want to have to repeat this process multiple times with smaller squares.

    Since I don't need as much as a 54" square would make, could I use a 54 x 30 rectangle? Or does it need to be a square to start out with (since there's no pattern to match)?

  • 2ajsmama
    Original Author
    14 years ago
    last modified: 9 years ago

    Sorry, forgot the link, here it is again.

    Here is a link that might be useful: making bias strips the mobius way LOL

  • dekeoboe
    14 years ago
    last modified: 9 years ago

    It has to be a square in order to cut on the true bias. I would not use the lightweight cotton because I think it is too lightweight for upholstery.

    You mentioned practicing. The thing you need to practice is making the piping go around the corners. (At least that is what I always have problems with.) And it is harder when you are doing the second side.

  • 2ajsmama
    Original Author
    14 years ago
    last modified: 9 years ago

    Well first I need to make the piping LOL. I found this link to make it starting with a rectangle of fabric, so won't waste as much as a square, I'll try that tomorrow if I can. Then I'll practice taking the curves! Thanks - I think I can spare a yard of the "canvas" if you think the "osnaburg" is too lightweight. The "canvas" is just a tiny bit stiffer than the striped fabric - will that work if it's cut on the bias?

    Here is a link that might be useful: Start with a rectangle