


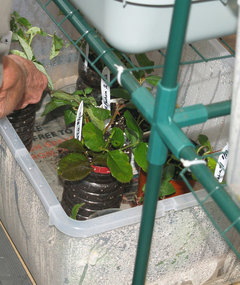
Best Method for Rooting Cuttings?
Lynn-in-TX-Z8b- Austin Area/Hill Country
10 years ago
Featured Answer
Sort by:Oldest
Comments (19)

ffff
10 years ago
seil zone 6b MI
10 years agoRelated Discussions
Only 1 cutting to root: which method should I use?
Comments (21)Hi Jenn, you're welcome! It really isn't all that difficult to wring out the paper. I like using three full sheets. I unfold them, laying them out flat, then put my hand right in the center, wrapping them around my hand and wrist while dunking them into a bucket of water for a few minutes. I pull them out, gently folding them into a twist and wring them out. There is a little tearing some times, but not terribly. If you're careful, you can wring out most of the water with little tearing because of the thickness of the three sheets. If it's more comfortable for you, fold them the best you can and run an old rolling pin from the kitchen over them until they no longer drip, but are thoroughly wet/damp. With the wet paper still twisted from wringing them out, grab the "rope" of wet paper in the center then just gently shake it back and forth. It will begin to loosen and fall open. It makes it easier for you to spread them out as a wet, three layer sheet. Process your cuttings and lay them in the center of the sheet with a label. Once you're finished processing all the cuttings, fold over the top and bottom of the sheet, the ends at the top and bottom of the cuttings, then begin rolling them tightly into the "burrito". Make sense? I've also laid out the three sheets of paper on the deck and thoroughly wet them with the hose, but that uses more water, so I prefer the bucket. My concern is your spray bottle may not sufficiently wet the paper. Dipping or dunking them into a bucket of water does. If the paper tears a bit, don't worry, just spread it out as flat as you can and use it. You'll have several layers of damp paper rolled up encasing the cuttings to provide them sufficient moisture so it isn't a real issue. If you're doing several batches, just put each burrito into a plastic bag to prevent it from drying and add each one to the bag as you complete it. Once you're finished with them all, gently squeeze out the excess air from the bag and tie it shut. I then put this one upside down into another bag and repeat the process. I've usually used three bags together, each one reversed from the other, to provide as much of a seal against moisture loss as possible, then placed them in the dresser drawer in the garage to keep them cool. When the weather is conducive for the work room attached to the garage to remain in the sixties degree range, I've also just laid them on a shelf in that room where they've also worked just fine. I understand what you meant about putting them on the refrigerator now, thank you. As long as the heat from the motor doesn't warm them, and they remain in the approximate temperature range, all should work just fine. I'm excited to follow your progress! Many years ago, very dear friends retired from this area and moved into the mountains north of Los Angeles. She was sad she had to leave the three bushes of Circus she planted at that house shortly after they bought it in the early sixties. After the move, I knocked on the door and introduced myself to the new owners and requested permission to take cuttings, explaining why I wanted them. They were delighted to share them with me. Both Janne and I were excited when I visited and handed her several own root plants of her beloved Circus, propagated from her old plants. She had some of her old garden, where she'd happily lived for thirty plus years and raised her six children, to grace her "retirement" garden. That connection with your old plant is a happy one. Been there many times and plan on many more! Kim...See Morebest method to root zz plant
Comments (4)Well if you've got two why not experiment? You could try one in water & in mix. I've done it both ways & didn't use a dome when doing it in dry mix (tho' that CAN take as long as a year). The one done in water, grew a small sized green tuber resembling a green pea & then grew a root as well. The fact of their being a bit yellowed may not help, but oh well; nothing you can do abt that. FYI: may not be that bad a time to try this, I noticed over the holiday one of my 2 ZZs is pushing out a new sprout. So maybe you CAN make this happen. Good luck....See MoreWhats you best rooting method?
Comments (12)- I am trying the 'rooting in soil' method; rooting hormone, initial watering w/Super Thrive and seaweed extract, gro lights, keep on the dry side thereafter in individual 16 oz clear heavy duty plastic cups w/holes drilled in the bottom for good drainage. I used a mixture of a 1 part good potting soil & cactus soil and 1 part perlite. The only thing that I am questioning is: Should the bottom of the cutting callous before putting it in soil? Or just work with what is there from the sender (usually the bottom is wrapped in damp newspaper or paper towel)? In the plumeria world, we let the bottom of the cutting callous for a week or two. Would this issue be why I read that so many people on this forum lose cuttings to stem rot? Also...as the cuttings are set in the soil, I notice after a day ir so, the very top of the cuttings have dried out & I see a hollow pocket of sorts on a few. Would misting be the kiss of death? Or just leave it be? Thank you for any information you could share with me! Mary Jane...See MoreWhat is the best method to root brugmansia?
Comments (9)I have been growing brumansia and I have great results with a lot of methods. CLICK HERE FOR A STEP BY STEP TUTORIAL ON BRUGMANSIA PROPAGATION usually put my cuttings in water. Make sure that you change your water every couple of days. I always use bottled water. If you get your water from a well, it is probably okay to use. The chlorine in town and county water can stunt the growth or kill your plant. You can take a container and fill it with perlite.You will need to poke holes in the bottom of the container, like a flower pot has. Next, you will need a pan that is larger in diameter that the bottom of the container that the perlite is in. sit the continer with the perlite in it in the pan. Fill the pan with water past the holes in your perlite container. This will allow the perlite to act as a wick and your plants will not rot. Stick your cuttings in the perlite alittle over half way. You can put some clear plastic over the set up or just the container with the cuttings in it. This will speed up the rooting process and it will also give you a better success rate. This is the way that you root tropical hibiscus (rosa senensis). They just take a little longer. I have included a link to my squidoo lens about brugmansia propagation. It has a tutorial with pictures on several ways to propagate brugmansia plants. It also has a lot of other helpful tips that will be helpful to you. Please leave a comment when you visit and sign the guest book. If you want me to research anything for you, or if you need help with something, just let me know what you need and I will create a Squidoo lens about that topic. I have a passion for writing, I like heplping people and I like to research things too. I would love to hear from you all. If you will sign my guest book and leave your email I will send you a free brugmansia cutting if you will handle the shipping. See Ya and Happy Gardening.!!!!!!!!!!JAMES COLEY Here is a link that might be useful: easy brugmansia propagation...See Moreroseseek
10 years agopatricianat
9 years agohenry_kuska
9 years ago
jerijen
9 years ago
Kippy
9 years ago
Lynn-in-TX-Z8b- Austin Area/Hill Country
9 years agojerijen
9 years agovettin
9 years agoroseseek
9 years agojerijen
9 years ago
ms. violet grey
9 years agojerijen
9 years agoLynn-in-TX-Z8b- Austin Area/Hill Country
9 years agoUser
9 years agoroseseek
9 years agoms. violet grey
9 years ago

Related Stories
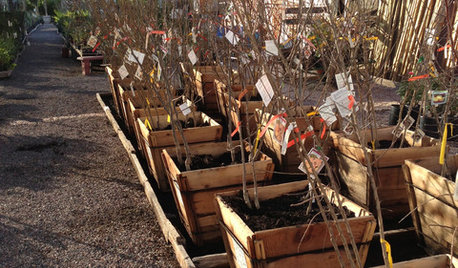
GARDENING GUIDESThe Beauty of Bare-Root Plants
Plant dormant trees and shrubs in fall using the easy, affordable bare-root method and enjoy beautiful results in spring
Full Story
ARCHITECTURERoots of Style: Art Deco and Art Moderne
Get to know the similarities and differences between these architectural styles of the 1920s and 1930s
Full Story
TRADITIONAL ARCHITECTURERoots of Style: Château Architecture Strides Through a Century
Live like a lord with design details that recall French estates of old, even if they're scaled down and updated for today
Full Story
MODERN ARCHITECTURERoots of Style: International Style Celebrates Pure Form
Using technology and materials of the time, International style is always current. See its expression in these 16 homes around the world
Full Story
ARTThe Beauty of Bonsai — Living Art, Rooted in Harmony
Create your own emblem of nature's balance with an art form dating back 1,000 years
Full Story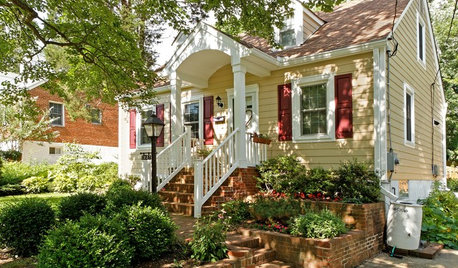
ARCHITECTURERoots of Style: Do You Live in a Minimalist Traditional House?
Cottages, bungalows, farmhouses ... whatever you call them, houses in this style share several characteristics. See how many your house has
Full Story
ARCHITECTURERoots of Style: Where Did Your House Get Its Look?
Explore the role of architectural fashions in current designs through 5 home styles that bridge past and present
Full Story
ROOTS OF STYLERoots of Style: The Birth of Modern Architecture
Learn how Prairie, Craftsman, art deco and other styles of the early 20th century came to influence architecture today
Full Story
ARCHITECTURERoots of Style: Does Your House Have a Medieval Heritage?
Look to the Middle Ages to find where your home's steeply pitched roof, gables and more began
Full Story
ARCHITECTURERoots of Style: See What Defines a Craftsman Home
Charming features and intimate proportions have made Craftsman houses an American favorite. See their common details and variations
Full Story
Sponsored


User