


Help!! Pros and cons of dry stack and mortar stone retaining wal
insanbrain
18 years ago
Featured Answer
Sort by:Oldest
Comments (6)

luvmypark
18 years agoRelated Discussions
The Wall
Comments (21)Regarding seepage, I don't think you will see mudflows through the wall but what we have with our dry stack walls (much smaller ones mind you) is that there is pretty consistently dirt at the base, and the level of soil in the bed seems to drop. However, you obviously had a packed base there before while we filled ours with new dirt, so you may fare better in that regard. I share in some feelings of discomfort about its design although I also agree with Ink's last sentence - it's an impressive achievement. I think my discomfort about its stability comes from two sources primarily: the lack of batter, and also that I think I would have either used larger stone or mortared this stone. I am used to seeing walls that perform this function poured out of solid concrete or built of various configurations of mortared stone (and even at that I've seen the latter fail). But good on you for saying you still have the material to rebuild! And by the way this is one reason I would not necessarily route all your roof water flow into this area. And that is why I was hoping you did not have a weight-bearing purpose in mind for the area :-) The final design issue I would have with it is the slope down to the corner, at least so it looks in pictures. You could add a final course, maybe of larger capstones, using thicker ones toward the corner... or just a partial course that tapers down to the centre front. That could rise above the soil level, which is another thing that bothers me visually, the soil being level or possibly too high. I didn't like any of the fences you posted (for your use; they're fine where they are) except maybe the rail option, but what you describe with interrupted sections of trellis sounds good. If you put the trellis sections in, you might angle a piece across the corner... leaving the tree outside. A shrubbery will look marvelous with or without trellis/fencing - if you're in Seattle you should be able to use Rhodos to good effect (look for good leaves, especially leaf undersides that have indumentum as it will show from the street). I like the combination of Rhodo/Japanese maple foliage overlays, with conifers or other textured leaves). Finally, it may be sacrilege, but I don't like the pathway as it is. I think it would be improved with continuous edging either side... brick or tumbled granite pavers or something. Karin L...See MoreThis retaining wall business is overwhelming me!
Comments (13)Inkognito: I'll try to explain my best. There are two portions of the wall, both coming in to create a border/edge at our entry. The total of both walls will equal appx. 150'. The one he's working on now will probably be close to 100'. At it's highest point with the most bricks showing it's about 29" tall. The bricks themselves are about 1' deep. He's started on the one wall saying he needs to start at the lowest level and work his way up. He started with the top of the wall being 1 1/2 " below our rock work on the face of the house and said he would come in at that same level to meet our entry way. When I arrived home Friday evening I noticed the wall would be (it wasn't complete yet) at least 3 to 4" above the rock work on the face of the house. I had my dh bring over a transit we have and we found it to be a gradual increase with the beginning of the wall to the end having at least a 5" height change. When the landscaper showed up this morning and I explained to him the problem he said he knew something was off and figured it to be about 3" to which we explained our finding of at least 5"'s. Dh thinks LS needs to tear down the entire wall and start over whereas LS thinks he can pick up where he started gaining and level it out from there. He claims he's never had to use a transit before and the walls come out level. I sure appreciate everyones input on this and thank you!...See MoreBroken Concrete for retaining wall
Comments (7)I am working on a project that sounds similar to what you have in mind. Sorry, I have no camera, so words will have to do. My yard is a long narrow valley, 300' X 80 wide, whose sides are three to six feet above the ground level in the center. There are high wooden fences along the crest of the hill on each long side. Last summer I arranged to get broken-concrete chunks from a paving company working in the area (I paid about $50/truckload to cover the labor of loading and unloading, even though I saved him the cost and gas of making dump runs) and used the three truckloads I thus obtained to make the first/outermost level of three terraced rows of beds I plan for the two long edges of my backyard. This first level consists of about 75 feet of walls about a foot thick, two to four feet in height, in long looping curves punctuated by a couple half-rounds that look like ruined castle towers, to bring the outermost beds level with the surrounding yards. These upper beds vary from four to twelve feet in width. I laid out hose to determine the curves (wider is always better!), used a Mantis tiller to dig foot-deep foundations, which I shoveled out and lined with landscape cloth and 6" of gravel, before I started dry-stacking the chunks. I was careful to slant the walls back into the hillside a bit, maybe six inches for every two feet of height. I used no mortar or other leveling gravel; instead it was important to me not to move on to the next stone until the one I was working on was well-balanced and unwilling to shift. If it wouldn't fit, I used a different chunk, or tried that chunk elsewhere. I was also careful to look to establish smooth linkages between stones on the face of the wall folks would see, even if there were jagged backsides. Whenever there was an available crack in the face of a row I was capping I tucked in an egg-shaped local stone or two, mostly stained orange by the local clay, for contrast with the rough rectangles of the grey concrete. I also built a wide flight of broken-concrete steps to climb the slope from the back yard to the side of the house, with a paved slope adjacent to allow wheelbarrow access to the side-yard beds. Once the beds were built, I filled them lasagna style: layers of leaf mulch, well-rotted horse manure, local clay tilled up with sand and leafmulch, and so on, tamping them down a bit every couple of feet of depth and making sure to fill the beds a foot or so above the walls to allow for further settling. It took an amazing amount of stuff to fill those beds, and about 2/3 of it was free for the hauling! I have planted the top row already: several flowering trees I got in the fall sales (purple plum, crepe myrtle, tree lilac, a Briotia horse chestnut) and tall shrubs like lilac, eleaginus, kerria and the like, shorter shrubs like goldmound spirea and dwarf blueberry in front, and all underplanted with lots of shade-lovers like hellebores, gentians, ferns, hostas. And bulbs, especially along the walls themselves. There are clumps of various daylily planted hard against the walls too. This summer's project is the next row -- 18"-high walls in counter-curves to create three garden rooms on the right-hand edge of the property, and incidentally refresh the iris beds along that side. I have to be done by May 22, when my local garden club is holding a planning meeting at my house... Oh yes. To cut the recurrent labor of edging/weedwhacking lawn along all those beds, I plan to plant a foot or so swathe of ajuga against the lawn-edge of the bottom-most walls. What d'you think? Does this help any? Lynn...See MoreBuilding on Bedrock - foundation styles
Comments (29)I have another type of bedrock on which I need to put a foundation. I live in the central Texas area and have some acreage that I hope to build a home on. It is in what is locally known as the "hill country". This area was a shallow sea, (back when I was a tyke), and the hills were sub-sea mounds. Where I want to build our house is on one of these mounds, near the peak. The general geology of the ground consists of layers of quite flat lime stone interspersed with caliche, (compacted limestone gravel and sand). Having driven the largest bulldozer that I could find around cutting access roads, clearing cedar and creating flat ground for construction of the house and outbuildings, I discovered that I had several thousand square feet of, almost table flat limestone to build on. The house that i want to build would be a two story with a slightly unique construction. The internal construction would be very similar to a fabricated two story metal building: a slab on grade first floor and concrete on decking second floor, at fifteen feet. The enclosure, for the steel frame work would be stucco on concrete block. The problem is that the wall will be a thirty vertical foot, single story of heavily reinforced concrete block, which is pretty heavy. The reasons for the odd construction that I tell all of my friends is: "It cant burn, Texas termites can't eat it and the small tornadoes that we occasionally get moving through the valley, won't knock it down". The problem is that those walls and any shear walls that I have to include will be heavy and I don't know the gross properties of that limestone sheet. I'm considering bringing in someone to run GPR over the areas of interest. Hopefully to fine out what the general thickness of the limestone and, because I'm paranoid, to find out if there are any voids in that I need to stay clear of. I hesitate to try coring as that would weaken the stone sheet. So... What sort of foundation would you use? A massive and very stiff foundation to spread the load or just glue the walls to the limestone or something in between. R Allen, Austin, TX...See Moregottagarden
18 years agorustytig
18 years agosleeplessinftwayne
18 years agovali44
17 years ago
Related Stories
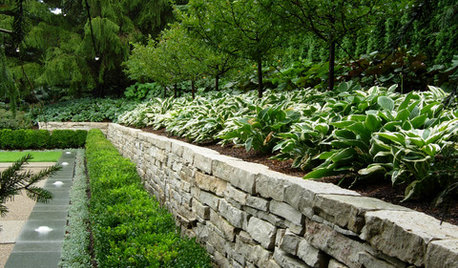
LANDSCAPE DESIGNGarden Walls: Dry-Stacked Stone Walls Keep Their Place in the Garden
See an ancient building technique that’s held stone walls together without mortar for centuries
Full Story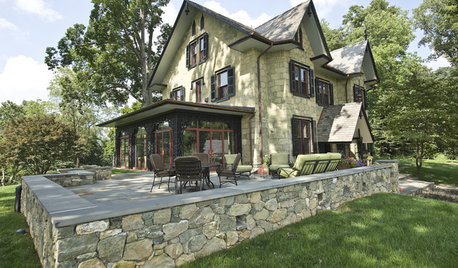
LANDSCAPE DESIGNGarden Walls: Mortared Stone Adds Structure, Style and Permanence
Learn the pros and cons of using wet-laid stone walls in your landscape
Full Story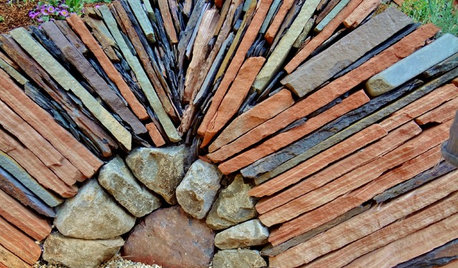
LANDSCAPE DESIGNFollow Nature’s Lead for Artful Stacked Stones
Surprise and delight in the landscape with rock formations resembling wildland hoodoos and cairns
Full Story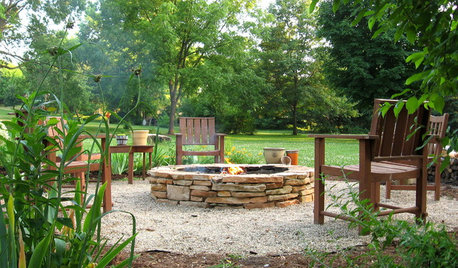
GARDENING AND LANDSCAPINGHow to Make a Stacked Stone Fire Pit
See how to build a cozy outdoor gathering place for less than $500
Full Story
FLOORSAre Stone Floors Right for Your Home?
If you’re thinking about going with this hard-wearing material, here are important pros and cons to weigh
Full Story
KITCHEN DESIGNKey Measurements to Help You Design Your Kitchen
Get the ideal kitchen setup by understanding spatial relationships, building dimensions and work zones
Full Story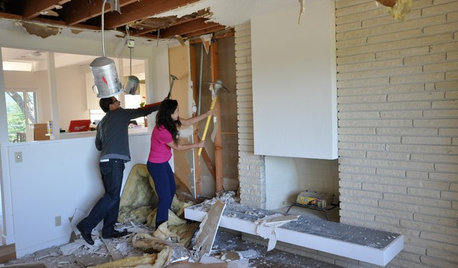
REMODELING GUIDESWisdom to Help Your Relationship Survive a Remodel
Spend less time patching up partnerships and more time spackling and sanding with this insight from a Houzz remodeling survey
Full Story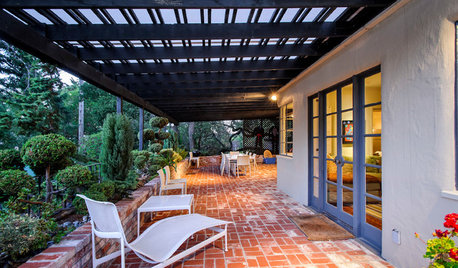
PATIOSLandscape Paving 101: How to Use Brick for Your Path or Patio
Brick paving is classy, timeless and a natural building material. Here are some pros and cons to help you decide if it’s right for your yard
Full Story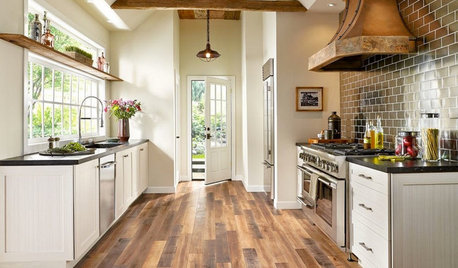
MOST POPULARPros and Cons of 5 Popular Kitchen Flooring Materials
Which kitchen flooring is right for you? An expert gives us the rundown
Full Story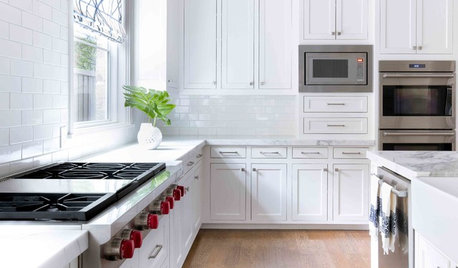
KITCHEN APPLIANCES9 Places to Put the Microwave in Your Kitchen
See the pros and cons of locating your microwave above, below and beyond the counter
Full StoryMore Discussions

The_Mohave__Kid