


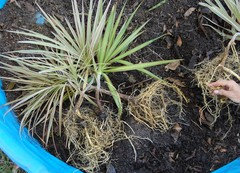
repotting techniques
10 years ago
Featured Answer
Sort by:Oldest
Comments (19)
 10 years agolast modified: 9 years ago
- 10 years agolast modified: 9 years ago
Related Discussions
Container Soils - Water Movement & Retention XIV
Comments (164)Thanks for the kind words, B&C. In Mississippi, Memorial day would be a good target date for repotting the fig. Hibiscus need an annual repot. Do that toward the end of March, before it starts growing in earnest. Apple and most deciduous trees should be repotted just before or at the onset of spring budswell. Cactus - ask the cactus experts at the cacti/succulents forum. Desert rose - in Mississippi - June Umbrella plant - June There are ways to mechanically limit the amount of perched water a planting will hold, even if you're using a very water-retentive medium. Eliminating all or most of the perched water allows the grower to use media that would otherwise be or border on the edge of unusable. This outlines ways to cope with heavy (water-retentive) media Another effective way of dealing with media that hold too much water is through the use of ballast. You can read more about that technique here: Ballast ..... For now, checking your planting's moisture level regularly with a 'tell' will make a difference in your plant's appearance and level of vitality. Here's something I wrote about that: Over-watering saps vitality and is one of the most common plant assassins, so learning to avoid it is worth the small effort. Plants make and store their own energy source – photosynthate - (sugar/glucose). Functioning roots need energy to drive their metabolic processes, and in order to get it, they use oxygen to burn (oxidize) their food. From this, we can see that terrestrial plants need air (oxygen) in the soil to drive root function. Many off-the-shelf soils hold too much water and not enough air to support good root health, which is a prerequisite to a healthy plant. Watering in small sips leads to a build-up of dissolved solids (salts) in the soil, which limits a plant's ability to absorb water – so watering in sips simply moves us to the other horn of a dilemma. It creates another problem that requires resolution. Better, would be to simply adopt a soil that drains well enough to allow watering to beyond the saturation point, so we're flushing the soil of accumulating dissolved solids whenever we water; this, w/o the plant being forced to pay a tax in the form of reduced vitality, due to prolong periods of soil saturation. Sometimes, though, that's not a course we can immediately steer, which makes controlling how often we water a very important factor. In many cases, we can judge whether or not a planting needs watering by hefting the pot. This is especially true if the pot is made from light material, like plastic, but doesn't work (as) well when the pot is made from heavier material, like clay, or when the size/weight of the pot precludes grabbing it with one hand to judge its weight and gauge the need for water. Fingers stuck an inch or two into the soil work ok for shallow pots, but not for deep pots. Deep pots might have 3 or more inches of soil that feels totally dry, while the lower several inches of the soil is 100% saturated. Obviously, the lack of oxygen in the root zone situation can wreak havoc with root health and cause the loss of a very notable measure of your plant's potential. Inexpensive watering meters don't even measure moisture levels, they measure electrical conductivity. Clean the tip and insert it into a cup of distilled water and witness the fact it reads 'DRY'. One of the most reliable methods of checking a planting's need for water is using a 'tell'. You can use a bamboo skewer in a pinch, but a wooden dowel rod of about 5/16” (75-85mm) would work better. They usually come 48” (120cm) long and can usually be cut in half and serve as a pair. Sharpen all 4 ends in a pencil sharpener and slightly blunt the tip so it's about the diameter of the head on a straight pin. Push the wooden tell deep into the soil. Don't worry, it won't harm the root system. If the plant is quite root-bound, you might need to try several places until you find one where you can push it all the way to the pot's bottom. Leave it a few seconds, then withdraw it and inspect the tip for moisture. For most plantings, withhold water until the tell comes out dry or nearly so. If you see signs of wilting, adjust the interval between waterings so drought stress isn't a recurring issue. Al...See MoreA Bag of Orphans and I Saw Who!
Comments (6)Nice plant & Pic Jane! I could live in your yard! Looks so pretty! When I contacted OHG since many of us were in the same boat with Twinkle. Their response: "Be patient. Many varieties send out spikes (or sheaths, in the case of Cattleyas) prematurely, well before blooming season. The Twinkles bloom usually between Thanksgiving and Christmas, so it is way too early to expect buds at this time. Keep the plants on the cool side at night to provide some temperature fluctuation, and give good light. And don't stress out about it" I also met with a couple from Canada a few weeks ago. G/H growers. Same story. They told me Twinkles can take months to bloom. They are a tease aren't they? Thinking back on my winter outings to OHG and Hausermann's, I remember a sea of Twinkles being in bloom in winter and continuing into early spring. Mine developed a spike during the last bloom cycle. Thought for sure it would bloom, still sitting there. More spikes developed over the summer. There is just no way I have found to push Twinkle to bloom. Mine has been in full sun all summer. It's still outside since we have been experiencing summer weather and cooler nights. Not bringing the rest of the "roof rats" in until month's end. Seems to be the summer pattern for many Oncids (species and Intergens) well anything with a bulb; throwing early and holding. Oncid "Ortho-novum" the parent of Twinkle is in the same condition. So is my Tenuifolia Many spikes/buds & holding. Same for 2 of my SB's. Wondering if the cooler early summer did that? Don't feel bad about breaking spikes. They are tiny and sooo easy to break. I broke the top of one spike. Scotch taped it. It branched. Cut the taped part off. Looks like nothing ever happened. I was cutting the dead spikes off and accidentally cut a new one off ... What a "blonde moment"! You'll have a really sweet flowers for the holidays! I bet that you'll have more spikes before bloom time. Mine has plenty of mature PB's that have not produced a spike yet. I took the opportunity to repot them into some cool pots. The roots really took off this summer. Clara...See MoreRoots growing out the top of container - repot?
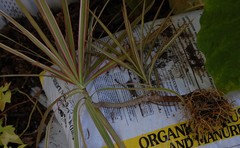
Comments (6)There is a clear delineation between repotting and potting up. A full repotting should be done in the spring before buds move and includes first removing a portion of the lower root mass (usually 1/3 - 1/2), all the soil from the roots, then selectively removing some of the largest remaining roots, then, replanting the tree into a fresh soil that drains well. Potting up can be undertaken any time with no ill effects & is simply putting the plant in a larger pot with more soil. Repotting guarantees that your plant has an opportunity to grow at or very near its genetic potential. Potting up guarantees that it will not. Copy/pasted in 2 parts from another thread I started on the Container Gardening Forum, so if it's a little off topic ..... Part 1: I have spent literally thousands of hours digging around in root-balls of tropical/sub-tropical trees (let's allow that trees means any woody plant material with tree-like roots), temperate trees collected from the wild, temperate nursery stock bonsai candidates, and trees that have already had some root work in preparation for bonsai training. The collected trees are a challenge, usually for their lack of roots, and have stories of their own. The nursery stock is probably the closest examples to what most of your trees are like below the soil line, so I'll offer my thoughts for you to consider or discard as you find fitting. I've purchased many trees from nurseries that have been containerized for long periods. Our bonsai club, just this summer, invited a visiting artist to conduct a workshop on Mugo pines. The nursery (a huge operation) where we have our meetings happened to have purchased several thousand of the Mugos somewhere around 10 - 12 years ago and they had been potted-up into continually larger containers ever since. Why relate these uninteresting snippets? In the cases of material that has been progressively potted-up only, large perennial roots occupied nearly the entire volume of the container, plant vitality was in severe decline, and soil in the original root-ball had become so hard that in some cases a chisel was required to remove it. In plants that are potted-up, rootage becomes entangled. As root diameters increase, portions of roots constrict flow of water and nutrients through other roots, much the same as in the case of girdling or encircling roots on trees grown in-ground. The ratio of fine, feeder roots to more lignified and perennial roots becomes skewed to favor the larger, and practically speaking, useless roots. Initial symptoms of poor root conditions are progressive diminishing of branch extension and lessened vitality. As rootage becomes continually compressed and restricted, branch extension stops and individual branches die as water/nutrient translocation is further compromised. Foliage quality may not (important to understand) indicate the tree is struggling until the condition is severe, but if you observe your trees carefully, you will find them increasingly unable to cope with stressful conditions - too much/little water, heat, sun, etc. Trees that are operating under conditions of stress that has progressed to strain, will usually be diagnosed in the end as suffering from attack by insects or other bio-agents while the underlying cause goes unnoticed. Potting-up temporarily offers room for fine rootage to do the necessary work of water/nutrient uptake, but these roots also soon lignify while rootage in the old root mass continues to grow and become increasingly restricted. The larger and larger containers required for potting-up & the difficulty in handling them also makes us increasingly reluctant to undertake even potting-up, let alone the now increasingly difficult root-pruning. I haven't yet mentioned that the dissimilar characteristics of the old soil as compared to the new soil when potting-up are also a recipe for trouble. With a compacted soil in the old roots and a fresh batch of soil surrounding the roots of a freshly potted-up tree, it's impossible to establish a watering regimen that doesn't keep the differing soils either too wet or too dry, both conditions occurring concurrently being the rule rather than the exception. Most who read this would have great difficulty showing me a containerized tree that's more than 10 years old and vigorous, that hasn't been root-pruned at repotting time (Trees in extremely large containers excepted. Growing in very large containers is similar to growing in situ). I can show you hundreds of trees 20 years to 200 years old and older that are in perfect health. All have been root-pruned and given a fresh footing in in new soil at regular and frequent intervals. Deciduous trees are some of the most forgiving of trees when it comes to root pruning. The process is quite simple and the long term benefits include best opportunities for plants to grow at or near their potential genetic vigor, and stronger plants that are able to resist the day to day perils that bring down weaker plants. Root-pruning is a procedure that might be considered borrowed from bonsai culture, but bonsai culture is nothing more than refined container culture, and to restrict the practice of root-pruning to bonsai only, is an injustice to those of us who simply enjoy growing trees in containers. I didn't mean for this to be so long. I haven't even touched on the methodology of the process yet, but I'll get to it soon, if I've presented my case adequately and there is interest. I'll follow with the short version of how to root-prune & repot. If not - I had a good time writing this anyway. Part 2: Previously, I made the case for why it is important to do a full repot (not to be confused with potting-up) and prune the roots of your containerized trees - regularly. Root-pruning is the systematic removal of the largest roots in the container with emphasis on removal of rootage growing directly under the trunk and at the perimeter of the root mass. The following is written primarily to offer some direction in the root-pruning of a high % of deciduous material, but with some very minor adaptations, it can be applied to conifers and evergreens. Root pruning can start immediately with year-old seedlings by removing the taproot just below the basal flare of dormant material, repotting, and treating the plant as a cutting. This will produce a plant with flat rootage that radiates outward from the base and that will be easy to care for in the future. Young trees (under 10 yrs old) are nearly all dynamic mass and will tolerate root-pruning well. Most deciduous trees are extremely tolerant of root work. Acer buergerianum (trident maple) is routinely reduced to a main trunk with roots pruned all the way back to the basal flare and responds to the treatment with a fresh growth of fine, fibrous roots and a fresh flush of foliage each spring. The point here is, you don't need to be concerned about the pruning if you follow a few simple guidelines. First, undertake the root-pruning and repot while the plant is quiescent (this is the period after the tree has met its chill requirement and has been released from dormancy, but has not begun to grow yet because of low soil temps). The ideal time is immediately before buds move (swell) in spring - next best time is at the onset of budswell - next best time is anytime late in the quiescent period. For deciduous plants that have not been root-pruned before: With a pruning saw, saw off the bottom 1/3 to 1/2 of the root ball. With a hand-rake (like you use for scratching in the garden soil) or a wooden chopstick, remove all the loose soil. Using a jet of water from the hose and the chopstick, remove the remaining soil - ALL of it. This should be done out of sun and wind to prevent the fine roots from drying. 5 minutes in the sun or wind can kill fine roots & set the tree back a week or more, so keep roots moist as you work. After the soil is removed, remove about 1/2 of the remaining mass of roots with a sharp pruning tool, taking the largest roots and those roots growing directly under the trunk. Stop your pruning cuts just beyond where a smaller root branches toward the outside, off the root you are pruning. Be sure to remove any J-roots, encircling roots, or others with abnormal growth. Before you begin the pruning operation, be sure you have the soil & new container ready to go (drain screens in place, etc). The tree should fit loosely inside the walls of the container. Fill the container with soil to the desired ht, mounded in the center, & place tree on the mound. Add soil to cover roots & with the chopstick, work soil into all voids in the roots, eliminating the air pockets and adding soil to the bottom of the basal root-flare. Temporarily securing the tree to the container with twine or small rope, even staking, against movement from wind or being jostled will speed recovery time by preventing breakage of newly forming fine rootage. Place the tree in shade & out of wind until it leafs out and re-establishes in the container. The first time you root-prune a tree will be the most difficult & will likely take up to an hour from start to finish, unless the tree is in larger than a 5 gallon container. When you're satisfied with the work, repot into a soil that you are certain will retain its structure until the next root-pruning/repot. Tree (genetic) vigor will dictate the length of time between repots. The slow growing, less vigorous species will likely go 5 years between repots. For these slow growing trees, it is extremely important that soils retain aeration. For these trees, a soil of 2/3 inorganic parts and 1/3 organic (I prefer pine or fir bark) is a good choice. The more vigorous plants that will only go 2 years between repots can be planted in a soil with a higher organic component if you wish, but would still benefit from the 2/3 inorganic mix. Most trees treated this way will fully recover within about 4 weeks after the spring flush. By the end of 8 weeks, they will normally have caught & passed in both development and in vitality, a similar root-bound plant that was allowed to remain in its old soil and container. When root-pruning a quiescent plant, you needn't worry much about "balancing" top growth with rootage removed. The plant will tend to only "activate" the buds it can supply with water. It is, however, the optimum time to undertake any pruning you may wish to attend to. This is how I treat all my deciduous material. Though I have many growing in bonsai pots, more of my plants are in nursery containers or terra-cotta and look very much like your trees, as they await the beginning of training. With a little effort at developing a soil from what's available to you and some knowledge and application of root-pruning and repotting techniques, I'm absolutely sure that a good % of those nurturing trees in containers could look forward to results they can be very pleased with. This is the repotting technique described that allows bonsai trees to live for hundreds of years & be passed from generation to generation while other containerized trees that have not had their roots tended to, and have only been potted-up, are likely to be in severe decline or compost well before they're old enough to vote. ;o) I hope you're bold enough to make it a part of your containerized tree maintenance, and I hope what I've written makes sense - it's well past a prudent bedtime for me. Al...See MoreWhy root-prune when you repot?
Comments (27)EW - The best time to repot F lyrata is around mid-Jun if you're N of the equator, and mid-Dec if you're south of it. If you're less than 25-30* N or S latitude, it's not particularly important when you repot. If you want to achieve that look, and especially that look combined with that ht, you'll need to make some sacrifices. Trees thicken and trunks strengthen in a direct relationship with foliage mass, The more leaves, the faster the tree grows, thickens, and strengthens. To replicate that look, your job would be to try to make sure the terminal bud on the main stem doesn't get damaged or removed until the plant is about 3/4 as tall as you want it in the end. In the meantime, you should only tip-prune any branches that occur, so you maintain as much foliage on the tree as possible. As the tree approaches the desired ht, you'll start removing the lowest branches and working your way upward over time. If you allow any secondary branching (branches of the main stem, to grow 2 - 3 leaves, then remove the apex (growing tip), more branches will be forced to grow from the leaf axils. You can then keep those oriented toward growth that flatters the plant, and remove those that spoil your vision for what you'd like it to be. Often, growing is a catch 22. If we maintain a plant so it always looks its best in the immediate, we might be destroying its future. If we're serious about having our plants grow into something that is going to be pleasing to the eye at maturity, we usually need to make some sacrifices and stick with a plan as the plant moves through the formative stages. I realize how much that is to ask of a grower because of how long it took me to develop the ability to look ahead. The good news is, though, I didn't have anyone to help me learn to see into the future or explain all this to me, you do. ;-) Al...See More 10 years ago
 10 years agolast modified: 9 years ago
- 10 years agolast modified: 9 years ago
 10 years agolast modified: 9 years ago
 PRO10 years agolast modified: 9 years ago
- 10 years ago
- 10 years agolast modified: 9 years ago
- 10 years agolast modified: 9 years ago
- 10 years agolast modified: 9 years ago
- 10 years ago
- 10 years ago
- 10 years agolast modified: 9 years ago
- 10 years ago
- 10 years agolast modified: 9 years ago
- 10 years agolast modified: 9 years ago
- 10 years agolast modified: 9 years ago


Related Stories
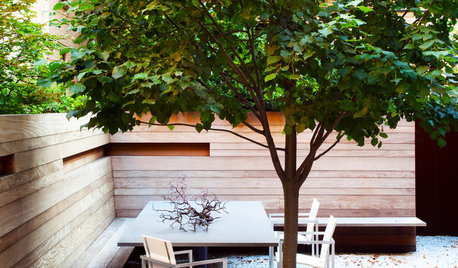
LANDSCAPE DESIGNPretty Trees for Patios, Paths and Other Tight Spots
Choose trees for their size, shape and rate of growth — or shape them to fit your space. Here's how to get started
Full Story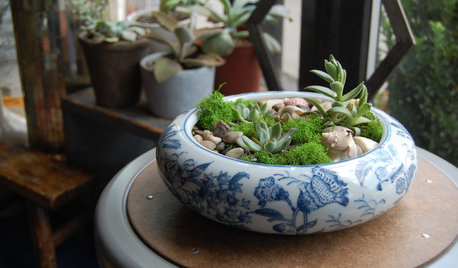
DIY PROJECTSQuick DIY Project: 3 Ways to Show Off Your Succulents
Create a simple yet lush vignette with a few plants and some everyday items
Full Story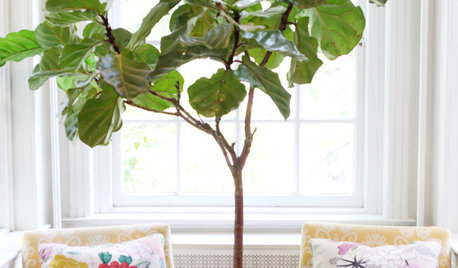
HOUSEPLANTSPlay Up Some Fiddleleaf Figs for a Lively Indoor Tune
Strike a dramatic chord in a minimalist scene or a country note in a rustic setting — fiddleleaf fig plants harmonize with any style
Full Story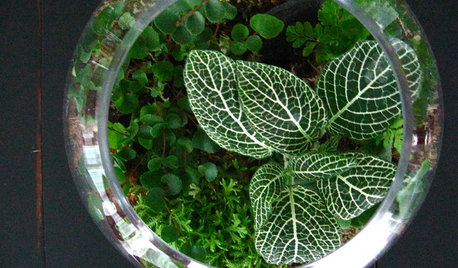
HOUSEPLANTSGardens Under Glass: How to Make Your Own Terrarium
Be the master of a mini ecosystem indoors — the low-maintenance, highly rewarding kind that fits any room
Full Story
MOST POPULARHow to Get Rid of Those Pesky Summer Fruit Flies
Learn what fruit flies are, how to prevent them and how to get rid of them in your home
Full Story
EDIBLE GARDENSSummer Crops: How to Grow Tomatoes
Plant tomato seedlings in spring for one of the best tastes of summer, fresh from your backyard
Full Story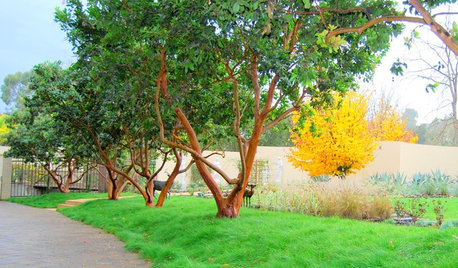
GARDENING GUIDESGarden Myths to Debunk as You Dig This Fall and Rest Over Winter
Termites hate wood mulch, don’t amend soil for trees, avoid gravel in planters — and more nuggets of garden wisdom
Full Story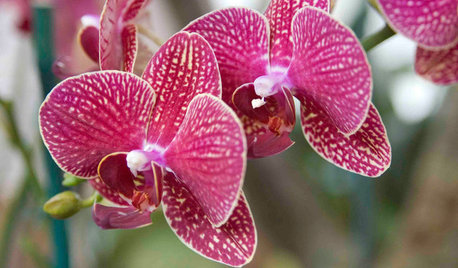
HOUSEPLANTSOrchids 101: How to Keep Your Moth Orchids Alive and Blooming
Growing Phalaenopsis — and getting it to flower again — is easier than you might think
Full Story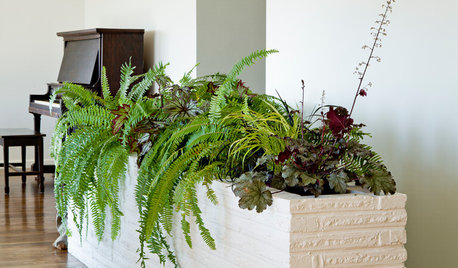
HOUSEPLANTS8 Houseplants You Can't Kill
They're forgiving and let you forget. Houseplants don't get any easier than this
Full Story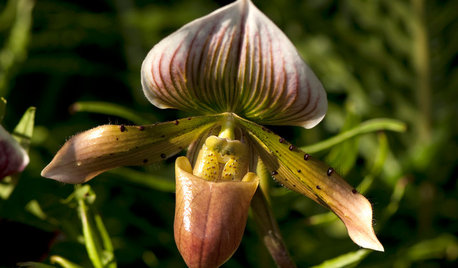
HOUSEPLANTSOrchids 101: Slipper Orchid Success
If you don’t already love Paphiopedilums, learning how to grow them with ease might change your mind
Full Story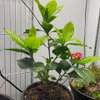


petrushka (7b)