


How waterproof, durable and structurally strong is Hypertufa?
dragonfly_wings
15 years ago
Featured Answer
Sort by:Oldest
Comments (10)

billie_ann
15 years agodragonfly_wings
15 years agoRelated Discussions
wip: indoor hypertufa fountain with led lighting
Comments (54)Hey, thanks! Good to be back. I'm hoping to get things rolling again...maybe even sell a thing or two (just to make room for new projects). I think I've finally tipped that mental scale where I can appreciate my own stuff more without so many of the "should have done this" or "next time I'll do that" type of thoughts. Not sure if that makes sense? Maybe I'm finally just too busy to think about it :)...See Morecuring cement peat sand hypertufa
Comments (28)Hi Rhonda I don't use fine molds. All my work is hand cast for shape only and then finished with brushes and other tools. I'm never trying for a super smooth finish and I do use a very dry mix to keep maximum strength. But you can get a glassy smooth surface with a runnier mix or a trowel.. Perlite mixes do some odd things. You would expect them to get dryer as the dry perlite sucks up moisture but they don't. They tend to get runnier as time goes on so you have to be very careful adding water. Like a superplaticizer mix it can become liquid in a hurry. As for bug holes, I don't get those in my mixes but I do get small flat surface imperfections that are easily removed with a brush. I can't explain them. I suspect they are caused by my home made release oils. That said you can't go wrong by trying this Perlite. It's cheap and if it does work out it works great in the garden as a soil lightener.:)...See MoreCan Hypertufa set up in a latex mould?
Comments (14)Shmooey, if you have a need to "pour" your mixture in, you might want to stay with a more traditional concrete mixture with the rock aggregate to maintain the strength. You could still switchout "some" of the aggregate with perlite/vermiculite for weight and probably even some peat. You could add an admixture for more strength--acrylic fortifier and/or fibers. To get a further aged pitted look, you could use Tango's suggestion of sprinkling the mold with baking soda which leaves small crevices. I think Tango had some samples of doing this in his photo album--check his "My Page" for the album. It was a mold of a star figure, I believe. I would imagine that you would end up with some weaker, stressed areas in the wing area in which you would have to be careful with--can you manage to put some type of steel bar reinforcement in that area?. I guess experimenting will be your best indicator here. Regarding the hypertufa recipe, I've heard that some people have had success filling both halves of the mold and slapping it together while it's still wet. If you desire the aged look anyway and you're using a steel file on it after it's unmolded to rough it up, you might find that the seams will blend in and/or you can concentrate on it at that time to blend them in. You can also use a cement slurry to touch it up somewhat. I totally submerse my stuff in a water bath which I change out every couple of days. The longer it stays in there, the better (within a 28 day range). You can submerse it in the water as soon as it's "set" which is somewhere around a few hours. Also watch the temperature in which you cure it. No colder than 50 degrees and I believe the hot point is somewhere around 85-90 degrees, otherwise it stops curing. Especially with a mold that has a weaker stress point on it, such as the wings, you'll want to avoid moving the piece too much because it can cause microfractures which weakens it. I guess you can be overly cautious with the stuff and give it it's best chance or find a happy medium that works for you and the application you're making which still will give you an acceptable outcome. Experiment, experiment, experiment. Here is a link that might be useful: Baking Soda trick...See MoreHypertufa experts Help please.
Comments (14)Hypertufa is made with portland cement. If you google curing cement you will find the answer to your question. - search "Curing Cement" Curing is a process that requires the item you are making to remain damp or maybe wet ( either is fine) to properly cure. Note - Curing is not drying ( you do not want it to Dry) How you keep it damp or wet could vary by what you want to do. After 1 day I unmold and I place the hypertufa in a garbage bag and twist l the end of the bag, that should keep it damp for a day or several. You should look inside the bag periodically and it begins to dry, the re wet the item. You could spritz, or spay with a hose, or take out and wet in a bucket. Bottom line you do not want it to dry. Drying stops the curing process. 2 months is too long. Keep damp in the bag for about 2 - 3 weeks. The concert web sites will say 28 days. Which is good if you can wait that long. The item gain the most strength after week 1, a little more strength after week 2 , and a little more after week 3. (The amount of strength it gains each week decreases) So if you google how to cure hypertufa 10 times you may find 10 different answers. In the classes I teach I suggest at least 2 weeks , 3 would be even better. Curing is especially important when you are making bigger hypertufa pieces. It is also important to add the water gradually until you get to the consistency of a meatloaf mix, too much water in your mix could also impact the strength of the container. Also all this is impacted by how hot or how cold it is outside. Never below 50f . Above 90f is too hot and speeds up the process. Like a turtle - slow and steady ( and damp) Mike...See More
Mike Larkin
15 years agobillie_ann
15 years agodragonfly_wings
15 years agobillie_ann
15 years agoclarenancy
15 years ago
Susan McCurdy
2 years agoDougal Öneton
last year
Related Stories

ARCHITECTUREHouzz Tour: Sturdy Enough for a Tsunami
Storms don't scare this Washington state home; breakaway features and waterproof finishes let it weather high winds and waves
Full Story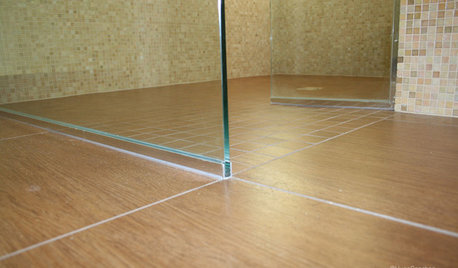
TILEEpoxy vs. Cement Grout — What's the Difference?
Grout is grout, right? Nope. Cement and epoxy versions have different appearances, durability and rules of installation
Full Story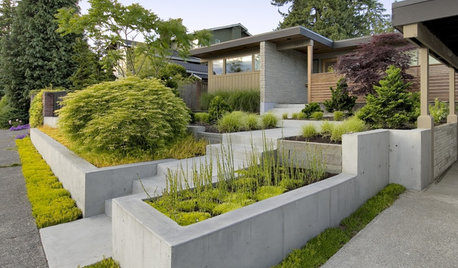
LANDSCAPE DESIGNGarden Walls: Pour On the Style With Concrete
There's no end to what you — make that your contractor — can create using this strong and low-maintenance material
Full Story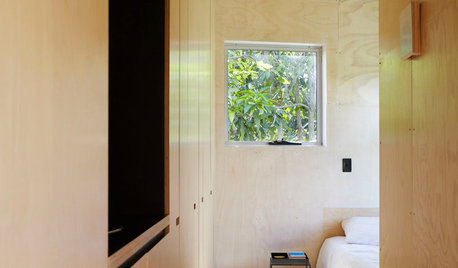
WOODDesign Workshop: Plywood as Finish
Trendproof your interior with this sensible guide to using this utilitarian material indoors
Full Story
ARCHITECTUREDesign Workshop: The Shed Roof
This popular — and versatile — form straddles the divide between contemporary and traditional styles
Full Story
KITCHEN CABINETSChoosing New Cabinets? Here’s What to Know Before You Shop
Get the scoop on kitchen and bathroom cabinet materials and construction methods to understand your options
Full Story
MOST POPULARWhat to Know About Adding a Deck
Want to increase your living space outside? Learn the requirements, costs and other considerations for building a deck
Full Story
MATERIALSMaterials Workshop: Polycarbonate — a Low-Cost Alternative to Glass
Looking for something lighter, stronger and less expensive than glass? Multiwall polycarbonate may be a good option
Full Story
REMODELING GUIDESModern Awnings: Sails Shade the Home
Today's fabric awnings add movement, color, and just the right amount of protection from the sun
Full Story
MOST POPULARHow to Add a Backyard Shed for Storage or Living
Need a home office, a playspace or extra room for your stuff? Learn about off-the-shelf, prefab and custom sheds
Full Story
dragonfly_wingsOriginal Author