


Drawing the Plan. part 1
pls8xx
15 years ago
Sort by:Oldest
Comments (9)
Related Stories
REMODELING GUIDESPlan Your Home Remodel: The Design and Drawing Phase
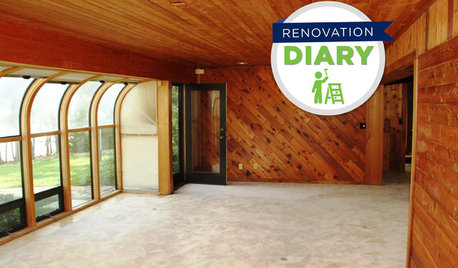
Renovation Diary, Part 2: A couple has found the right house, a ranch in Florida. Now it's time for the design and drawings
Full Story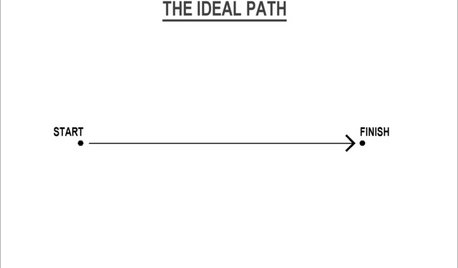
MOST POPULARThe Many Paths of Design, Part 1
Blame engineering issues, unforeseen revisions or even the Internet. As these diagrams show, it's probably not your fault
Full Story
HOLIDAYSHoliday Party Prep: Add Sneaky Seating
Worry no more about where guests will sit. These 10 seating options can hide in plain sight
Full Story
DENS AND LIBRARIES8 Victorian Drawing Rooms for Modern Living
Whether you remodel it for an open plan or keep it intact, a Victorian drawing room can graciously adapt to modern needs
Full Story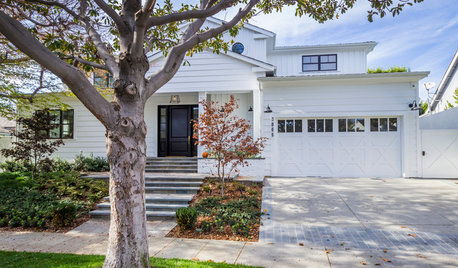
TRANSITIONAL HOMESHouzz Tour: Part Traditional, Part Modern and All Family Friendly
With clean lines, vintage touches and durable surfaces everywhere, this Los Angeles home balances tastes and needs beautifully
Full StoryHOW TO PHOTOGRAPH YOUR HOUSETake Better Photos of Your House in a Snap: Part 2
Think like a professional photographer and learn to capture stunning images of your home
Full Story
DOORSKnow Your House: Interior Door Parts and Styles
Learn all the possibilities for your doors, and you may never default to the standard six-panel again
Full Story
HOME INNOVATIONSHouzz Tour: Meet a Home Made With Minivan Parts
Sawn-off car roofs for the siding, windows popped out of van doors ... this California home is as resourceful as it is beautiful
Full Story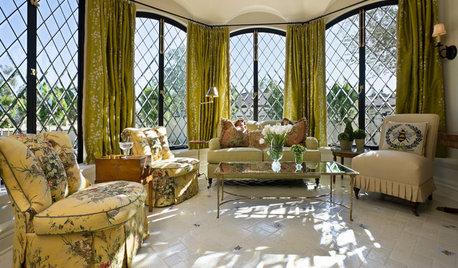
DECORATING GUIDESGetting the Room Right: Part I
Great Spaces Show How to Avoid the Top 10 Decorating Mistakes
Full Story
STANDARD MEASUREMENTSKey Measurements for a Wine Cellar, Part 1
Find out the best ways to store your stash and how much space you need for wine refrigerators, racks and other storage
Full Story

isabella__MA
pls8xxOriginal Author
Related Discussions
drawing up garden plans
Q
architects drawing plans you can't afford
Q
The Best Laid Plans, Part 1 . . .
Q
Architectual floor plan drawing as wall art?
Q
fordsn
timbu
pls8xxOriginal Author
pls8xxOriginal Author
shirauo
asinha
happy_macomb