


Karly Simon Master Rain Gardener Class 2020 - Washtenaw County
Hi all,
Homework 1:
I'm currently deciding on a location for a rain garden and have a couple of options I would like some opinions on.
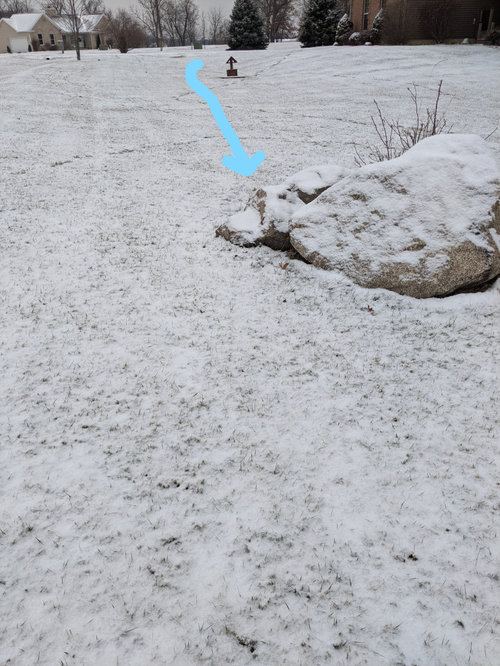
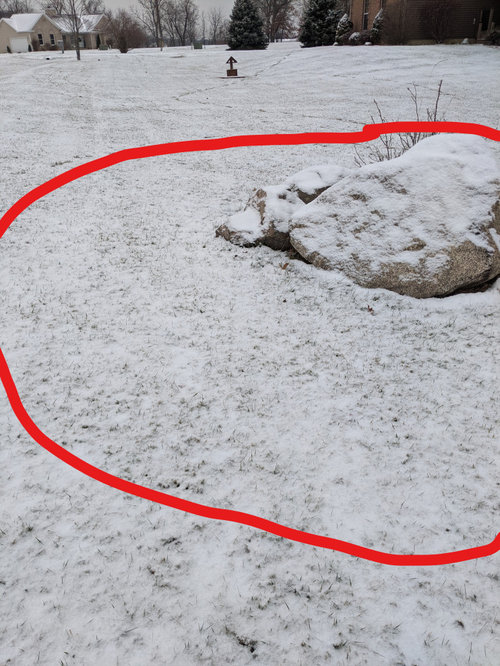
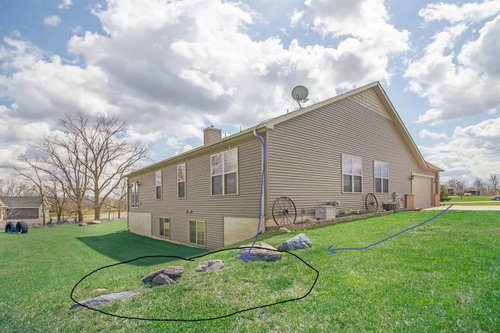
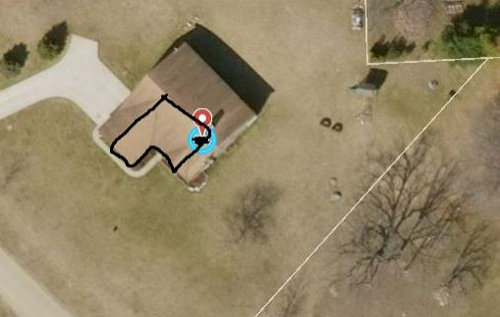
The one I'm most interested is around of giant rocks in my yard located on a downward slope, I think this location could visually benefit from the rain garden and the area looks like it could have drainage issues. There's a couple of things I am not sure about and would like some opinions:
- The pile of rocks is approximately 11 feet away from my property line, so if I plan on a rain garden here, it will probably shrink this distance. I don't know how close is too close to the property line.
- The location is about 25 - 30 feet away from my wellhead, is this far enough away? Or is the garden going to divert water away from my well? Will enough water even get to the garden if the wellhead appears before the raingarden in the natural drainage slope?
- The distance between the garden location and the downspout is probably 30 feet or so, is this too far away? Otherwise, there is a drain outlet into the swale by the driveway, but this is further away.
Water flow from the driveway

Trying to show the slope of the land, the rock pile sits at a low point.
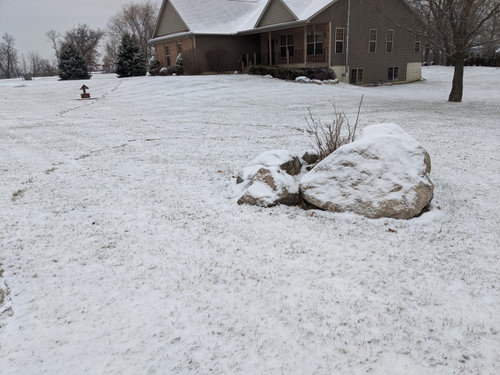
If water was to be used from the roof, there is a downspout on the left corner near the garage. Not sure if this is too far away
If this location doesn't work out, I have 2 alternative ideas.
One:
Directly off of the driveway. This area is like a bowl. If I picked this location, would water need to be diverted from the roof or is the driveway close enough that this is my water source? If I need to use the downspout from the roof, is this going to take water away from my well if I am redirecting this water flow? (Currently the downspout is faced downwards the well head and approximately 25 feet away) .
Two:
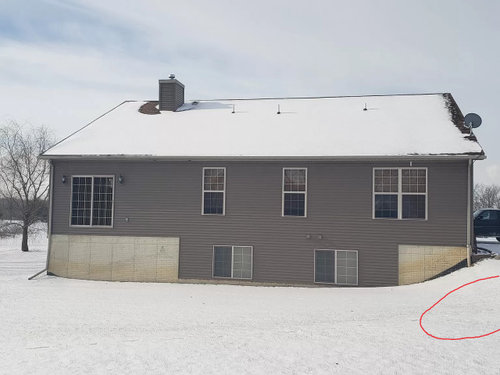
There is a steep slope that I could dig into on the corner. My concern with this location is that it is near the basement, so it would need to be built out far enough. This whole side is sloping down and might be able to catch water from the roof and the driveway. Again we have some random rocks in the yard that I would want to incorporate into the garden if possible.
Thanks in advance
1/4/2021
Homework 2:
I have decided to do a design comparison of two different locations for the rain garden, since I am still unsure of the final location. I will be comparing the first location from the last update (which I'll call the "rock pile") and a new location by the driveway (which I'll call "sidewalk").
Here are pictures of the new location, sidewalk.
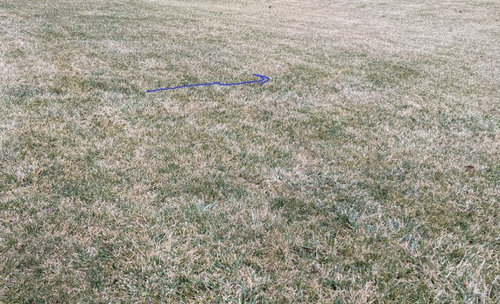
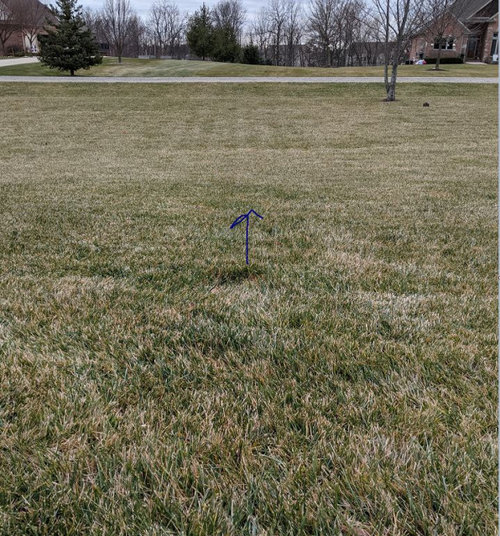
There is a pipe connected to the downspout that travels under the sidewalk and discharges water into the yard. Water exits the pipe at the start of the blue arrow drawn and travels downward.
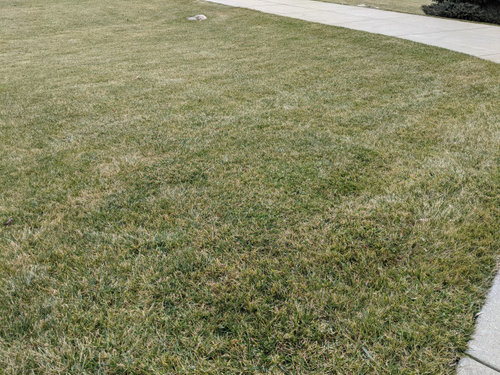
View from the sidewalk, hard to tell in the photo but there is a downward pitch from the sidewalk to the rocks near the driveway.
Given these areas, the water supply area is different. I calculated the area by measuring the distance of roof area that will be used to collect water for each downspout via the MapWashtenaw website. Sizing of the garden will be based off the 20% of the impervious area rule.
Sidewalk location roof area is approximately 430 square feet, leading to the rain garden area of 86 square feet.

Rock pile location would have water pulled from a downspout also in the front of the house (with pipe under the sidewalk to discharge water into the yard), but this downspout collects a larger area.
Rock pile roof area is approximately 880 square feet, leading to rain garden area 176 square feet.
Since the ground is frozen, I'm going to be using soil data that was collected when my house was under construction until I can do a perc test in the spring. In general, the soil on the property layers between sand, clay, and clay with sand pockets.
2/8/2021
Homework 3:
After finishing the previous assignment, I decided to use the garden location "sidewalk" since it is closer to the water source (less digging!) and would be nice to add some plants closer to the house.
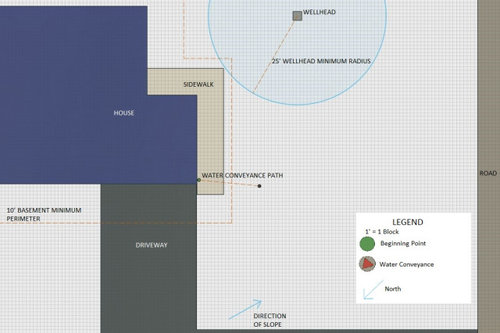
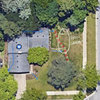
In the creation of the base plan for my design, I decided it was best to design in CAD to make it easier to make any adjustments. To locate a wellhead in the front yard, I followed the same basic technique using the arcs that was mentioned in the lecture, shown below.
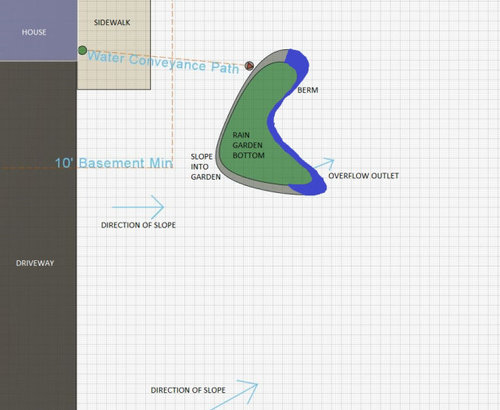
The final base layout of the yard is shown below. Note that the property lines are past the shown areas (technically the road is on my property).
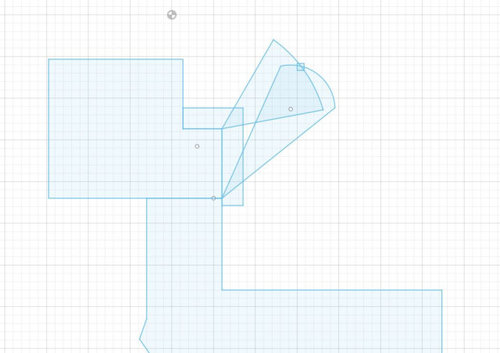
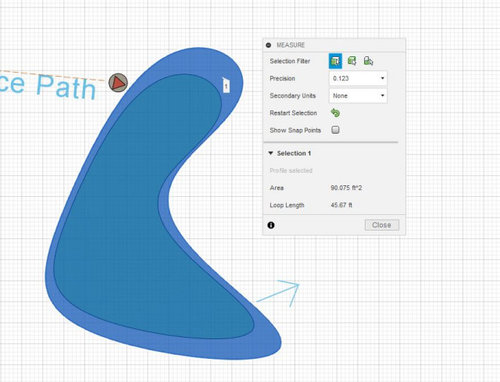
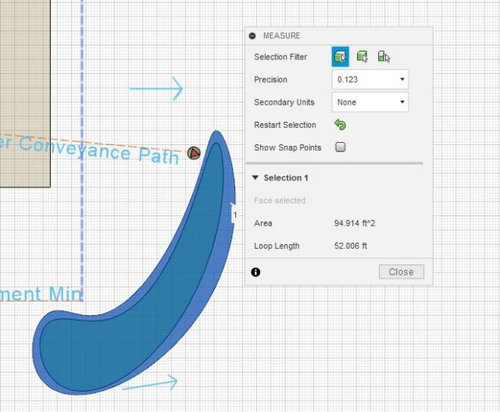
I drew two shapes of interest, with my goal of creating something "curvy". My area for the rain garden is approximately 86 square feet.
Shape 1 and Area:
Shape 2 and Area:
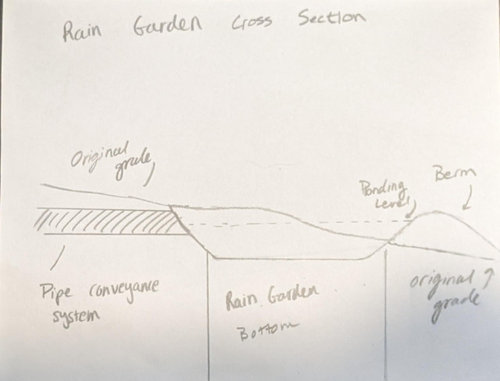
Here is a sketch of the cross section that would apply to both scenarios:
2/26/2021
Homework 4:
To start, I did some more research about berms and construction of rain gardens. I updated my sketch of the cross section to better understand my situation with the water conveyance system and to decide how the water will be entering the basin. The slope of the yard was drawn very dramatically.

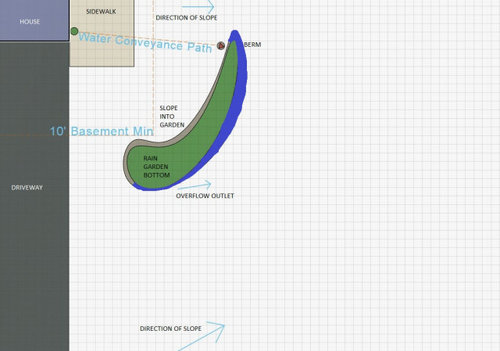
I talked with someone I know that is a licensed landscape architect to get some input on the designs from the previous homework posting. I drew up a new shape (in the same location) based on their experience with design.
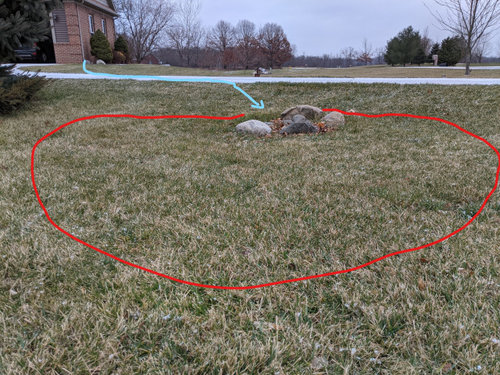
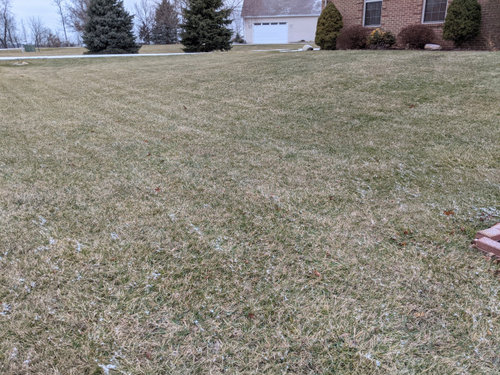
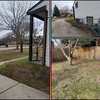
Two pictures of the before location are shown below:
Arrow is showing where a pre-existing pipe is draining water into the yard.
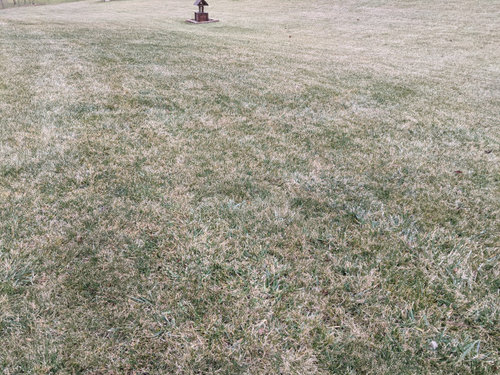
Location shown from the side.
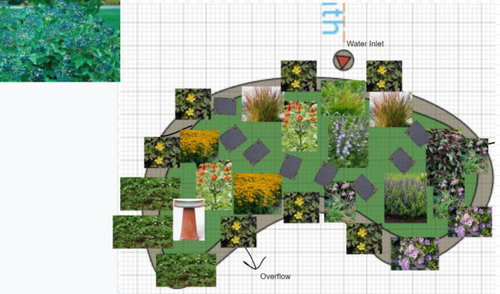
All of my work for plant list, bloom visualization, and designs considered can be found in the link to my Google Spreadsheet below.
Plant List:
- Wild Nodding Onion
- October Sky Aster (oblongifolius) - replace with Silky Aster if I can not find this
- Shenandoah Switch Grass (Panicum virgatum' Shenandoah')
- Great Blue Lobelia
- Palm Sedge
- Michigan Lily
- Swamp Buttercup
- Chocolate Joe-Pye Weeds
- Black-eyed Susan's
- Blue False Indigo (Baptisia australis)
- Blue Muffin Arrowwood Viburnum - as an anchor near the garden, not actually inside the garden
- Wild Strawberry (Fragaria virginiana)
Blooming Time Visual:

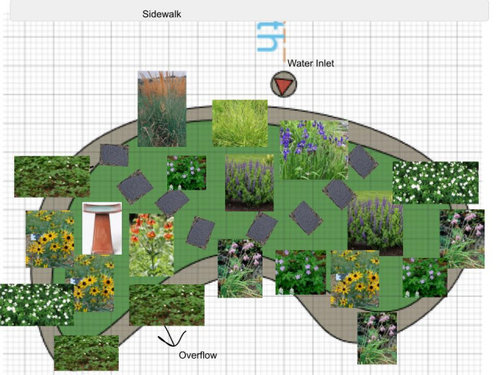
Garden Design Plan:
I threw in some pictures of the plants to help get an idea of where they should be placed. I'm still deciding on the garden accessories (maybe add one of those cool tall wind spinners?). I think I'm going to have to scale this design up to 30% of the roof area, making this area ~130 square feet instead of the 86 I calculated earlier (since I'm suspicious this is clay but haven't done the perc test yet).
5/23/2021
Final Project
Before

After
The rain garden is complete! In preparation of the great digging, I (finally) performed a perc test. The area that dug was sand, and was gone in about 4 hours. I decided to stay with the original square footage I had calculated and the plants I had picked. I updated the plant list to the following:
- Wild Nodding Onion
- Canada Anemone (Anemone canadensis)
- Wild Geranium (Geranium maculatum)
- Fox Sedge
- Indian Grass
- Michigan Lily
- Black-eyed Susan's
- Blue False Indigo (Baptisia australis)
- Blue Muffin Arrowwood Viburnum - as an anchor near the garden, not actually inside the garden
- Wild Strawberry (Fragaria virginiana)
Proposed layout
When digging out the garden, I learned that the pre-existing PVC connection to the gutter that ran under the sidewalk was actually buried in the ground, and was not at the hole outlet in the yard as I thought. I dug about 6 inches up towards the house to find the PVC. The PVC was completely clogged with wet clay, which was removed by flushing water down the gutter and using a long stake to break up chunks of clay.
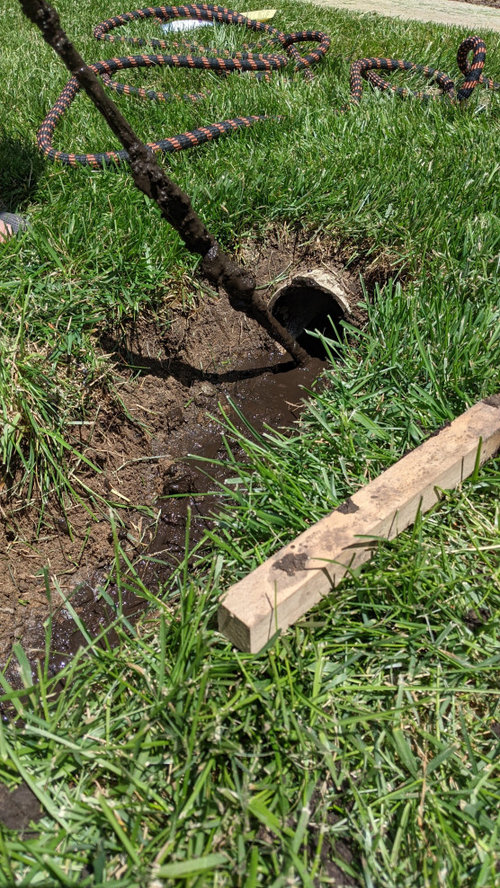
Picture of the clogged drain. Didn't seem to up to building codes..
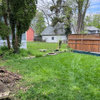
As the shape of the rain garden came together and started to remove soil, I learned that the one spot where I toke perc test was sandy, while the rest of the area was a clay/sand mix. I decided to keep the size as is after adding water to the hole to see how fast it drained. I also moved the bottom of the berm a little lower to compensate for this smaller garden size given it was a majority of clay.
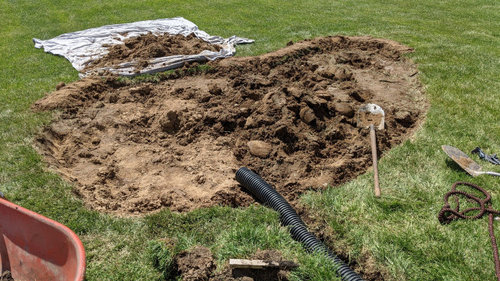
Mid Dig
After about 7 inches of soil was removed from the bottom of the water inlet pipe, I added in enough compost to raise the level up about 1 inch. After mixing, leveling, and compaction, the final level was about 4 inches below the inlet drain.
I decided to create a slope down into the garden from the top to create less of a "cliff" along where the water source drain was coming in. I added in some rocks that I found while digging the garden and rocks from other locations around my house.
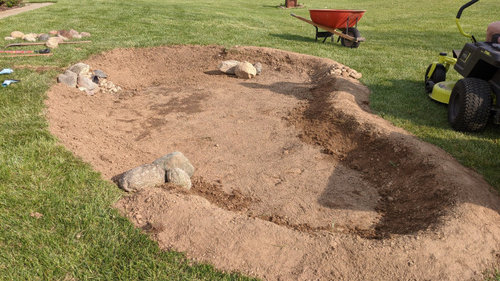
Final shape before planting (and mulch)
After the initial planting of what I ordered, I had more plants brought to me from family members.
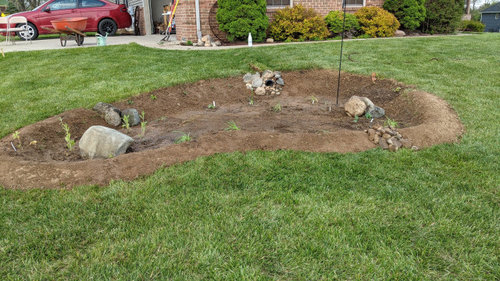
Initial planting. More strawberries, Iris, and Black-eyed Susans were planted later.
Comments (2)


Elizabeth
Susan Bryan