


Your Essential Seed-Starting Glossary
Before starting plants from seed indoors, learn these common horticulture terms
Curtis Adams
November 4, 2017
Houzz Contributor. Landscape designer, native plant enthusiast and blogger located in west-central Maryland. I have always had an interest in things botanical, especially species that are native to a particular locale. When it was time to start a second career I decided that the best way to build on this interest and to educate others about the wonderful plants that grow in their own region was to train to become a landscape designer. I completed the Landscape Design certificate program at Harvard's Landscape Institute and launched my own business, Adams Garden, in the Boston area. In 2012 I moved to Knoxville, MD where I am continuing to evaluate native plants, work on removing invasive plants and continue my design business. You can find my blog at http://adamsgardennativeplants.blogspot.com/...
Houzz Contributor. Landscape designer, native plant enthusiast and blogger located... More
Most commercially available seeds have been selected and bred for easy use. In late winter or early spring, you put them in soil, give them water and some light, and you get new plants. By starting from seed, you can grow many plants that are not readily available in garden centers.
With just a little more planning and a few extra steps, there are even more plants you can start from seed. This glossary will introduce some terms and treatments — or clarify those you might have read on Houzz — to get you started with seeds from temperate plants.
With just a little more planning and a few extra steps, there are even more plants you can start from seed. This glossary will introduce some terms and treatments — or clarify those you might have read on Houzz — to get you started with seeds from temperate plants.
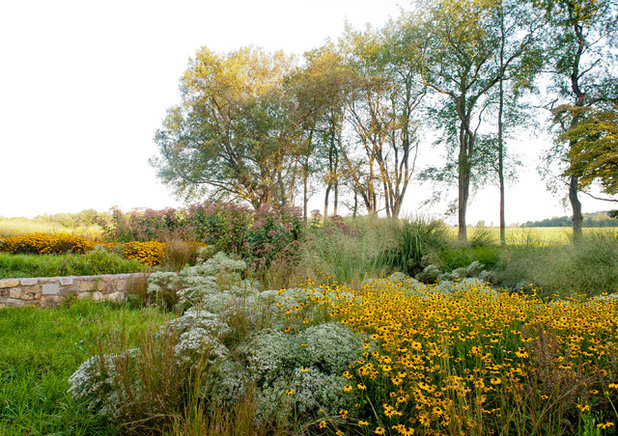
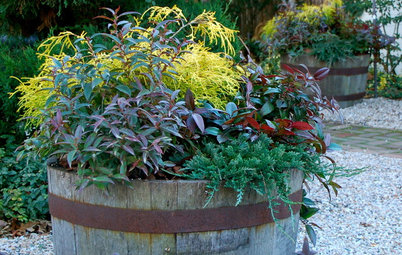
The seeds of all of the perennials in this landscape will germinate much better if they have been exposed to a period of moist cold for one to two months. You can achieve this by planting them outside in the fall. If you want to start them indoors or plant them in the spring when the beds are prepared, you will need to mimic that process indoors.
Starting seeds indoors requires setting up an area that is at a moderate temperature, has room for plant trays and is well-lit, either naturally or with artificial lighting. The advantage of starting indoors is that you can grow your plants under controlled conditions, free of competition from weeds and predators, and germination rates are often much higher. You also have more control over your garden’s design, as you are placing individual plants.
Planting Time: Get Your Garden Started With Seeds
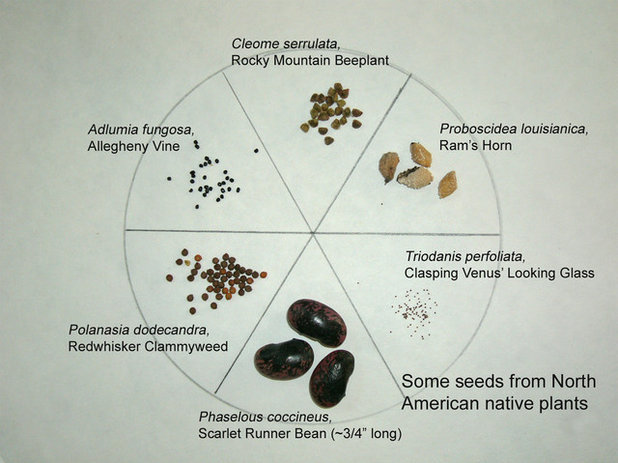
A variety of seeds illustrates the vast array of sizes. There are about 3 million Triodanis seeds per ounce, while runner beans have closer to 25 seeds per ounce.
Dormancy: The seeds of most plants from temperate zones (that is, having distinct warm and cool seasons) have protective layers or mechanisms built in that keep them from germinating prematurely or when the conditions are not favorable for growth. If seeds were to sprout immediately when they hit the ground, they may not have a chance to mature before the winter weather set in, or it may be in a season that is not favorable to growth, such as a summer dry season. This protection may be a thick seed coat or a more elaborate biochemical process that inhibits growth.
In many cases the end of dormancy is triggered when the seed has experienced a period of moist, cold conditions, as it would get in the winter. Some seeds are protected by a thick seed coat that prevents moisture and oxygen from getting inside. These coatings may be broken down naturally by erosion or by passing through the digestive tract of an animal that has eaten the fruit in question. Some seeds need to be consumed by an animal and come out in its droppings; this mechanism supports spreading the seed away from the parent plant.
Dormancy can also be broken artificially by scarifying seeds or subjecting them to a simulated cold season (stratification). The method used depends on the plant species in question.
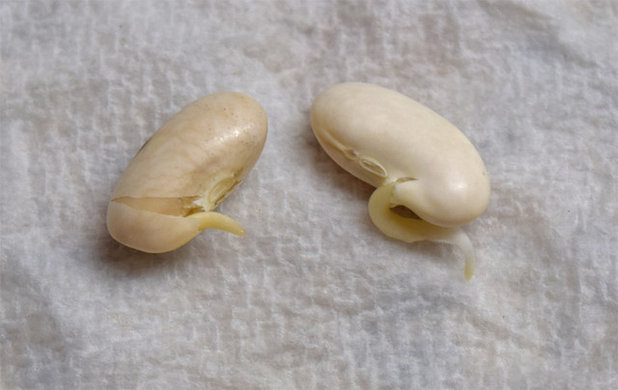
These pole beans were covered with damp paper towels at room temperature for three to four days to get them to germinate. Germination is signaled when the first root breaks out of the seed coat.
Germination: The process where a dormant seed absorbs water and the embryo develops to form a root (radicle). It may take several more days before the stem or leaves appear above the soil surface.
Scarification: A process of scratching or weakening the seed coat to allow moisture, gases or both into the seed to promote germination. This is usually done by rubbing with sandpaper or grit or scraping with a sharp blade. This mimics natural weathering or passing through the digestive tract of a bird or animal.
Soaking: This is often done to rehydrate dried seeds and speed the germination process. Peas, beans and other large seeds such as nasturtiums are often soaked. Wrap seeds in moist paper towels and leave them at room temperature for a few days until the seeds swell and germination begins. Keep the towel moist throughout this time. A few species need exposure to hot water, but those are special cases.
Seeds can also be tested for viability in this way. If they do not germinate after a week or two at room temperature (about 70 degrees Fahrenheit, or 21 degrees Celsius) they may be old or need some further treatments to get them to germinate.
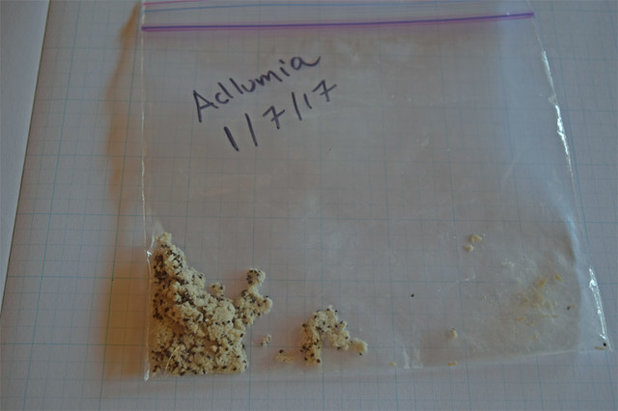
These seeds are ready to be put into the refrigerator for cold stratification. The sand is moist and clumping and there are no free water droplets. The light-colored sand makes it easy to pick out the dark-colored seeds come planting time.
Stratification: This process simulates changing seasons, usually winter. Typically the procedure calls for storing seeds in a moist, but not wet, environment at 33 to 38 degrees Fahrenheit (1 to 3 degrees Celsius) for a period of 10 to 90 days, depending on the individual seed’s requirement. To do this, mix seeds with two to three times the volume of clean sand in a sealable plastic bag. Moisten the mixture with clean water just short of saturation (no free water droplets visible). Label the baggie with the plant name and date, and put it into a refrigerator for the desired period of time. Check occasionally to ensure that seeds are not germinating. If they do germinate early, plant them into trays immediately.
Sometimes a seed needs to experience two cycles of winter. In this case, after the initial period of moist cold, the seeds are kept warm and moist, at around 80 degrees Fahrenheit, or 27 degrees Celsius, for 30 to 90 days, then returned to the cold conditions for another period of time before being planted.
Alternatively, if you live in a temperate climate where it will naturally get near freezing for a month or two, seeds can be sown directly outside in the fall into prepared beds. This avoids the hassle of planning ahead, growing seeds under lights, and potting up seedlings. But you do need to make sure that the area is cleaned up prior to planting and left undisturbed after sowing. Also, label the planting so seedling growth can be monitored. This works well for wildflower beds, but not so well if you are planting to a specific design. Note that some seeds may still require scarification before planting out.
Light: Very small seeds, which do not have a lot of energy reserves, need light to induce germination. When starting such seeds indoors, press them onto the surface of premoistened soilless mix or seed-starting medium. You can also use a thin layer of fine sand to help retain moisture but still allow light to hit the seed.

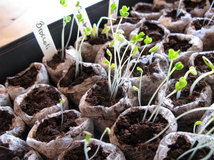
These seedlings are developing nicely. This stage of development is particularly sensitive to damping off.
Inoculum: Most plants form partnerships with soil bacteria and fungi that help them survive. There are some species of plants that have very close relationships with specific microorganisms to help them fully develop. Many of these are legumes, which partner with soil bacteria to allow them to fix nitrogen directly from the air. You can purchase these bacteria in dried form as an inoculum to add along with the seed to your otherwise sterile soilless mix or during the stratification process. Inoculum is also available for garden beans and peas and is recommended if you have not grown these plants in that area in the recent past.
Damping off: This is a fungal disease that affects developing seedlings. It may attack the roots or stems, causing the little plants to quickly wither and die. Often it looks like the stem of the plant has been pinched and the upper portion just falls over. Damping off can be prevented by using sterile soil mixes, clean pots and utensils, by avoiding over-watering and by keeping plants warm to help speed growth. Putting a thin layer of sand on top of the soil helps, as does good ventilation, to keep the upper portions of the seedling dry.
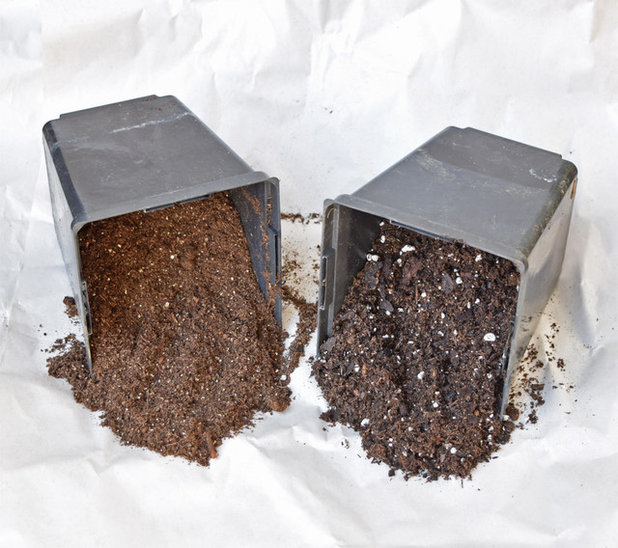
On the left is a finely ground grade of soilless mix; on the right is a standard grade of soilless mix, in which you can still see bits of bark and larger pieces of perlite.
Soilless mix: This is the preferred medium for starting seeds as well as for growing plants in containers. It consists of a mixture of peat moss or coir, bark, vermiculite or perlite. It may also contain some fertilizer, lime and wetting agents. Soilless mix is recommended for starting seeds because it is sterile, so there won’t be any disease pathogens to damage the seedlings, and because it is well-draining so the developing roots get lots of air to breathe. Some grades are finely ground; these make it easier for roots to develop. Fine grades will not stick to the roots, which helps when transplanting very young seedlings.
Compost should not be used in seed-starting mixes, as this will introduce potential pathogens.
More Information: Information on germination conditions should be available from your seed supplier. Many times it just says “plant in fall” on the packet. You can do a little research from other sources including: Prairie Moon Nursery, the Lady Bird Johnson Wildflower Center and garden educator Tom Clothier’s website. William Cullina’s books Wildflowers and Native Trees, Shrubs and Vines have detailed information for species native to North America.
More
How to Start a Cut Flower Garden for Beautiful Bouquets All Year
Basic Lingo Every Novice Gardener Needs to Know
Making Sense of a Seed Packet


As a full-service, family-owned remodeling company in New Albany, OH, we strive to bring our clients incredible... Read More
What are you working on?


Related Products


We design, build and renovate in the most exquisite of fashions. Our team of revolutionaries is dedicated to... Read More
Related Stories

Gardening Guides
Get a Head Start on Planning Your Garden Even if It’s Snowing
Reviewing what you grew last year now will pay off when it’s time to head outside
Full Story
Gardening Guides
Yes, You Can Enjoy Your Yard in December! Here's How
Garden writers around the U.S. share their favorite winter garden joys. See what to do in your region this month
Full Story
Gardening Guides
New Year, New Landscape — What to Do in Your January Garden
Whether you've resolved to make over your garden or just enjoy it more, these tasks can help
Full Story
Gardening Guides
Your Garden Is Stirring — Here’s What to Do in February
By Susan Haynes
February is a good time to start seeds, shape up shrubs and watch for the earliest blooms. Here’s what to do in your part of the U.S. now
Full Story
Gardening Guides
7 Ways to Get Your Container Garden Ready for Winter
Learn how to transition your fall pots to colder weather — and which plants to lose, keep or add
Full Story

Gardening Guides
8 Tips to Get Your Early-Spring Garden Ready for the Season
Find out how to salvage plants, when to cut back damaged branches, when to mulch and more
Full Story
Fruit Trees
How to Prune Your Fruit Trees in Winter
Garden chores may slow down this season, but pruning your fruit trees now means healthier plants that will produce more
Full Story
Holidays
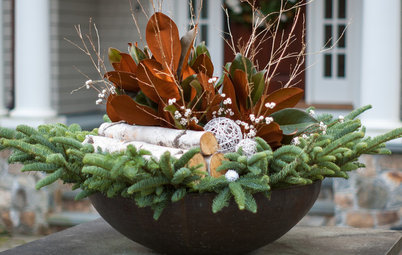
Last-Minute Ideas for Attractive Winter Container Designs
Create a welcoming holiday entryway with ideas from these 9 looks
Full Story

Houseplants
8 Tips for Keeping Your Houseplants Healthy in Winter
Reduce watering, stop fertilizing, move them into the light and more
Full Story
Monthly Home Checklists
Your Winter Home Maintenance Checklist
Keep your home and yard safe and running smoothly as temperatures drop and activity moves indoors
Full Story
.
Great article. Thank you.