


Polish Your Bathroom's Look With Wrapped Tile
Corner the market on compliments for your bathroom renovation by paying attention to where the walls meet and the edges round

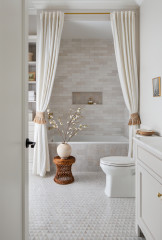
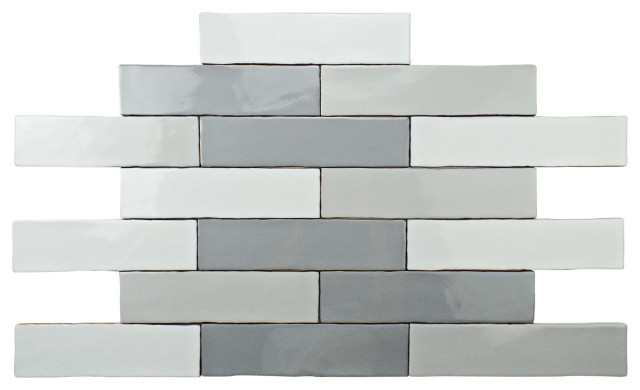
Wrapping tile around a tub or shower's curves and corners is a wonderful touch that adds a lot. This technique makes it look like a piece of tile folds around a corner, as the same size tile and pattern are used. If the tile has veining or graining, the same tile is used side by side in the corner, so it looks like the tile was bent into position.
Tile layout can make or break a bathroom renovation. You don't need to spend a fortune, but you should invest some time in a pleasing tile design. Here you'll see how wrapped corners and the right tile layout can give your bathroom the polished look you want.
Tile layout can make or break a bathroom renovation. You don't need to spend a fortune, but you should invest some time in a pleasing tile design. Here you'll see how wrapped corners and the right tile layout can give your bathroom the polished look you want.
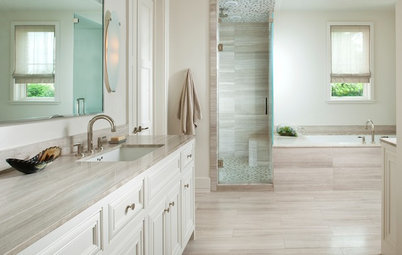
Wrapping the corner with your tile pattern creates seamless walls. Here you can see the diagonally set tile rolls around the corner, making the tile layout constant.
Tip: It can take two tiles to get a perfectly wrapped corner. Use the same color or find another tile with similar grain, or your efforts will not be rewarded with such a polished look.
Tip: It can take two tiles to get a perfectly wrapped corner. Use the same color or find another tile with similar grain, or your efforts will not be rewarded with such a polished look.
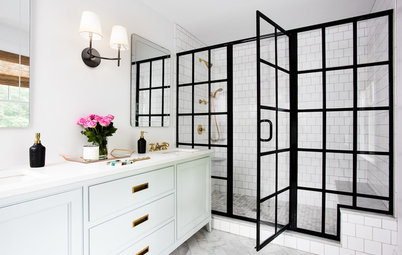
Often one corner of a shower is the key starting point. You can see how the designer of this tile layout started with half tiles in the corner, then worked out from there. At the entry to the shower, the eye is drawn to this corner with the bench, making the corner itself the shower's feature wall.
Tip: Not every shower needs a feature wall, but in most showers one wall or one corner is the primary viewpoint. Take care to ensure this main focal point does not look unbalanced.
Tip: Not every shower needs a feature wall, but in most showers one wall or one corner is the primary viewpoint. Take care to ensure this main focal point does not look unbalanced.
Again, you can see the tile pattern starting in one shower corner and spreading out from there.
I like to maintain the same tile width in the corners. When a tile on one wall is cut to a shorter length, for example, I like to start the next wall with this same width. The inside corner of this shower looks great; the tile widths are kept consistent for a more finished look.
To me balance is about finding a perfect tile layout. Not every shower is built to exacting standards, so tiling often creates the illusion of perfection.
To me balance is about finding a perfect tile layout. Not every shower is built to exacting standards, so tiling often creates the illusion of perfection.
Notice how in this photo, the cut tiles wrap around the corner. It looks perfect. These details should be decided on in the beginning.
Tip: When selecting a stone or natural-looking tile, use ones with more character in the corners to create an instant feature wall.
Tip: When selecting a stone or natural-looking tile, use ones with more character in the corners to create an instant feature wall.
This offset or brick-style tile installation is very popular. Notice the inside corners. Half tiles alternate with full tiles from the inside corner working out. If you maintain a balance like this with your tile layout, your shower will look great.
This shower has a nice, basic 1- by 2-foot tile, with a 50 percent offset brick pattern.
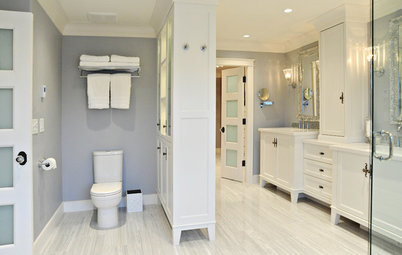
Notice how the wall above the toilet has two tiles installed to fill in the short wall. The other tiles flare out from there. The floor tile grout lines also run up and over the shower curb. All of these little details give a basic tile layout a very polished look.
This shower has a nice, basic 1- by 2-foot tile, with a 50 percent offset brick pattern.
Notice how the wall above the toilet has two tiles installed to fill in the short wall. The other tiles flare out from there. The floor tile grout lines also run up and over the shower curb. All of these little details give a basic tile layout a very polished look.
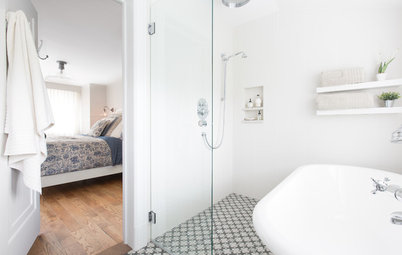
The floor tile in this shower wraps through the shower drain.
It would have been easier to install the tile insert drain with straight cuts, but notice how the floor pattern is maintained across the entire floor, including the drain.
It would have been easier to install the tile insert drain with straight cuts, but notice how the floor pattern is maintained across the entire floor, including the drain.
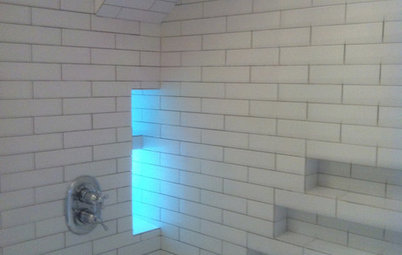
This is my daughter's shower before we grouted. If you look below the angled ceiling, you will see that the corner tiles are even in width.
But look above the light, on the diagonal ceiling portion. I messed up the pattern here, and the look is nowhere near as good. The uneven tiles mess up any balance.
I thought about changing it. Then I thought about all the work it would take. I grouted it, and still, two years later, I wish I had done it right the first time.

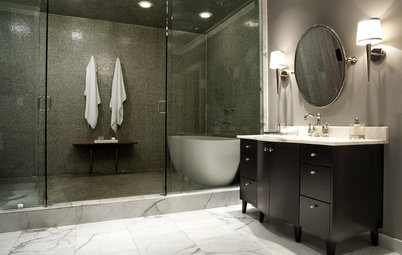


When care is taken planning a tile layout, feature walls and inside corners can look just as amazing.
Tip: Before installing mosaic tile, dry fit it. Find out how the tile meets the edge or the corner in your bathroom. You might find that if you start from center of the wall with a grout joint, your layout will end up going too wide, with tiles going beyond your end point. Instead, starting from the center with a full tile centered on an edge or corner will save you a half inch at least.
Pro tips for getting your bathroom tile right