


Kitchen of the Week: Restored Cabinets Revive a Midcentury Gem
A Carter Sparks-designed kitchen that had been covered in layers of linoleum and white paint shines again
Karen Egly-Thompson
October 6, 2017
Houzz Contributor
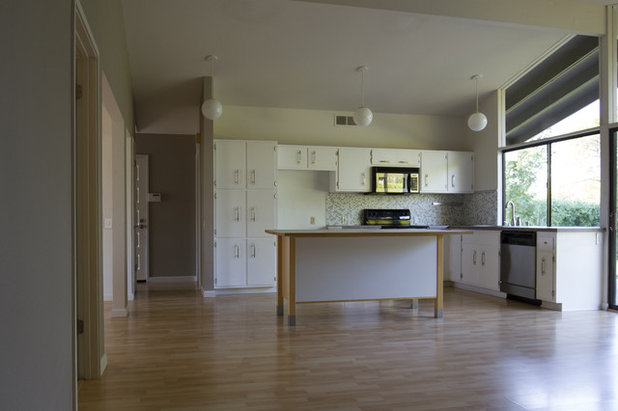
Before Photo
Photos by Robert Maurer
Kitchen at a Glance
Who lives here: Robert Maurer, cofounder and creative director of brand development company Commuter Industries and blogger at Mid-Century Maurer
Location: Citrus Heights, California, near Sacramento
Built: 1974
Size: 140 square feet (13 square meters); 10 by 14 feet (3 by 4.2 meters)
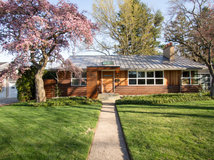
The backstory: Robert Maurer spent two years searching for a midcentury home, with its original kitchen intact, designed by renowned modernist architect Carter Sparks.
Before: Maurer finally landed his dream home, but the kitchen needed some TLC. The cabinets were original to the house but had been painted white and had chunky brushed aluminum hardware. The former homeowner had installed a beech laminate flooring over two layers of linoleum from the 1970s and 1990s.
The countertops were gray 12-by-12-inch ceramic tiles. The island was newer and was not initially part of Maurer’s renovation plan.
Kitchen at a Glance
Who lives here: Robert Maurer, cofounder and creative director of brand development company Commuter Industries and blogger at Mid-Century Maurer
Location: Citrus Heights, California, near Sacramento
Built: 1974
Size: 140 square feet (13 square meters); 10 by 14 feet (3 by 4.2 meters)
The backstory: Robert Maurer spent two years searching for a midcentury home, with its original kitchen intact, designed by renowned modernist architect Carter Sparks.
Before: Maurer finally landed his dream home, but the kitchen needed some TLC. The cabinets were original to the house but had been painted white and had chunky brushed aluminum hardware. The former homeowner had installed a beech laminate flooring over two layers of linoleum from the 1970s and 1990s.
The countertops were gray 12-by-12-inch ceramic tiles. The island was newer and was not initially part of Maurer’s renovation plan.
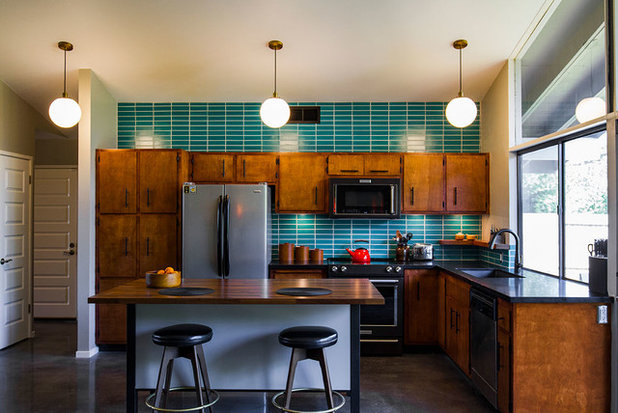
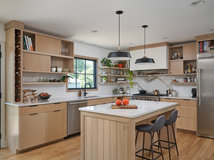
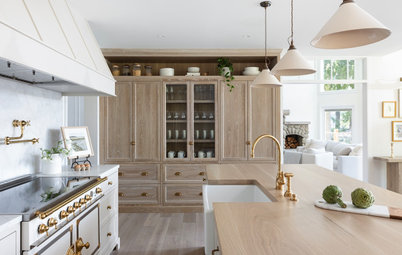
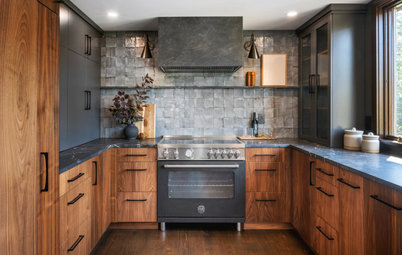
After: Luckily for Maurer, once he started restoring the cabinets, he discovered they had been painted only once in the home’s 42-year lifetime.
Uncovering the original birch wood cabinets underneath the paint required a three-step sanding process using progressively finer sandpapers and great care to not sand through the veneer to the plywood below. “Slow and steady won the race in this endeavor,” Maurer says. Eighteen doors and six drawer fronts later, the beautiful wood grain was revealed.
Uncovering the original birch wood cabinets underneath the paint required a three-step sanding process using progressively finer sandpapers and great care to not sand through the veneer to the plywood below. “Slow and steady won the race in this endeavor,” Maurer says. Eighteen doors and six drawer fronts later, the beautiful wood grain was revealed.
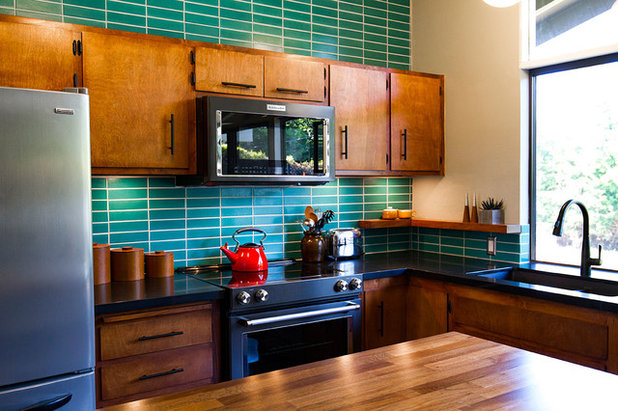
Maurer finished the newly bare birch in a medium walnut stain and four coats of tung oil. He says he likes using tung oil versus polyurethane because it stands up well to heat, which is advantageous in the kitchen, and it actually hardens the wood because it penetrates the surface. It will need touching up from time to time, though.
“If you have an older home, and particularly an older kitchen, consider restoring your cabinetry rather than replacing it,” he says. “Just because something is old doesn’t mean it’s useless. I took a risk by not knowing what was under the white paint on my cabinets, but with some patience, determination and a few days of hard labor, the payoff was huge. I saved at least $20,000 by putting in the effort to restore what I already had.”
Wall paint: Mindful Gray, Sherwin-Williams
New hardware: Streamlined black matte bar-style hardware replaced the beefy brushed aluminum pieces.
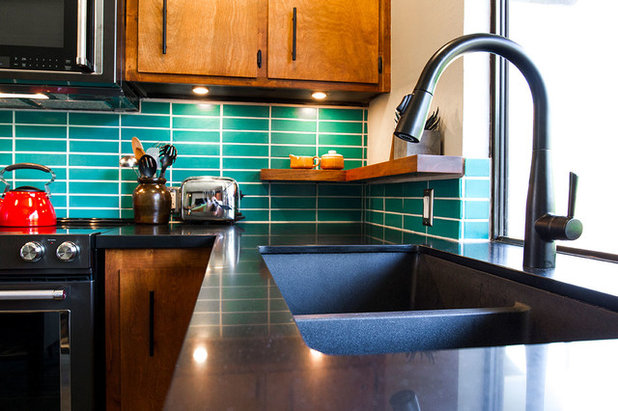
Cleaner-looking counters: Maurer wanted a sleeker, more modern look for the countertops. Plus, he disliked how the grout joints on the previous tile countertop could harbor bacteria. Replacing the tile with smooth black quartz, and adding black matte fixtures and an undermount granite composite sink, made the kitchen visually — and physically — cleaner.
Countertop: Silestone in Iconic Black; countertop installation: Genoa Soapstone

Wall woes, twofold: All of the walls throughout the home were heavily textured with a loathsome orange-peel finish, and ceilings had a popcorn texture. Maurer hired a professional to help finish them perfectly smooth.
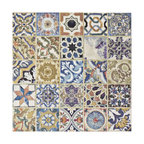
To make matters worse, the previous homeowner had adhered glass mosaic tile directly to the drywall as a backsplash. Once Maurer got underway chiseling off the old tile (in process shown here), he managed to do significant Sheetrock damage, which took several days to rectify.
Wall smoothing: Interstate Companies
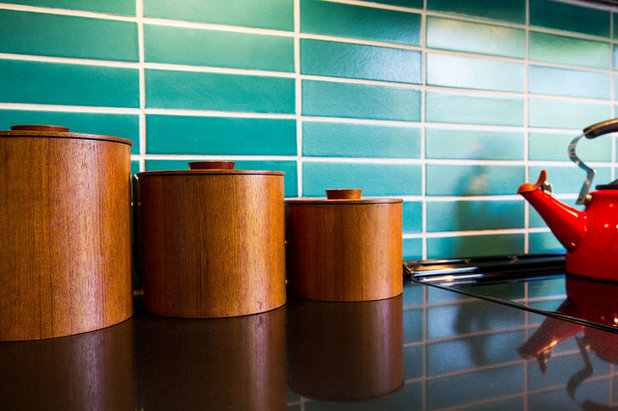
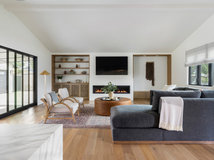
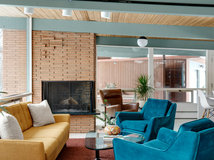
New eye-popping tile: The floor plan is open and visible to the adjacent living room, and Maurer wanted to tie the two spaces together. He pulled the 2-by-8-inch tile design from the home’s floor-to-ceiling brick fireplace, opposite the kitchen. The kitchen tile installation wasn’t limited to the backsplash but mimics the fireplace, spanning the entire 10-foot-high wall above the upper cabinets.
Replacing the glass mosaic backsplash tile with a handmade turquoise straight-set tile fit in with the midcentury modern aesthetic. The color perfectly complements the warm hue of the wood stain, and the pale grout matches the light gray wall paint.
Tile: Fluorite, 2 by 8 inches, Fireclay Tile
Replacing the glass mosaic backsplash tile with a handmade turquoise straight-set tile fit in with the midcentury modern aesthetic. The color perfectly complements the warm hue of the wood stain, and the pale grout matches the light gray wall paint.
Tile: Fluorite, 2 by 8 inches, Fireclay Tile
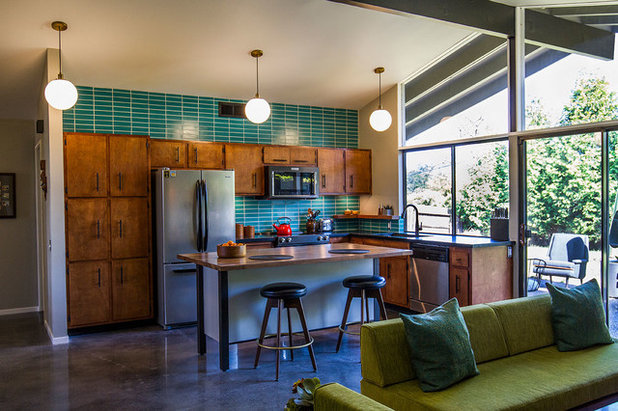
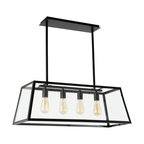
Globe lights: The older kitchen had been rocking the original globe light fixtures, but they were inefficient and their tops were covered in paint. New fixtures made of milk glass, brass and fabric-wrapped cords create the same classic look.
Polished concrete floor: After visiting other midcentury modern homes, Maurer says he got turned on to the idea of polished concrete floors, because they keep the house cool in the summer and warm in the winter. Plus, polished concrete is easy to clean and maintain.
Prep Concrete and Construction managed the huge job of peeling away all of the old flooring, glue and baseboards. The original concrete slab was ground, then stained and polished in a warm charcoal gray, with mottled bits of aggregate shining through. While the flooring was costly, the appliances were purchased on sale to help offset expenses.
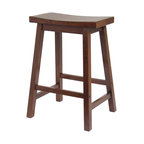
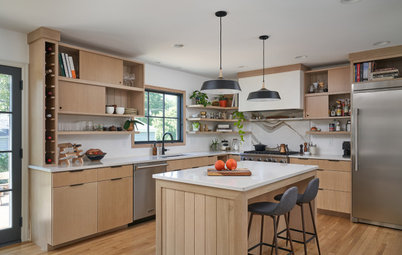
Hacked Ikea island: Maurer says when he first saw the Ikea island, his plan was to get rid of it. “The light beech wood posts, bright white face and warped, knife-gouge-covered top were not quite jiving with my vision,” he says. However, after some consideration, he painted the legs black and the inset panels the same light gray used on the walls, and topped everything off with coordinating hardware and a 2-inch-thick walnut butcher block top.
While it may not be his permanent solution, Maurer says he uses it every day, and for just the $270 cost of the countertop — and a little elbow grease — it brings a bright, modern and airy look to the kitchen inexpensively.
Appliances: KitchenAid black stainless; lighting: West Elm (no longer available); see more kitchen lighting options
Polished concrete floor: After visiting other midcentury modern homes, Maurer says he got turned on to the idea of polished concrete floors, because they keep the house cool in the summer and warm in the winter. Plus, polished concrete is easy to clean and maintain.
Prep Concrete and Construction managed the huge job of peeling away all of the old flooring, glue and baseboards. The original concrete slab was ground, then stained and polished in a warm charcoal gray, with mottled bits of aggregate shining through. While the flooring was costly, the appliances were purchased on sale to help offset expenses.
Hacked Ikea island: Maurer says when he first saw the Ikea island, his plan was to get rid of it. “The light beech wood posts, bright white face and warped, knife-gouge-covered top were not quite jiving with my vision,” he says. However, after some consideration, he painted the legs black and the inset panels the same light gray used on the walls, and topped everything off with coordinating hardware and a 2-inch-thick walnut butcher block top.
While it may not be his permanent solution, Maurer says he uses it every day, and for just the $270 cost of the countertop — and a little elbow grease — it brings a bright, modern and airy look to the kitchen inexpensively.
Appliances: KitchenAid black stainless; lighting: West Elm (no longer available); see more kitchen lighting options

Floating shelf: At the corner between the sink and stove, Maurer built a solid 2-inch-thick L-shaped birch shelf to display vintage items and salt and pepper shakers.
While the shelf looks delightfully simple, anchoring it was not an easy feat. Concealed floating shelf support rods fit snugly into holes drilled into the wood, and a Dremel tool was used to notch out the shape of the rectangular shelf bracket. “After some initial sweating and nail-biting, everything lined up perfectly,” Maurer says.
More
Your New Kitchen: 7 Tricky Questions You Didn’t Know You’d Ask
From the Pros: 8 Reasons Kitchen Renovations Go Over Budget
4 Kitchen Design Decisions to Spend a Little Extra Time On
Other Resources on Houzz
Search for kitchen products
Find a pro near you


J.S.Brown & Co. is an award winning, full service Design / Build remodeling contractor with more than three... Read More
What are you working on?

Related Products

Related Stories

Kitchen Makeovers
Kitchen of the Week: Beer, Shuffleboard and Pizza Bring the Fun
Entertaining features and a warm industrial style create a lively atmosphere in this revamped Craftsman bungalow space
Full Story
Kitchen Makeovers
Kitchen of the Week: Airy Beach Style in a Lake House
By Becky Harris
A designer creates a cottage feel by adding classic architectural elements and mixing white with warm woods
Full Story

Kitchen Makeovers
Kitchen of the Week: Baker’s Dream Kitchen With Two Islands
A kitchen-family room makeover adds happy' aqua cabinetry and a dedicated baking space to a Massachusetts farmhouse
Full Story
Kitchen Makeovers
Kitchen of the Week: Open Feel With White-and-Wood Japandi Style
A design-build firm helps a couple relocate their kitchen to gain space, openness and a warm and welcoming look
Full Story
Kitchen Makeovers
Kitchen of the Week: Bold Black Style With Nods to ‘Star Wars’
A designer helps a young couple create an open kitchen with a large island and a dramatic look with fun sci-fi roots
Full Story
Kitchen Makeovers
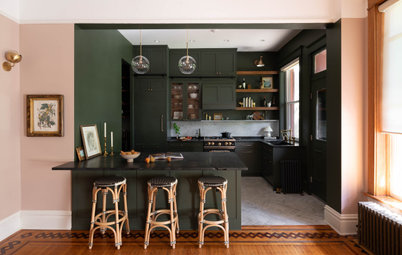
Kitchen of the Week: Rich Color and Style in a 19th-Century Condo
A 160-square-foot kitchen in a Chicago three-flat gets a traditional look with dark green cabinets and authentic details
Full Story
Kitchen Makeovers
Kitchen of the Week: Former Barn Gets a Modern Rustic Style
A designer opens up a closed-off kitchen and creates a warm and moody look with walnut cabinets and black details
Full Story
Kitchen Makeovers
Kitchen of the Week: Respecting History in a Seattle Bungalow
By Becky Harris
A designer uses an English-inspired palette in the kitchen to honor the style of the landmark Arts and Crafts home
Full Story
Kitchen Makeovers
Kitchen of the Week: White, Wood and Blue With Cottage Charm
A 181-square-foot kitchen in a 1920s Atlanta bungalow gets a light and airy makeover filled with small-space ideas
Full Story
Kitchen Makeovers
Kitchen of the Week: New Location for an Open Layout With Style
A designer transforms a dining room to create an airy kitchen with an island, natural light and white-and-wood style
Full Story
I applaud you for restoring and keeping the original cabinets. We would have done the same thing. I am tried of the design shows I watch where the owners/buyers want a mid-century, craftman,etc. Then proceed to tear down walls, rip out original details to "modernize it. I have to stop watching. Can't handle it. I have a '65 ranch in FL and was thrilled to find terrazzo, some great tile still left in the shower area. We wouldn't dream of ripping out walls, because I don't want to see the kitchen when I walk in the door and this house has good flow anyway. And a water view from nearly every room in the house.
Stunning restoration. You pretty much have to do this kind of work yourself because even if you can find someone prepared to do that meticulous work, chances are you just can't afford to pay for it! Every decision carefully thought through and meticulously executed. Good temporary solution for the island too.
@judybath Your kitchen is an absolute stunner!