


How to Whip Your Baking Center Into Shape
Corral your supplies and ingredients to make baking a sweeter experience
Patricia Lee
October 20, 2023
Houzz Contributor. Patricia Lee is a professional home organizer in the San Francisco Bay Area. She is the co-owner of Tailorly with her business partner Jeanne Taylor. Together they create beautiful homes through decluttering, organizing, and styling. For more information visit www.tailorly.net.
Houzz Contributor. Patricia Lee is a professional home organizer in the San Francisco... More
Do you love baking but find that the thought of getting all the supplies out — and fitting everything back in the cupboards afterward — is enough to send you on a trip to buy your pies and cookies instead? If so, it’s time to organize and pare down your supplies. That way, when your next baking inspiration hits, you’ll know where everything is.

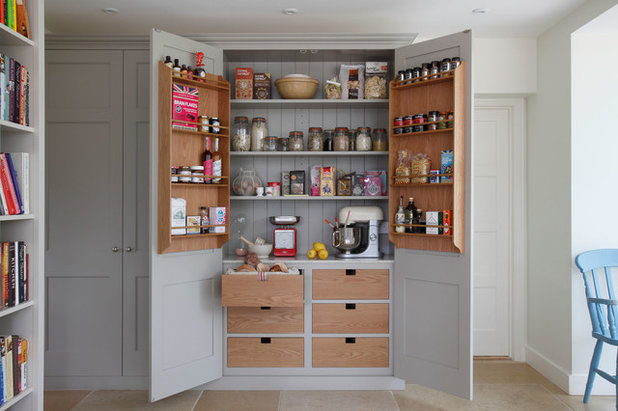
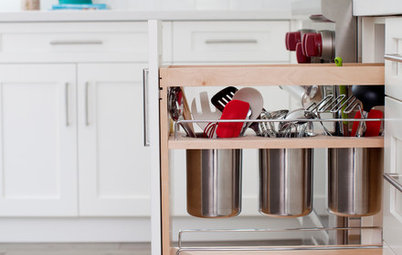
1. Centralize Your Supplies
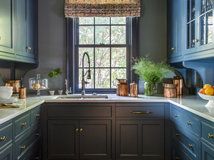
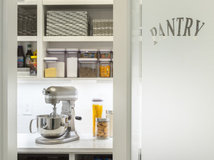
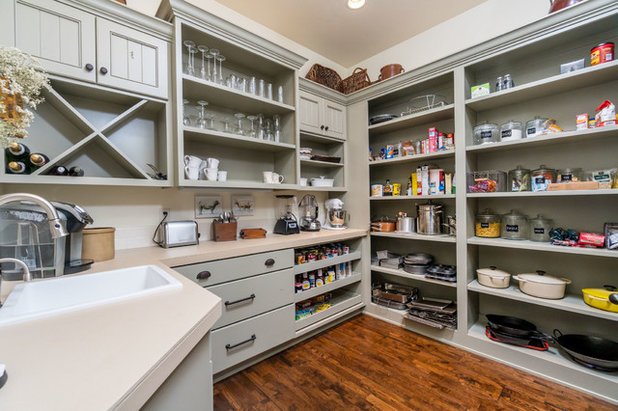
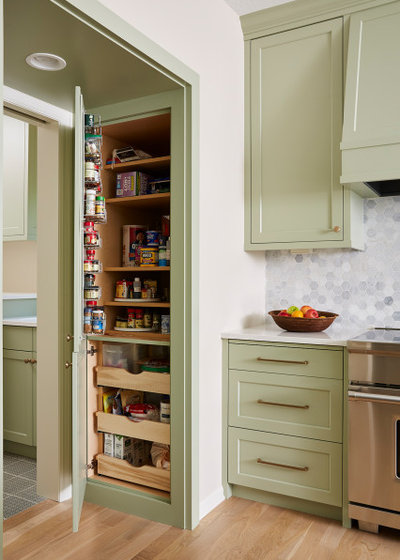
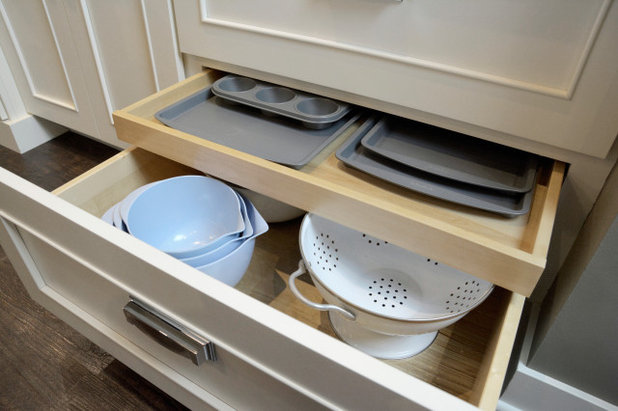
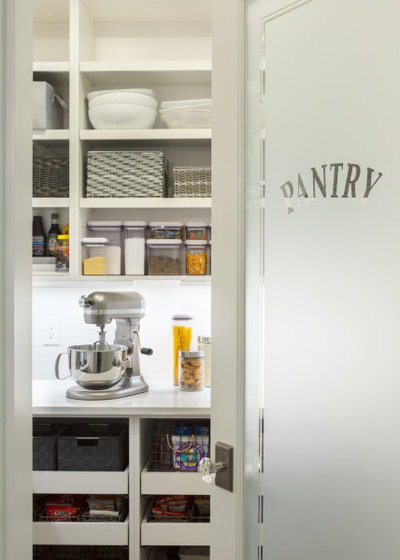
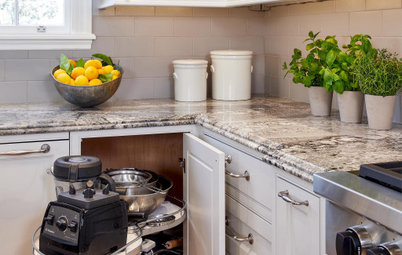
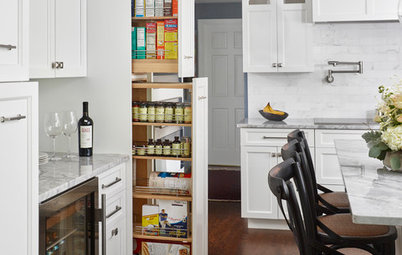
Consider keeping all your baking items together. Many ingredients and tools are unique to baking and can be kept separate from other kitchen items. You’ll want to store your ingredients in a dark, cool spot, so keep that in mind as you determine where to place your baking center. If space allows, a baking cabinet with a pullout shelf is one way to keep your stand mixer off your counter yet close at hand and easy to use.
Find a design-build firm on Houzz
2. Toss Expired, Ineffective Ingredients
It’s easy to overlook expiration dates when there are no visual or olfactory clues of decay. There’s no question when milk has spoiled, but what about flour or baking soda or vanilla or sprinkles?
Currently, no federal regulations are in place for food product dating, except for infant formula. In an attempt to minimize confusion, the Grocery Manufacturers Association and the Food Marketing Institute encourage companies to limit product dating to two categories: “Best if used by” (product may not be as fresh after the date but is still safe to consume) and “Use by” (product may be less safe as it ages beyond the date). It may be comforting to know that most of your food will probably fall into the former category.
Shop for glass food storage containers

But what does that really mean for your everyday life? Personally, I would be embarrassed to bring a cake to a dinner party made with safe but stale ingredients. Therefore, for my own pantry, these categories make sense to me.
Stash It All: Know the 3 Zones of Kitchen Storage
- Ingredient will spoil or lose its effectiveness and should not be kept past its expiration date or long after its “best by” date (milk, nuts, frosting, yeast, butter).
- Ingredient can be kept past expiration date with monitoring. Potency will decrease with time or ingredient may eventually become rancid or stale (baking soda, baking powder, imitation extracts, flour).
- Ingredient can be kept indefinitely with proper storage (sugar, pure vanilla, corn syrup, honey, salt).
Stash It All: Know the 3 Zones of Kitchen Storage
When reviewing your ingredients, also consider which items, realistically, you will not use again. Perhaps you had a unique baking project and are left with supplies that wouldn’t be sufficient for another batch or no longer make sense, such as icing decorations for a baby shower. Let them go, as this will free up valuable space to keep your often-used items organized and easily accessible.
Not sure where to start on your home project? Learn the basics
Not sure where to start on your home project? Learn the basics
3. Sort and Edit Accessories
Next, find a large space to spread out, gather all your baking accessories together and sort them into categories. These categories might include measuring items, mixing bowls, baking trays, baking pans, decorating tools and appliances. Once all the items have been sorted, sift through each category, removing unused items and duplicates. Complete one category before advancing to another.
How to Organize Kitchen Cabinets and Drawers for Good
4. Invest in Airtight Storage Containers
To maximize the freshness of your ingredients, minimize air contact. Investing in airtight containers can save you money in the long run by extending the shelf life of your ingredients.
Choose containers that stack and line up well together, keeping in mind that square or rectangular ones may create more usable space than round ones. Select containers large enough to hold the typical amount of ingredient you purchase, so you don’t always have half a bag of something sitting around.
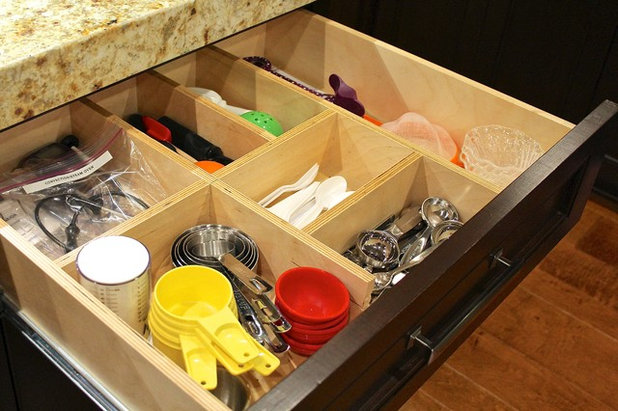
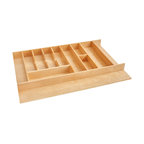
I recommend grouping small and random items — cookie cutters, cupcake liners, bottles of food coloring, small appliance parts — into containers to keep them organized. Clear containers or clearly labeled opaque ones will make organizing and finding items easier. Before you buy, be sure to measure your space to ensure the containers will fit well.
Consider your current lifestyle. If you no longer need to bake five dozen cupcakes for your child’s birthday parties, you might be able to reduce the number of cupcake pans you own or give up your cupcake carrier. If you have a bullet blender, a nut chopper may be redundant. The one supply category I would advocate keeping duplicates of is measuring cups and spoons. If you have a dedicated baking cart, it might be more convenient to keep an extra set with the rest of the baking supplies.
10 Tips for Designing a Kitchen That’s Easy to Keep Organized
5. Reduce Recipe Clutter
I used to have a three-inch binder crammed with recipes. But I only ever used about 12 of them. Most of the others I either tried once and never used again, because they were too complicated or didn’t taste good, or I hadn’t yet got around to them. I found myself turning more to the internet for recipes, so I got rid of the paper copies and began saving my favorite recipes digitally, including scanned versions of my favorites from the binder.
Digital recipes work best for me, but if they don’t for you and you prefer hard-copy recipes, then recycle all your unused recipes and preserve your remaining ones with sheet protectors.

6. Organize Your Supplies
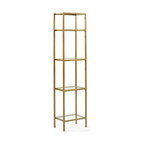
After you’ve pared down your ingredients and supplies, you can organize your space. Keep your most-used items in the front for easy access. If space allows, storing your bakeware vertically, using something similar to a pot lid organizer, will provide you with a clear view and easy retrieval. Otherwise, nest your bakeware. Seasonal items can take a backseat if they’re used only once a year. Organize according to how you use your items so that your baking spot works best for you.
After you’ve pared down your ingredients and supplies, you can organize your space. Keep your most-used items in the front for easy access. If space allows, storing your bakeware vertically, using something similar to a pot lid organizer, will provide you with a clear view and easy retrieval. Otherwise, nest your bakeware. Seasonal items can take a backseat if they’re used only once a year. Organize according to how you use your items so that your baking spot works best for you.
Your turn: Share your tips for organizing a baking center in the Comments.
More on Houzz
Homeowner’s Workbook: How to Remodel Your Kitchen
Look for a kitchen designer near you
Shop for baking tools
More on Houzz
Homeowner’s Workbook: How to Remodel Your Kitchen
Look for a kitchen designer near you
Shop for baking tools


Related Stories
Kitchen Design
Foolproof Storage Solutions for Corner Kitchen Cabinets
By tidgboutique
Consider Lazy Susans, pullouts and more to maximize storage
Full Story

Kitchen Pantries
25 Beautiful Butler’s Pantries
Get design ideas and inspiration from kitchen storage, prep and cleanup spaces that are as practical as they are pretty
Full Story
Kitchen Design
How to Get Your Pullout Waste and Recycling Cabinets Right
By tidgboutique
Personalize your kitchen waste storage with the best bin configuration and pullout system
Full Story
Kitchen Design
Stash It All: Know the 3 Zones of Kitchen Storage
Organize storage space around your kitchen’s main activities for easier cooking and flow
Full Story
Kitchen Design
10 Steps to an Organized and Functional Kitchen
A designer shares her top tips and techniques for creating a stress-free area for cooking, dining and socializing
Full Story
Kitchen Design
10 Tips for Designing a Kitchen That’s Easy to Keep Organized
A professional home organizer shares her favorite design ideas to help keep your kitchen tidy and clutter-free
Full Story
Kitchen Design
12 Custom Storage Solutions for a Clutter-Free Kitchen
A home organizer shares top features to add during a renovation to help keep your kitchen tidy and organized
Full Story
Kitchen Makeovers
Before and After: 4 Kitchen Remodels With Smart Storage Solutions
Pullouts, inserts and careful planning ensure that these newly renovated kitchens pack it all in and stay organized too
Full Story
Working With Pros
Everything You Need to Know About Hiring a Cabinetmaker
By Cheryl F
Pros share advice on when to hire a cabinetmaker and what to know about choosing one
Full Story
@marciagreenpea .It's a funny name, isn't it? I have no idea why it is called that, but there you have it. I used to have a pet axolotl and I can vouch that it would make for a very good kitchen companion.
One of my absolute wants when i built in 2019 was a ”baking center”.i love to bake for family and friends but I hate clutter in the kitchen so out of sight was my goal as well organized
with everything within reach. Most cabinet builders said it would have to be custom. I knew Ihad found the right kitchen designer when she listened and helped me avert the cost associated with a “custom”. We modified base cabinets in terms of depth and stacked them. I opted to purchase pan organizers (bottom) so i could easily adjust the width between the baking sheets/dishes w/ a small shelf over them for smaller baking pans.
The hardest part was finding canisters with handles making it easier to reach without a step stool each time (a bit short I might be).
Like Erika above, my kitchen is small (1960's build) and unable to implement many of these improvements. But, a couple of years ago my son installed some pull out "shelves" that makes it much easier to reach my baking pieces and ingredients. They are more organized and I don't have to reach for the back of deep cabinets to get them.
I cook and bake a LOT, and this small change has made a big difference in the life of this 60+ year old Mom.