


Make a Little Origami Box Out of a Sheet of Paper
We show you how to fold two kinds of open-top boxes to use for treats or gifts

Square Origami Box
1. Start with the printed side of the chiyogami sheet face down. Fold the sheet in half to form a rectangle. Then fold it in half again to form a square. Unfold both folds.
2. With the printed side still face down, and using the creases from step 1 as guidelines, fold each corner toward the center.
3. Fold one side of the square toward the center. Repeat with the opposite side. Then unfold these sides completely to form an elongated hexagon.
4. Fold the other two sides toward the center, as in step 3; you now have a skinnier hexagon.
5. Lift these two sides so that they are perpendicular to the rest of the sheet; they form two walls of your box. While keeping these walls upright, bring each of the remaining two sides up, collapsing the ends of the existing walls inward. Use the creases from step 3 as guidelines.
6. Fold the points down inside the box to form the remaining walls and floor sections. Square the walls, and your box is complete.
Trapezoidal Origami Box
1. Start with the printed side of the chiyogami sheet face up. Fold the sheet in half on the diagonal to form a triangle. Then fold it in half again to form another triangle. Fold it in half a third time and undo the fold to make a crease that will help you with step 2.
2. The triangle has two flaps on one side. Insert a finger under the first layer of paper and bring the top flap up. Flatten the top flap to form a square along the creases from step 1 (the bottom flap of the triangle will stick out alongside the square). Flip the sheet over and repeat with the other flap to form a square. (This “square base” is a common building block of origami.)
3. Turn the square so that it looks like a diamond, with the loose layers pointing toward you. Grab the top layer of paper and bring the corner to the top of the diamond. Flip the sheet over and repeat on the other side. Now the printed side of the paper is facing outward, and the diamond has two flaps on each side and a gap that runs from the bottom corner to a center line that’s perpendicular to the gap. Grab the top flap on the right side and fold it to the left side. Flip the sheet over and repeat on the other side. Now the printed side of the paper is facing inward, the gap is hidden, and the diamond has two flaps on each side and a crease down the center.
4. Turn the diamond 90 degrees counterclockwise so that it has two flaps at the top and bottom and the center crease is horizontal. Fold the upper right side of the diamond down so that it lines up with the center crease. Then fold the bottom right side of the diamond up so that it lines up with the center crease. Flip the sheet over and repeat on the other side to form a kite shape with two flaps on each side.
5. Grab the top flap on the right side of the kite and fold it to the left side along the center crease. Flip the sheet over and repeat on the other side. The kite now consists of a pentagonal body with two tails coming out of its bottom.
6. Grab the top layer of paper at the top of the kite body and fold it down toward the tails.
7. Then fold that same corner back up to the line running horizontally across the kite body.
8 and 9. Tuck that corner neatly inside the pocket that is formed by the other four corners of the pentagon. Flip the sheet over and repeat on the other side.
10. Grab the top flap on the right side of the kite and fold it to the left side to cover the gap between the tails. Flip the sheet over and repeat on the other side so that the kite once again has two flaps on each side.
11. Bring the top layer of the tail up to meet the top of the body.
12 and 13. Fold the top of the triangle you just made inward, tucking it neatly inside the pocket that is formed by the other four corners of the pentagon. Flip the sheet over and repeat on the other side.
14. You now have a neat pentagon consisting of a triangle on top and an inverted trapezoid on the bottom. The plain triangle will become the floor of the box, and the printed trapezoid will become the walls.
15 and 16. Gently pull the walls apart while pushing the floor toward the inside of the box.
17. Straighten the bottom, adjust the walls, and your box is complete.
15 and 16. Gently pull the walls apart while pushing the floor toward the inside of the box.
17. Straighten the bottom, adjust the walls, and your box is complete.
How to Use the Boxes
You can put the boxes on a plate to hold a variety of treats, such as the roasted soy beans that are traditionally thrown to bring luck during Setsubun celebrations in February.
You can put the boxes on a plate to hold a variety of treats, such as the roasted soy beans that are traditionally thrown to bring luck during Setsubun celebrations in February.
Celebrated on March 3, Hinamatsuri (Girls’ Day) is when girls in Japan gather to enjoy a meal together — a perfect chance for these boxes to shine. Or consider putting little dolls or cookies in them for a child’s birthday party.
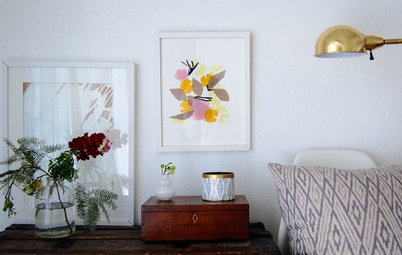
The boxes also are attractive grouped together as a display. For a charming summer look, you can fill them with fresh or dried flowers.
More
9 Decorating Projects for Lazy Summer Days
Get other ideas for craft projects
More
9 Decorating Projects for Lazy Summer Days
Get other ideas for craft projects


We’ll give instructions for two kinds of open-top boxes: a basic one with square corners, and a more advanced trapezoidal one that narrows toward the top. Each is made with a standard 6-by-6-inch sheet of paper. Traditional chiyogami tends to be in bright colors like red, blue and gold, but here we use delicate pastel tones. You can find chiyogami at paper stores or online.