


Designer Tips for Range Hoods, Appliances and Lighting
Learn how to get your microwave height just right, what kind of bar stool will be most comfortable and more
Barbra Bright
June 27, 2021
Houzz Contributor. San Francisco-based designer.
http://www.barbrabrightdesign.com/
Houzz Contributor. San Francisco-based designer.
... More
As a kitchen designer, I have developed many secrets for creating a successful kitchen remodel. Read on for some of my tips for getting the details of your kitchen — the hood, appliances and lighting — just right. Which one would you try in your home?
Before we get started on the details, I have one overall bit of advice: select finishes that you love, regardless of what is trending. Recently, I bumped into an old client and asked if she still loved her chartreuse kitchen seven years later. She does, and chartreuse is still her favorite color. Remember that trends come and go, and select the finishes that make you happy. Now on to design tips for your kitchen remodel.
Range Hood Strategies
1. Use door restrictors. Due to the projection of the hood, the doors on any directly adjacent wall cabinets will hit the hood when opened. To avoid dinging your beautiful cabinet doors, you have two options. You can add a restrictor to the door closest to the hood, keeping the door from opening past 90 degrees. Or you can use a door that opens away from the hood.

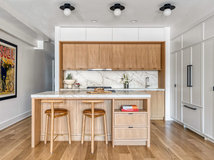
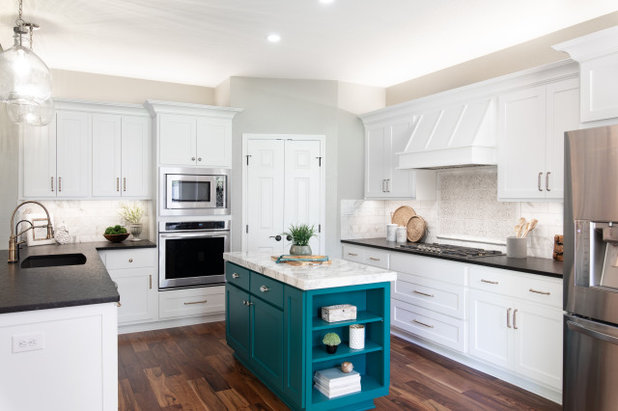
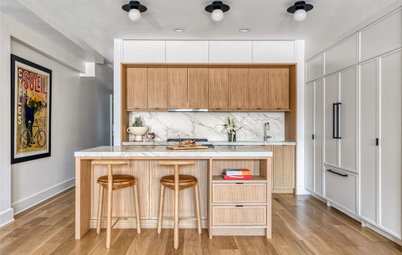
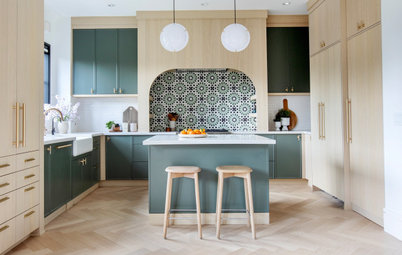
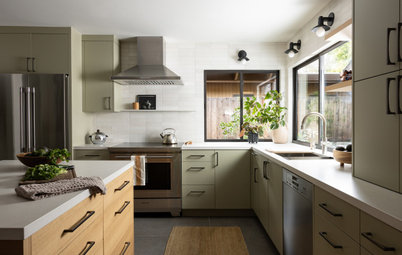
2. Consider a ceiling hood. In the past, if you had a cooktop in your island, your only choice for venting, other than a downdraft, was a hood placed over the island. It then became a focal point, often obscuring sightlines. These days, I specify ceiling hoods to alleviate this issue.
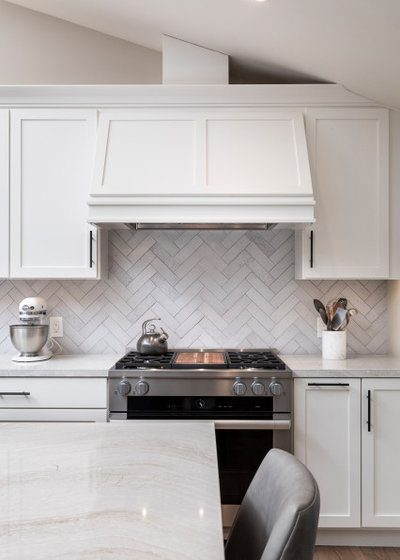
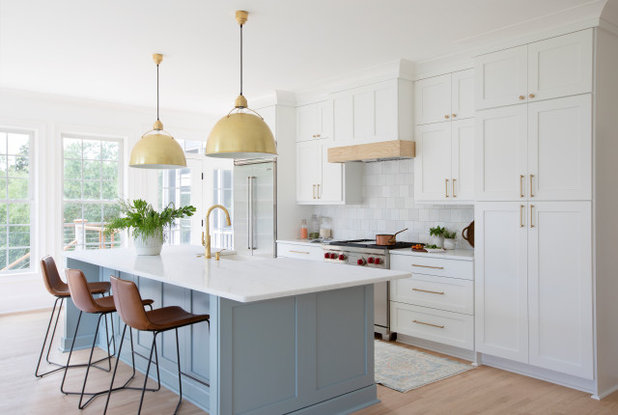
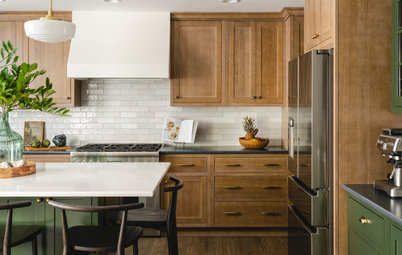
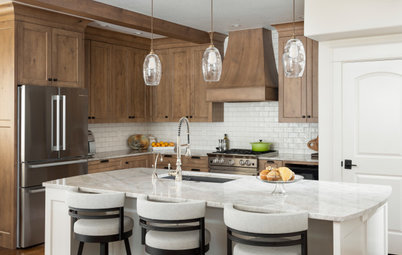
3. Get a larger hood. Consider an oversize hood, as shown in this photo. A larger hood accomplishes two things. First, it becomes an umbrella that can capture more grease and odor than one sized exactly to your range or cooktop. Second, it increases the distance between the cabinets next to it, visually creating more openness.
Browse range hoods
Browse range hoods
Appliance Placement
Anyone can design a beautiful kitchen, but it should also function well. Pay attention to placement of your appliances.
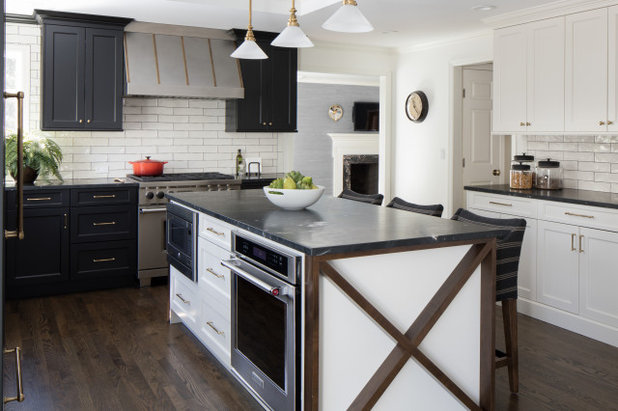
4. Get your microwave height right. Microwaves are often placed too high, and warming drawers too low. A maximum of 48 inches above the floor is an ideal height for a microwave for most people — unless you’re LeBron James!
Homeowner’s Workbook: How to Remodel Your Kitchen
Anyone can design a beautiful kitchen, but it should also function well. Pay attention to placement of your appliances.
4. Get your microwave height right. Microwaves are often placed too high, and warming drawers too low. A maximum of 48 inches above the floor is an ideal height for a microwave for most people — unless you’re LeBron James!
Homeowner’s Workbook: How to Remodel Your Kitchen
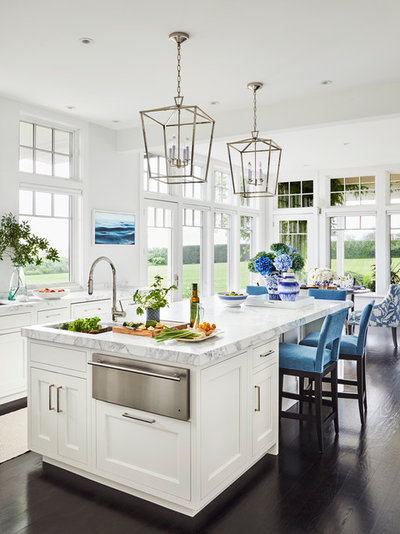
5. Move the warming drawer up. There was a time when the warming drawer was routinely located beneath the double oven stack. In many ways this made functional sense, since it was near the ovens. But over time, many people ceased to use them since they were so low, making accessibility a challenge. These days it’s all about function. Place your warming drawer at counter level and close to your cooking appliance.
11 Must-Haves in a Designer’s Dream Kitchen
11 Must-Haves in a Designer’s Dream Kitchen
Lighting Solutions
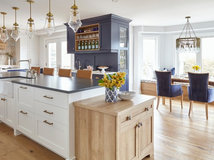
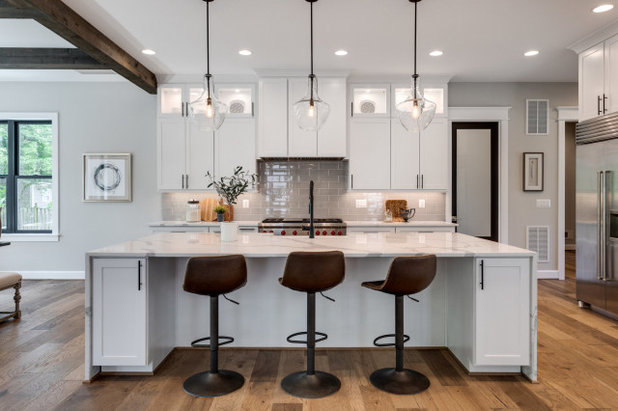
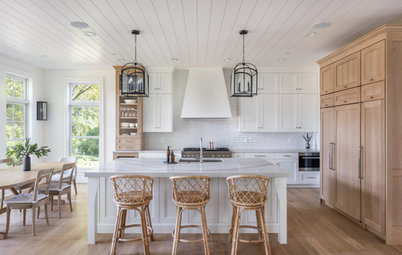
6. Uplighting. Not all cabinetry goes to the ceiling. In the past, it was common to add a soffit to close the gap. But not everyone likes the look of a soffit. Uplighting creates a source of ambient lighting when the space above the cabinetry is left open. One caveat: The light reflects best off the ceiling when there’s a minimum space of 12 inches; otherwise it will create a halo effect above the cabinets.
6. Uplighting. Not all cabinetry goes to the ceiling. In the past, it was common to add a soffit to close the gap. But not everyone likes the look of a soffit. Uplighting creates a source of ambient lighting when the space above the cabinetry is left open. One caveat: The light reflects best off the ceiling when there’s a minimum space of 12 inches; otherwise it will create a halo effect above the cabinets.
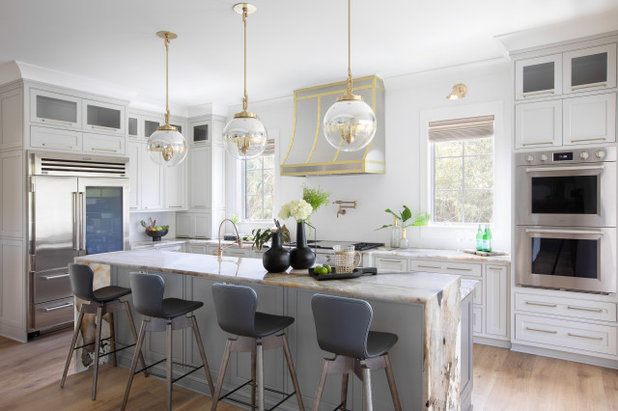
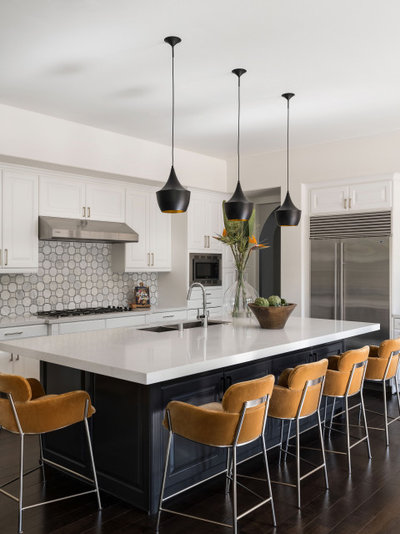
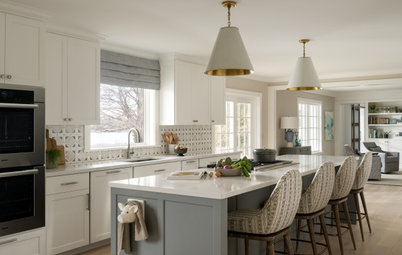
7. Pendant height. I wish I could tell you the ideal height for island pendants, but it doesn’t exist. Consider many factors, from the pendant itself to the sightline height of the kitchen’s users. In general, pendants should be 30 to 40 inches above the island countertop. Why measure from the top of the island’s counter instead of from the ceiling? Because ceiling heights differ.
How to Get Your Pendant Lighting Right
How to Get Your Pendant Lighting Right
Extra Details That Count
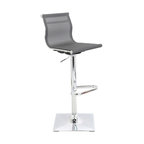
8. Bar stools. There are many bar stool styles to choose from, but if you plan on eating meals at the island, consider a stool with a back. The back support will let you enjoy sitting there longer. A bonus would be if the stool swivels.
8. Bar stools. There are many bar stool styles to choose from, but if you plan on eating meals at the island, consider a stool with a back. The back support will let you enjoy sitting there longer. A bonus would be if the stool swivels.
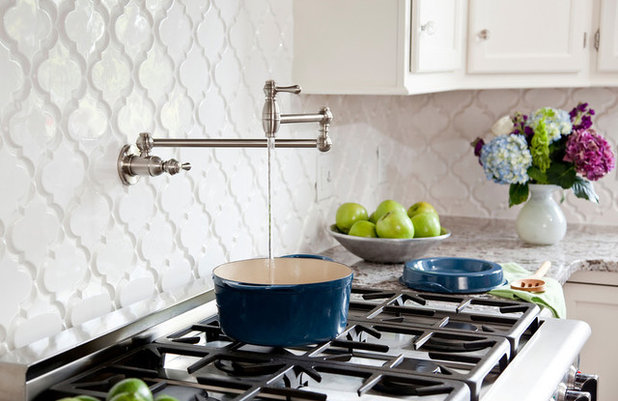
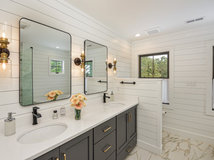
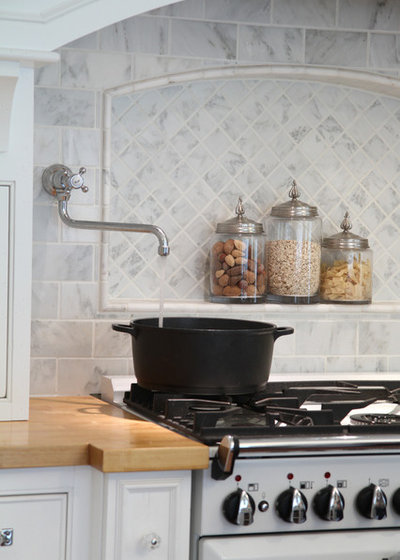
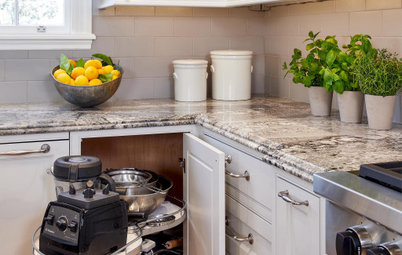
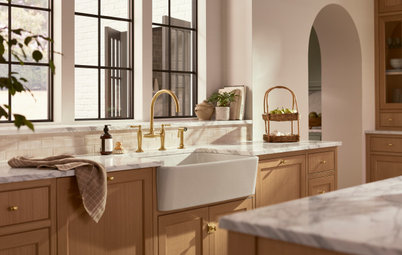
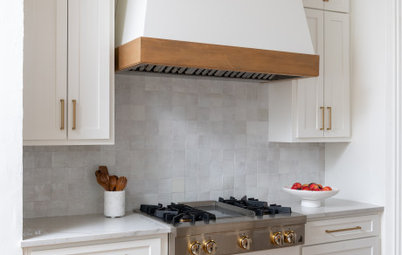
Pot filler with a spout taller than the water source
8. Pot fillers. My old pot filler rule was this: If I put it in, you must promise to use it. But at what height should it be placed? I recommend measuring your tallest pot and then adding an inch or two. And before your contractor plumbs the waterline, be sure to have the pot filler on-site.
8. Pot fillers. My old pot filler rule was this: If I put it in, you must promise to use it. But at what height should it be placed? I recommend measuring your tallest pot and then adding an inch or two. And before your contractor plumbs the waterline, be sure to have the pot filler on-site.
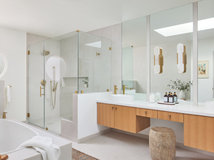
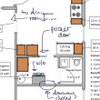
Pot filler with a downspout
Pot fillers come in different configurations. Some have a spout that is taller than the water source, while others have a downspout and require the waterline to be placed higher.
Pot fillers come in different configurations. Some have a spout that is taller than the water source, while others have a downspout and require the waterline to be placed higher.


We care about your home remodeling project needs as much as you do. We believe in conducting business with... Read More
What are you working on?
Related Products

Related Stories
New This Week
4 New Kitchens With Wonderful Wood Cabinets
Pros share how they used various wood species, styles, stains and details to create warm and welcoming kitchens
Full Story
Kitchen Backsplashes
30 Bold and Beautiful Range Backsplashes
Get ideas for eye-catching tile and stone backsplashes inside stove alcoves and behind cooktops
Full Story
Kitchen Design
7 Essential Features of a Well-Designed Kitchen
Make sure your new kitchen not only looks good but also functions beautifully
Full Story
Kitchen Workbook
How to Map Out Your Kitchen Remodel’s Scope of Work
Help prevent budget overruns by determining the extent of your project, and find pros to help you get the job done
Full Story
Kitchen Storage
Foolproof Storage Solutions for Corner Kitchen Cabinets
By tidgboutique
Consider Lazy Susans, pullouts and more to maximize storage
Full Story
Trending Now
The 10 Most Popular Kitchens So Far in 2024
Get inspired by the warm neutral palettes, ample storage and inviting islands in these most-saved new photos on Houzz
Full Story
Houzz TV
5 Trends for Kitchen and Bath Products in 2024
See fascinating new features for showers, tubs, faucets and more launched at the 2024 Kitchen and Bath Industry Show
Full Story
Kitchen Backsplashes
Where to Start and Stop Your Backsplash
By tidgboutique
Consider these designer tricks to work around cabinets, windows and other features for a finished look in your kitchen
Full Story
Kitchen Workbook
How to Find Your Kitchen Style
If you’re planning to remodel your kitchen, here’s how to find inspiration and start narrowing down your choices
Full Story
Kitchen Design
15 Stylish Kitchen Range Hood Ideas
Get ideas for hood shapes, sizes and looks that can elevate a kitchen’s design while ridding it of bad air and odors
Full Story
Wondering how it’s possible to clean a ceiling rangehood? It would require a ladder.... I fill my pots and i can top them up as needed while cooking with a jug. Jugs live on our kitchen bench and never get put away as we are always filling dog water bowls, watering indoor plants and filling and topping up pots on the stove. They are very easy to use and there are so many beautiful ones around.
We have a downdraft instead of the range hood and it’s great. Smell gets sucked down and doesn’t steam up first. It takes a second to remove the filter and pop it into the dishwasher. Also love the warming drawer. It squared off the gap between large and compact oven and has so many uses other than warming plates. It’s so handy to keep food warm for late comers and also when cooking lots of different things, even proofing dough or slow cooking on very low temperature works. Having the ovens at bench hight is the best idea. So much easier to put the dishes in and out of the oven without bending or stretching. No to the pot filler but a tap with a veggie spray is a must for me.
On the hood: try to avoid constrictions and get large diameter ‘tubing’. The shorter and fatter the air passage to outside the quieter the extractor since the fan doesn’t need to work as hard.