


Remodeling Guides
Ranch House Remodel: Installing the Interior Finishes
Renovation Diary, Part 5: Check in on a Florida remodel as the bamboo flooring is laid, the bathroom tiles are set and more

Follow the progress of Mike and Leann Rowe of Lutz, Florida, as they renovate a 1970s-era ranch house in St. Pete Beach, Florida. We've shown how they found the right house, assembled their project team, gathered inspiration, established a budget, drew the plans, started construction and began to reshape the interior. The author is the project architect.
In the last installment of our Florida ranch house renovation diary, the interior construction was well under way. We were relocating walls, installing new electrical devices, relocating plumbing lines for the new fixture locations and more. In a sense we were getting the skeletal and muscular systems roughed in and ready for the new finishes.
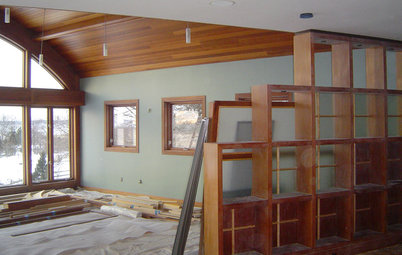
Once the walls were up and the systems roughed in, we installed all-new drywall throughout. Once the drywall was up and primed, we started on all those really nice finishes that we've spent the last several months selecting. Here's what the project looks like now.
In the last installment of our Florida ranch house renovation diary, the interior construction was well under way. We were relocating walls, installing new electrical devices, relocating plumbing lines for the new fixture locations and more. In a sense we were getting the skeletal and muscular systems roughed in and ready for the new finishes.
Once the walls were up and the systems roughed in, we installed all-new drywall throughout. Once the drywall was up and primed, we started on all those really nice finishes that we've spent the last several months selecting. Here's what the project looks like now.
We've started installing the new wood floor now that the walls and ceilings all primed. The flooring is a dark stained bamboo that will provide a nice base to the interiors.
Flooring like this should always be left to acclimatize before installation. For several days beforehand, we controlled the humidity in the house to make sure that the flooring won't expand, contract or otherwise change its dimensions excessively after installation. We've also used a urethane floor sealer that will hold down any moisture from the concrete slab.
Flooring like this should always be left to acclimatize before installation. For several days beforehand, we controlled the humidity in the house to make sure that the flooring won't expand, contract or otherwise change its dimensions excessively after installation. We've also used a urethane floor sealer that will hold down any moisture from the concrete slab.
While a team works on installing the hardwood floor, two teams are installing the tile finishes. The tile setters have laid out a section of the master bath shower wall to make sure they understand how everything will fit together and where, if needed, tile cuts will occur.
Mocks like these are especially useful when doing a remodel. Nothing beats verifying things in the field ...
Mocks like these are especially useful when doing a remodel. Nothing beats verifying things in the field ...
... even when a drawing is done that shows the detailed tile layout. The old adage "measure twice and cut once" is the best way to save time and money for all concerned.
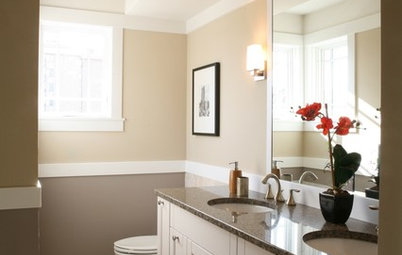
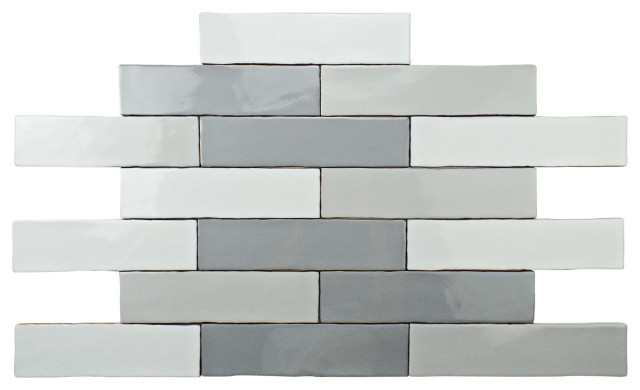
The guest bathroom tiling is just about all done. So far we're really pleased with our use of small blue-green and gray pebbles for the shower floor and one wall. These tiles will help add to that beach house character that Mike and Leann very much want.
We've also worked with the tile setters, Artisan Tile of St. Petersburg, to select the grout color for the bathrooms and the kitchen backsplash. While the grout color can be selected earlier, doing so just about when the tile is getting started is always nice, as you get to see the tile in place and with the kind of light it will exist in.
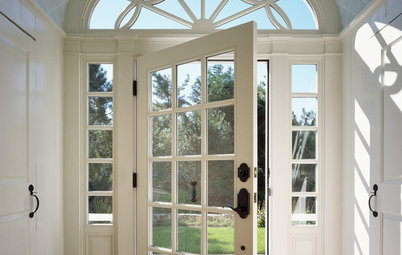
One of the last remaining pieces of work at the exterior is the front door. We didn't want to install this too early, as we didn't want to risk damage. Now that we are close to finishing, we've gotten the new door (by Therma-Tru) in place and ready to be painted.
The previous front door was solid wood, but we chose a door with a lot of glass and sidelights, with a rain-glass pattern for privacy. A lot of light comes through, but no one will be able to peer in uninvited.
The previous front door was solid wood, but we chose a door with a lot of glass and sidelights, with a rain-glass pattern for privacy. A lot of light comes through, but no one will be able to peer in uninvited.
For the front door color, we'll be selecting something from the orange family. This came about when Leann saw the Houzz ideabook When to Paint Your Door Orange. We're looking forward to testing some sample oranges on the door next week.
Next: The final result | Follow this remodel from the beginning
Next: The final result | Follow this remodel from the beginning


The angled orange boards on the floor are the template for the kitchen island. This template was built early on so that Mike and Leann could verify the exact location they wanted for the island.