


Refresh Your Home for Spring With These DIY Projects
Have fun bringing new energy into your home with a little elbow grease and craftiness

If you’d like to refresh your home for spring, but deep cleaning isn’t your idea of a good weekend, you may have more fun delving into some DIY decor. The people of Houzz have shared many creative projects over the years, often with step-by-step instructions. Read on and get inspired, then choose one or more of these nine DIY projects to give your home a mini makeover this spring.
Try the below mix for a spring-fresh scent. (You can find many other recipes online.) For an 8-ounce spray bottle, use 1½ ounces of vodka or witch hazel. You may want to mix your spray in a bowl to test out the scents before you put them in a spray bottle.
Everyday Lemon + Lavender Spray
Everyday Lemon + Lavender Spray
- 25 drops of lavender essential oil
- 15 drops of lemon essential oil
2. Tighten up old couch cushions with tufting. Over the years, loose cushions can lose their shape and start to look shabby. The mid-1970s sofa in this photo belongs to Houzz contributor Shelly Leer, who turned to tufting to give it a cleaner shape.
Tufting keeps the filling evenly distributed and helps cushions look more modern. It can also squeeze more good years out of an old piece of furniture. This photo shows the sofa after Leer tufted it.
The secret to getting this look is using two long tufting needles threaded with tufting twine (or any twine that will slide through your sofa cushions). You’ll also need to determine the spacing you want for your tufts. It’s helpful to cut out a paper template for this spacing so that it will be the same for all the cushions you tuft.
Read more about tufting saggy couch cushions
Read more about tufting saggy couch cushions
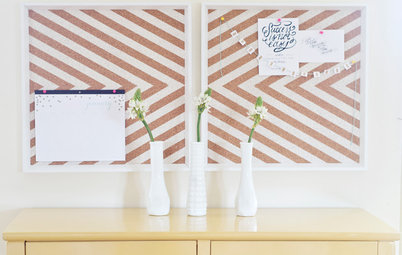
3. Create a new piece of floral art. New art can bring a new look to your home, and it’s even more satisfying when you can display a piece you make yourself. Here’s a recipe for tissue paper art you can make — the example below is a floral design, but you could also go more abstract.
Supplies
Supplies
- Pencil
- Tissue paper
- Scissors
- Paper
- Mod Podge
- Frame (optional)
The steps are simple enough: Just create and cut out designs on your tissue paper, play with your composition on a white piece of paper and, once you’re happy with the design, apply a thin layer of Mod Podge decoupage glue to secure the pieces. Pictured here is a piece of art made this way, then framed. Let your inner artist out and give it a try!
Read more about art you can make for your home
Read more about art you can make for your home
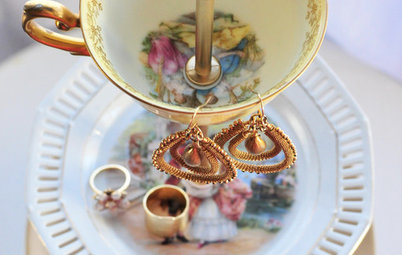
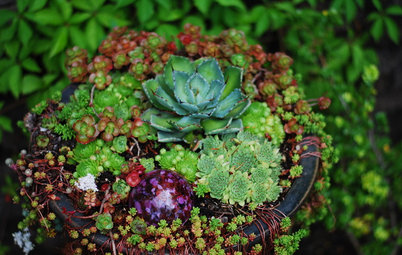
4. Turn old teacups into flower pots. Mismatched cups and saucers that you no longer want to use for your morning hot beverage can get new life as tiny flower pots. If you don’t have any on hand, you can often find other people’s castoffs at thrift or consignment stores.
This DIY is pretty straightforward: You basically just need to drill a drainage hole in your cup. You’ll want to use a 6-millimeter, tungsten-tip diamond drill bit, says Houzz contributor Cate Holst. Affixing a piece of masking tape to the bottom of the cup, as shown in this photo, can help prevent the drill bit from slipping.
This DIY is pretty straightforward: You basically just need to drill a drainage hole in your cup. You’ll want to use a 6-millimeter, tungsten-tip diamond drill bit, says Houzz contributor Cate Holst. Affixing a piece of masking tape to the bottom of the cup, as shown in this photo, can help prevent the drill bit from slipping.
Once you’ve drilled the hole, you simply fill the cup with potting soil and plants, as you would with any other flower pot. The saucer can serve as a handy tray for catching any runoff when you water your little plant.
Read more about turning cups into flower pots
Read more about turning cups into flower pots
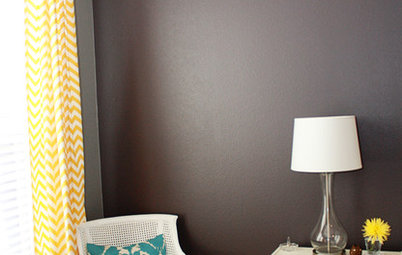
5. Paint a mural on the wall. The mural shown here is the creative work of designer Rebecca Zajac of Rebecca Interiors and Design by Numbers. Zajac painted this mountain scene in her infant son’s nursery; inspiration struck her when she and her husband took a before-baby trip to Alaska and saw Denali, the highest mountain peak in North America.
Zajac chose four colors from a single paint swatch to create the ombré mountains. From darkest to lightest, the paint colors are Smokey Blue 540F-5, Shale Gray 540F-4, Blue Box 540E-3 and Cloudy Day 540E-02. The second row of mountains down from the ceiling is Benjamin Moore’s Nimbus 1465; the uppermost band is Benjamin Moore’s Swiss Coffee OC-45. Zajac painted the mural freehand.
See how this mural was created
Ken Pelletier and Martiza Gualy made a playspace for their two children in the garage of their Southern California home, and used a black permanent marker to create this accent wall. Their inspiration was the Frames wallpaper by Graham & Brown.
See more cool hand-painted walls
See more cool hand-painted walls
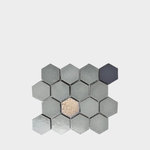
6. Make a concrete tray and ring holder. Concrete may not be a material you’ve worked with before, but it’s surprisingly easy to use. Stockholm-based DIY expert Lovisa Häger created the recipe below for crafting your own concrete tray and ring holder.
Supplies
Supplies
- DIY cone molds (sturdy paper, cardboard, box bottom, milk cartons)
- Masking tape
- Craft concrete mix (available online and at hobby supply shops)
- Beverage glasses
- Spoon, putty knife, craft stick or other smoothing tool
- Coarse and fine sandpaper
For the cone-shaped ring holder, use a strong piece of paper or some flexible cardboard to form a cone shape. You know you have the right size when your rings, watches or bracelets fit over the cone and come to a rest about midway down. It helps to reinforce your cone with masking tape. For a tray, the bottom of a box and two paper milk cartons taped together can make a great mold.
Then you simply mix up your concrete — 1¼ cups of concrete powder with two-fifths cup of water — and pour it into the molds. For stability, you can rest the cone upside down inside a glass. You’ll want to pour the concrete within a quarter inch of the end of the mold. For the tray, you’ll want to fill the bottom of your box with a layer about half an inch thick. Then press the milk cartons into the mold to make the indentation of the tray. Let the concrete dry for a couple of days before removing the mold. Sand down any rough edges with sandpaper.
Read more about making DIY concrete storage
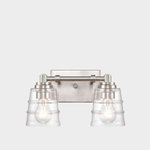
7. Turn a vase into a lamp. The first step in turning a vase into a lamp is, of course, finding the right vase. You could certainly use a clear or colored glass one, but Houzz contributor Mike Dietrich chose to use an antique ceramic Chinese vase he’d had on hand for years. Pictured are many of the other supplies he used, and that you will need, for this project: a cap, a neck, a socket, a harp, a base, a length of threaded pipe, three washers, four nuts that fit the threaded pipe, and an electrical cord with a plug at one end. You’ll also need a hacksaw and a screwdriver.
The next step is taking your chosen vase to a lamp store to get a hole drilled in the bottom — without that, you won’t be able to thread the electrical cord into the vessel. There’s a possibility that the lamp could break during this process, but Dietrich says it has never happened to him.
After that you’ll secure the lamp to the base, thread the electrical cord through the soon-to-be-lamp, and finish it off. The finished product can look something like the pictured one here, which is Dietrich’s completed project. For more specific instructions, read our guide below.
Read step-by-step instructions for turning a vase into a lamp
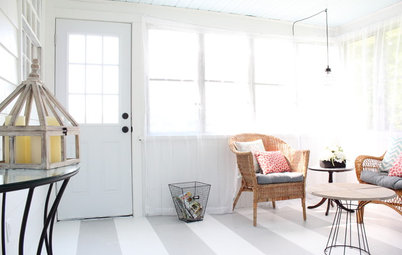
8. Paint an Ikea chest spring-y fresh. The owner of this home in San Francisco upcycled basic wood furniture from Ikea using rose pink, deep peach, white and blues (see both photos). Adding a mishmash of brass, ceramic and glass pulls helps them feel extra special.
Read more about this home
Read more about this home
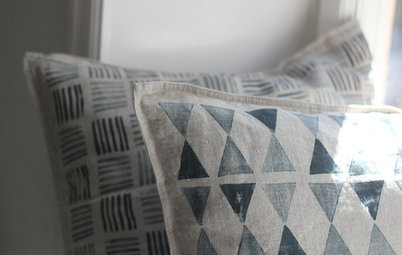
9. Create potato-printed fabric. Häger, the Stockholm DIY expert, also gave us this great recipe for creating your own designs on fabric. To make the potato stamp, cut the potato in half and use a small, sharp knife to carve your desired shape. Be careful with the knife, of course. Dip your cut potato in the paint and stamp away. You can control the intensity of the ink application; it can be nice to let the prints get faded so that there is some organic variation to them.
Supplies
Supplies
- Potatoes
- Craft knife or sharp paring knife
- Textile paint (Häger uses Palett textile paint)
- Plate or other shallow container
- Scrap fabric for testing and pressing
- Paintbrush (optional)
- Newspaper or other padding (optional)
- Natural fabrics such as linen and cotton, or bed and kitchen linens such as pillow shams and dish towels
- Iron
Here is what Häger did with her own potato-printed fabric. If you have some sewing skills, you could also use your designs to make a table runner, placemats, even curtains. If sewing isn’t your style, you could potato-stamp plain cloth napkins that already have finished edges. You could even use potatoes to create a fun, graphic piece of original art on paper.
Read more about making your own potato-printed fabric
More
Ideas for Refreshing Your Kitchen Without Remodeling
8 Ways to Make Your Living Room More Luxe
Read more about making your own potato-printed fabric
More
Ideas for Refreshing Your Kitchen Without Remodeling
8 Ways to Make Your Living Room More Luxe


Supplies