


Houzz TV: How to Stencil a Wall
Use paint and a stencil to add a pattern to any room in your home
Brenna Malmberg
March 28, 2017
In this episode of Houzz TV, watch as decorative artist and paint expert Shauna Gallagher demonstrates how to transform a wall with the help of a stencil.
Watch: How to Stencil a Wall
One of the best things about stenciling your walls is that you can do it yourself, picking any pattern and color you like.
One of the best things about stenciling your walls is that you can do it yourself, picking any pattern and color you like.
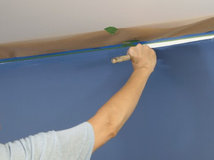
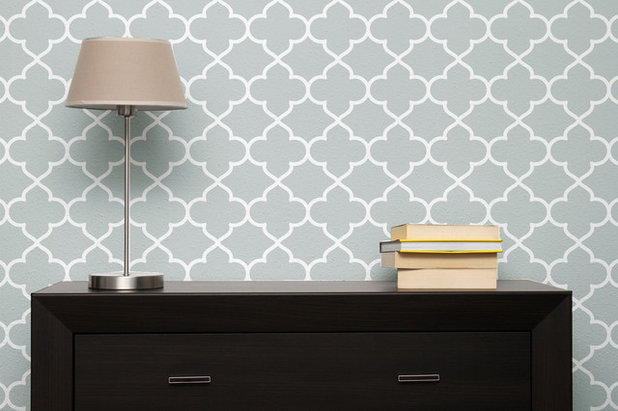
1. Pick a stencil. You can use any stencil on the wall, but the simpler it is, the easier it will be to use, especially if you are just learning, Gallagher says. She chose a Casablanca Trellis Moroccan stencil to demonstrate the steps on a sample board.
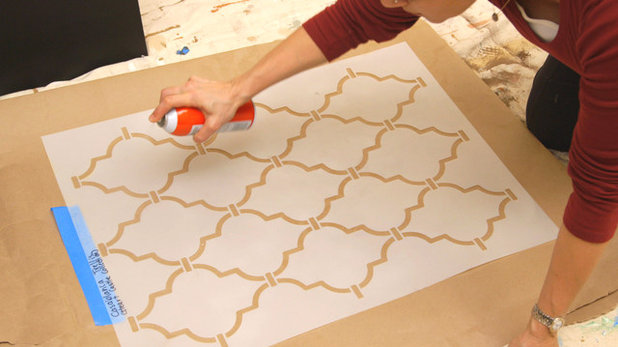
2. Add adhesive. Spray a coat of adhesive on one side of your stencil. Be sure to use an adhesive that is labeled as repositionable, not a permanent photo-mounting product.
3. Apply stencil to wall. Stick the stencil to the wall and then flatten it out with a piece of cloth, such as cheesecloth or an old T-shirt. Avoid using a cloth that could snag on the stencil and pull it up. This also keeps any extra adhesive off your hands while you are working. As you go along, you may need to add more adhesive to the stencil.
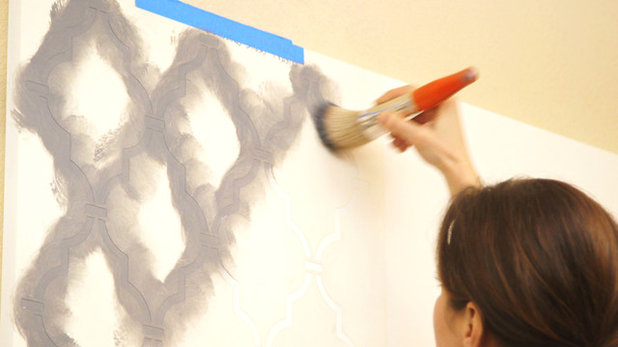
4. Brush on paint. Use a stencil brush to apply your paint. Gallagher’s brush is about 2 inches in diameter.
Dab on your paint until you cover the entire area. Don’t overload your brush; otherwise, the paint will get goopy and seep underneath the stencil.
Dab on your paint until you cover the entire area. Don’t overload your brush; otherwise, the paint will get goopy and seep underneath the stencil.
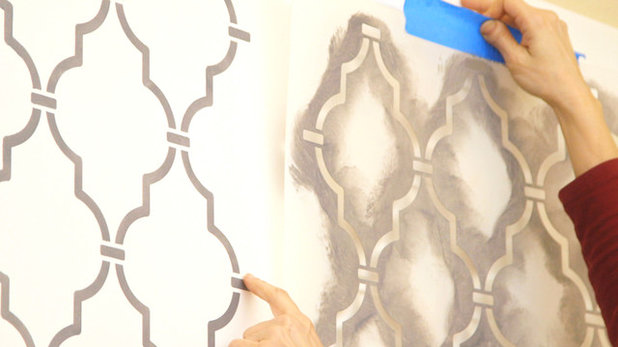
5. Repeat the design. Move the stencil so that you can continue the pattern. To ensure that your pattern continues seamlessly, match up registration points, or elements in the design that match up. On this stencil, Gallagher uses the small horizontal bars as a guide. Once things are lined up, press the stencil against the wall and continue painting.
Tip: If you have thicker paint, you may need to wait for it to dry before painting the next section.
Tip: If you have thicker paint, you may need to wait for it to dry before painting the next section.
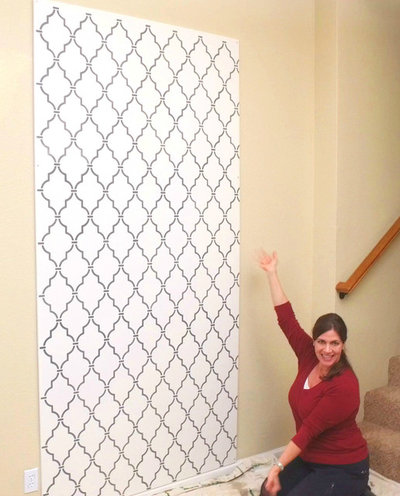
6. Continue stenciling. Keep painting and moving the stencil until you cover your wall.
The edges and corners of walls can be tricky spots. Gallagher recommends taping off any adjacent walls that you don’t want to get paint on and applying tape to the stencil to hold it in place.
Another trick is to buy two stencils. This allows you to cut the second stencil to the size you need to finish up any place where a whole stencil doesn’t fit.

If you are looking for a place to add a stencil in your home, Gallagher recommends a wall of the bedroom, but the stencils also lend themselves to a dining room or a bathroom — they can go virtually anywhere.
Watch: How to Stencil a Wall | Find Stencil Patterns on Houzz
More Houzz TV
How to Paint a Wall Like a Pro
How to Paint a Wall Faster
How to Paint Perfect Wall Stripes
Watch: How to Stencil a Wall | Find Stencil Patterns on Houzz
More Houzz TV
How to Paint a Wall Like a Pro
How to Paint a Wall Faster
How to Paint Perfect Wall Stripes


High Point Cabinets is a custom cabinet builder located between Apple Creek, Fredericksburg and Mt. Hope, Ohio,... Read More
Related Products

Related Stories
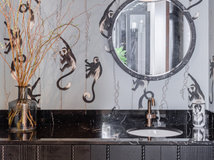
Powder Rooms
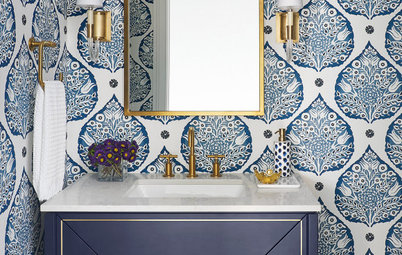
30 Powder Rooms With Wonderful Wallpaper
Wall coverings fill these rooms with color, pattern and pizzazz
Full Story
Events
What’s New in Tile for 2023
By Julie Sheer
Five trends in new tile collections were spotted at the recent International Surface Event 2023 trade show in Las Vegas
Full Story
Decorating Guides
10 Places to Use Paint or Wallpaper to Create a Fun Design Moment
By tidgboutique
Add a bright pop of color and pattern to these areas to bring a sense of whimsy and cheer
Full Story
Decorating Guides
40 Inspiring Wallpaper Ideas
See ways to add personality and visual texture to any room with this collection of wonderful wallcoverings
Full Story
Organizing
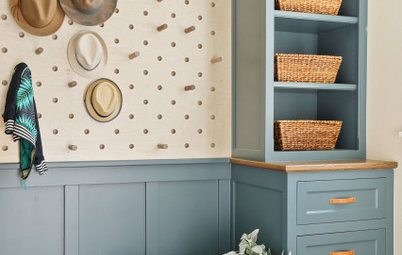
Pegboard Gets a Stylish Upgrade
See 25 modern takes on the classic organizational system that add style and function throughout the home
Full Story
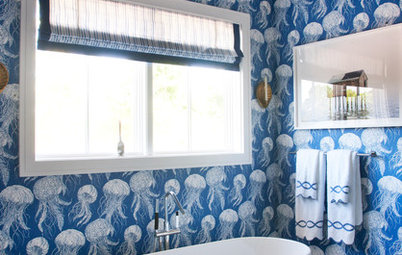
Photo Flip
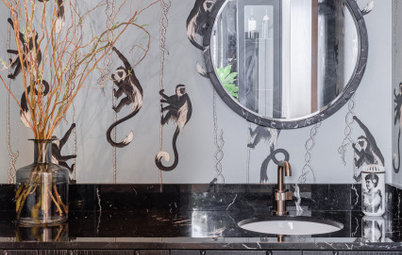
25 Fanciful Rooms Featuring Animal-Motif Wallpapers
Wallpapers covered in critters from land, sea and sky bring out the wild side of every room in the house
Full Story
Powder Rooms
20 Powder Rooms With Eye-Catching Wallpaper
See how wallpaper in various colors, patterns and textures transforms these powder rooms into jewel boxes
Full Story
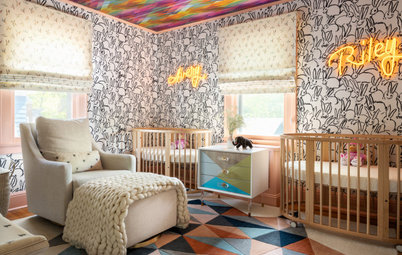
Nursery Ideas
Colorful and Energetic Nursery for Newborn Twin Girls
Animal-inspired decor, geometric patterns and clever storage are among the highlights of this New Jersey nursery
Full Story

Decorating Guides
Gorgeous Details: How to Make Your Millwork Shine
By tidgboutique
A designer shares his tips for creating beautiful rooms with wainscoting, paneling, molding and more
Full Story
Design Details
9 Inspiring Ways With Wallpaper
A designer shares her tips on where to add wallpaper for the greatest visual impact
Full Story
I found wallpaper for a dining room that was soooo out of my price range, but I had to have it. To do my 11x12 ft dining room, $1800 for paper alone. I bought one roll for $260, sent a piece to a custom stencil company for $165, and spent a lot of money on stencil paint/supplies.... around $500 total (as opposed to $1800 plus installation cost!) The base color was an eggshell with a slight shine, the stenciling is flat. When looked at on an angle, it looks slightly like silk with the contrast. The adjoining kitchen was painted in the base coat color but in semigloss. The green is the other side, adjoining room- living room. The white speaks for itself- 7" base molding, trim and crown. The floors were refinished to match the kitchen cabinets. Final product....
Fun to see stenciling making a bit of a come back. I used to have rabbits running along my cabin baseboards. I loved those rabbits but after 10 years they started to feel dated. Perhaps I can make them scoot along again.
What adhesive is the best to use? I want to use a stencil pattern in my kitchen. So I need to seal it?