


Easy DIY: Triangular Plant Stand
This quick project creates a small display table that will fit into any corner of your home
Faith Towers
March 17, 2017
Houzz Contributor. Faith Towers is a designer, writer and crafter with a passion for all things creative. She received her art degree from Skidmore College, and her work has been featured in Forbes and Yahoo. She writes her blog called Design Fixation and also spends her days designing wedding invitations and stationery.
Houzz Contributor. Faith Towers is a designer, writer and crafter with a passion... More
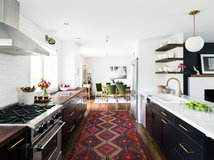
Whether you’re hoping to raise plants up off the ground and out of the reach of your furry friends or you just want to add interest to a forgotten corner of your house, this triangular plant stand is sure to do the trick.
![by Design Fixation [Faith Provencher]](https://st.hzcdn.com/fimgs/a5712be508b5ed1d_7908-w400-h560-b0-p0--home-design.jpg)
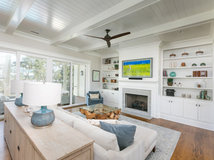
The stand is simple to assemble, especially because you use ready-made table legs. And the right-triangle shape allows it to fit into any corner of your home without protruding into your living space. Add your own decorative touches; we used white paint to highlight the top and parts of the legs.
![by Design Fixation [Faith Provencher]](https://st.hzcdn.com/fimgs/f9c1701308b5ecc2_7907-w618-h376-b0-p0--home-design.jpg)
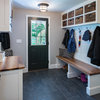
Tools and Materials
- ¾-inch-thick plywood or similar wood, at least 14 by 14 inches
- Measuring tape
- Pencil
- Straightedge
- Handsaw
- Fine-grit sandpaper
- Drill with a bit that matches the diameter of the screws in the top of the table legs
- Three 11½-inch-high wooden table legs
- Wood glue
- Painters tape
- White spray paint
![by Design Fixation [Faith Provencher]](https://st.hzcdn.com/fimgs/42f17c4c08b5ecd1_7658-w618-h403-b0-p0--home-design.jpg)
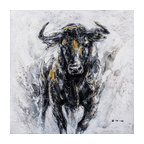
Assembling the Table
Decide which two edges of your board will form the right angle, which will be 90 degrees. Measure 14 inches from that corner on each side and mark those spots with a pencil.
Using a straightedge, draw a line to connect the two marks. The finished length of this line should be just about 20 inches. Each of the angles formed by this should be 45 degrees.
Saw along the line. Sand any rough edges.
![by Design Fixation [Faith Provencher]](https://st.hzcdn.com/fimgs/83615af508b5ecd9_7907-w618-h415-b0-p0--home-design.jpg)
Next, measure 1½ inches in from a corner that has a 45-degree angle and place a pencil mark centered between the two edges. Do the same on the other corner with a 45-degree angle. On the 90-degree-angle corner, measure 1 inch in from the corner and mark that spot.
At each of the pencil marks, drill down a half-inch. Sand the holes and brush away the sawdust.
At each of the pencil marks, drill down a half-inch. Sand the holes and brush away the sawdust.
![by Design Fixation [Faith Provencher]](https://st.hzcdn.com/fimgs/69e111ac08b5ece2_7907-w618-h405-b0-p0--home-design.jpg)
Apply wood glue in one of the holes and to a diameter of 1½ inches around it. Insert a leg in the hole and twist it until it feels secure. Repeat this process for the other two legs.
![by Design Fixation [Faith Provencher]](https://st.hzcdn.com/fimgs/f641117908b5eced_7907-w618-h453-b0-p0--home-design.jpg)
With the table upside down, let the legs dry until they are tacky, about 10 minutes. Then flip the plant stand right-side up and adjust the legs so that they look straight. Let the stand dry overnight in this position.
![by Design Fixation [Faith Provencher]](https://st.hzcdn.com/fimgs/eb51bd9108b5ecf6_7908-w618-h438-b0-p0--home-design.jpg)
Starting halfway down from the tabletop, tape off the bottom of each leg with painters tape. The tape should be wide enough to prevent any paint from getting on the bottom half of the legs, but it doesn’t need to extend all the way to the end.
![by Design Fixation [Faith Provencher]](https://st.hzcdn.com/fimgs/f661274108b5ecff_7907-w618-h428-b0-p0--home-design.jpg)
Spray-paint the tabletop and the tops of the legs. Apply two or three thin coats, letting each dry for 20 minutes before adding the next.
![by Design Fixation [Faith Provencher]](https://st.hzcdn.com/fimgs/b8f183c008b5ed38_7907-w400-h560-b0-p0--home-design.jpg)
Once the paint is thoroughly dry, remove the tape. Place your stand in any corner of your home to display your favorite houseplants.
Explore more DIY projects
Explore more DIY projects


I have specialized in kitchen and bath designs for the past 20 years. I am an NKBA certified designer and would... Read More

Related Products

Bella Casa, llc is a full service interior design firm that has been specializing in high end residential & light... Read More
Related Stories
Fall and Thanksgiving
DIY: Make a Fresh Magnolia Wreath
Learn how to add a statement piece to your front door with these easy-to-find evergreens
Full Story
Bathtubs
10 Times When Painting a Claw-Foot Tub Refreshed a Bathroom
See how designers and homeowners use colorful paint to give tubs and bathrooms a fresh look
Full Story
Decorating Projects
6 Fun Ways to Decorate With ... Tape?
By Janet Paik
Add a new accent wall, a midcentury closet detail and more with this budget-friendly, multipurpose wonder
Full Story
Decorating Guides
How to Hang a Heavy Mirror
By Erin Carlyle
Here’s what to know about your mirror, wall and hanging hardware to do it right
Full Story
Mother’s Day
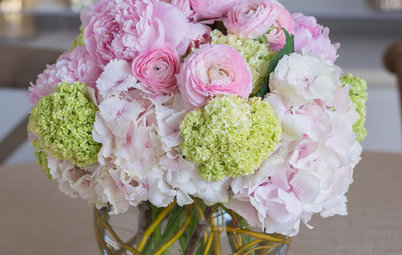
Surprise Mom With an Elegant DIY Bouquet
For Mother’s Day, use flowers and branches from your local market or backyard to create this pastel beauty
Full Story
Decorating Projects
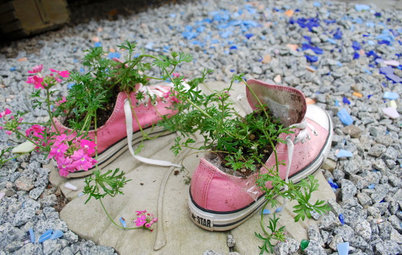
12 Projects to Indulge Your Spring Fever
Get busy beautifying your home with one of these budget-friendly DIY decorating projects
Full Story

Entryways
DIY: Corral Your Boots With This Handy Entryway Tray
By Faith Towers
Follow along to make this easy and chic tray to protect your floors when it’s soggy outside
Full Story
Valentine’s Day
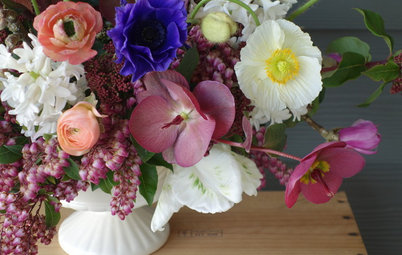
Put Together a Romantic and Whimsical Valentine’s Day Bouquet
By Becky Harris
Use American-grown branches and blooms for a truly individual way to show your love
Full Story
Crafts
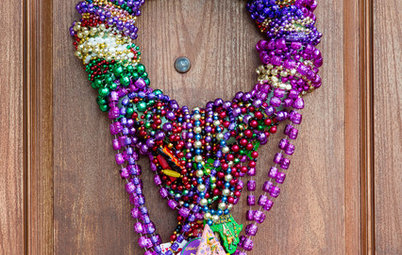
Create a Festive, Colorful Mardi Gras Bead Wreath
Reuse collected beads from parades for an easy-to-make front door accent
Full Story
Organizing
DIY: Make a Wooden Wall Organizer to Curb Entryway Clutter
By Faith Towers
Create a hanging catchall for hats, coats, keys and phones
Full Story
I have a similiar thrifted table about twice that height .....back corner has been trimmed to allow an electrical cord to pass so it can be used for a lamp. Just an idea that might double its usefulness
super cute-thanks :)
This is something cute, useful and easy to build. Thanks for the instructions!
Just two days back, I made a triangular stand using bamboo, nuts and bolts for two clay pots that I'll be using for composting.