


DIY: 1 Tablecloth, 2 Great Holiday Looks
Creating these projects is an easy, enjoyable activity to do with family and friends
Sara Rivka Dahan
November 13, 2017
Houzz Contributor, blogging at www.creativejewishmom.com about a creative life in Northern Israel. A designer and writer by trade, a crafter by night, with a passion for houseplants.
Houzz Contributor, blogging at about a creative life in... More
Whether you prefer artfully applied bold color or streamlined Scandinavian-style black and white, with freezer paper stenciling you can make a unique Hanukkah or New Year’s tablecloth that will adorn your home this holiday season and for years to come.
Once you get the hang of applying designs to fabric using freezer paper stencils, a whole world of possibilities awaits. Use your skills to create fun table runners, personalized or monogrammed napkins and even seasonal or occasion-specific pillowcases.
Once you get the hang of applying designs to fabric using freezer paper stencils, a whole world of possibilities awaits. Use your skills to create fun table runners, personalized or monogrammed napkins and even seasonal or occasion-specific pillowcases.
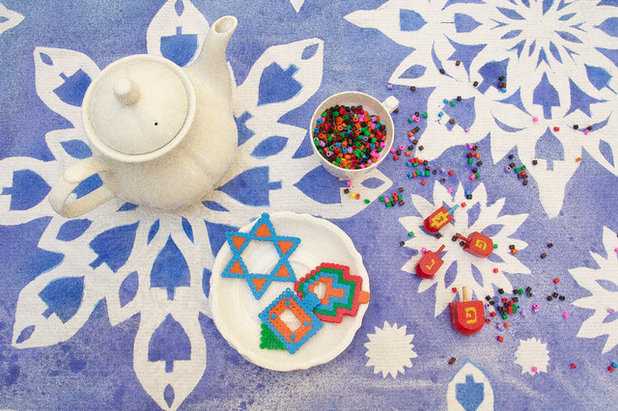
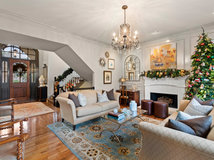
Holiday Look No. 1
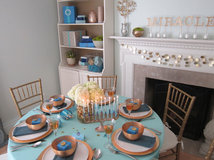
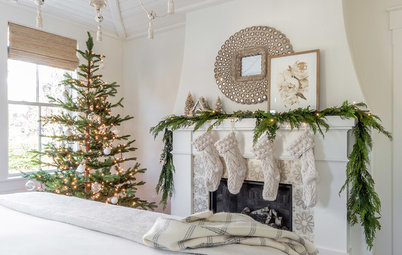
This design is bright, bold and casual. The batik-like results are so interesting, you may opt to use your tablecloth as a wall hanging or a bedspread — so consider making more than one while you’re at it.
This design is bright, bold and casual. The batik-like results are so interesting, you may opt to use your tablecloth as a wall hanging or a bedspread — so consider making more than one while you’re at it.
Everyone loves paper snowflakes. Family members and friends can enjoy cutting snowflakes and, later, trying to remember whose is whose.
For a festive Hanukkah tablecloth, make the snowflake stencils with a simple dreidel design.
You need quite a few stencils for a large tablecloth, so gather the gang around (with plenty of scissors) and enjoy creating together. The ironing of the stencils should be done by a designated person, but the spray-painting step can also be done as a group. Check whether your spray paint is permanent and whether your location is suited for involving the younger set in this step.
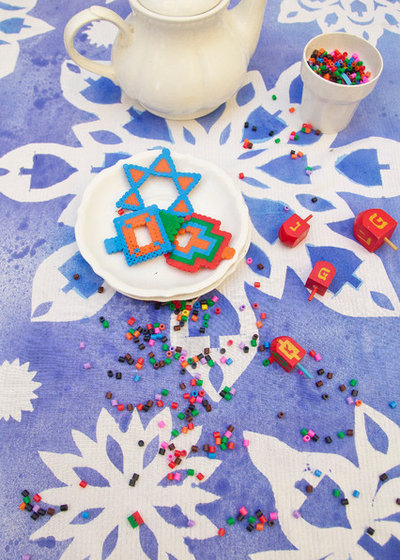
Holiday Look No. 2
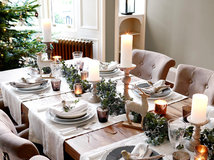
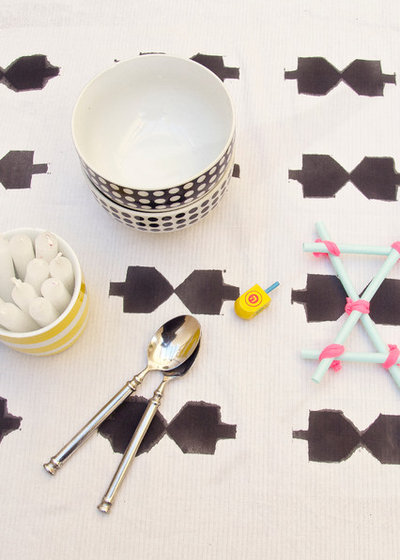
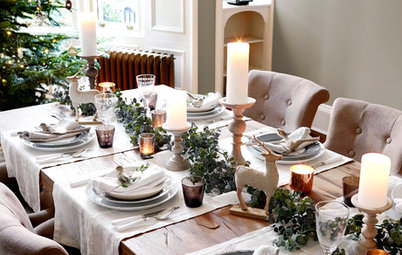
This black-and-white geometric pattern evokes pared-down Scandinavian textiles, Navajo weavings or something in between. Choose a dreidel shape for a Hanukkah tablecloth.
You can apply the pattern all over, just down the center or as a border. There are no rules, so although the design is restrained, its placement needn’t be.
This also can be adapted to fit your personal style. For rustic elegance, choose a linen tablecloth and small-scale stencils.
For a traditional look, consider using white or light-colored paint on a solid-colored tablecloth.
For a modern look, err on the large side and consider a pattern that combines several shapes or one shape in several sizes. Letters and numbers would work well for this idea as well, so why not make one for New Year’s?
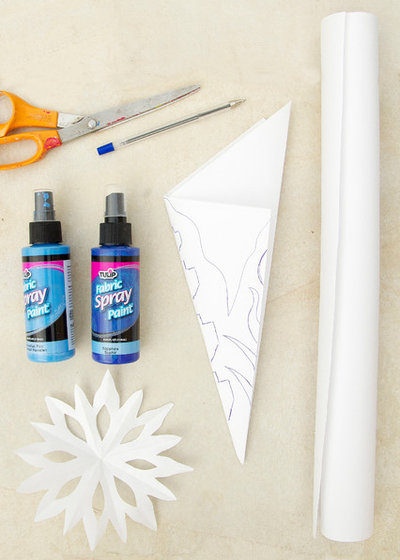
Tools and Materials
- 18-inch-wide freezer paper
- Pen
- Scissors or craft knife
- Cardboard
- Ruler (optional)
- Natural-fiber tablecloth in white or even a white sheet (most fabric paints specify natural-fiber fabric)
- Iron
- Plastic dropcloth
- Nonaerosol fabric spray paint in two shades of blue or just black
Instructions
1. Cut the Stencils
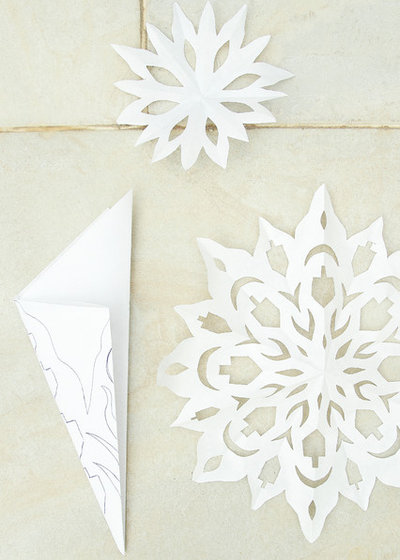
Snowflake stencils. The largest snowflakes shown here were made with an 18-inch-square piece of freezer paper. Smaller snowflakes and starbursts were made with the scraps from that stencil.
Fold the square diagonally to form a triangle. Fold that initial triangle in half to form a smaller triangle, and then fold that second triangle in half again as well. (If you were to unfold your work, you would see that the square is now divided into eight triangles.) Now fold the triangle to form an ice cream cone-like shape, as seen here.
Use a pen to draw your design on the lower three-quarters of the first layer of the cone, leaving the top part free, and then carefully cut it out with scissors or a craft knife. Or just cut out something spontaneous.
1. Cut the Stencils
Snowflake stencils. The largest snowflakes shown here were made with an 18-inch-square piece of freezer paper. Smaller snowflakes and starbursts were made with the scraps from that stencil.
Fold the square diagonally to form a triangle. Fold that initial triangle in half to form a smaller triangle, and then fold that second triangle in half again as well. (If you were to unfold your work, you would see that the square is now divided into eight triangles.) Now fold the triangle to form an ice cream cone-like shape, as seen here.
Use a pen to draw your design on the lower three-quarters of the first layer of the cone, leaving the top part free, and then carefully cut it out with scissors or a craft knife. Or just cut out something spontaneous.

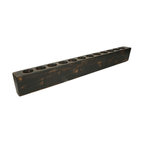
Dreidel stencils. The dreidel pattern was made using a single large stencil created from one sheet of freezer paper 18 inches wide and roughly 36 inches long. In this case, the length of the stencil panel was determined by the width of the tablecloth.
For a consistent pattern, you want your shapes to be nearly identical and evenly spaced. You can achieve this by making a small dreidel template out of cardboard. Trace around the template for each dreidel and use a ruler to measure the spacing between each cutout.
Because the dreidel shape is symmetrical, you need to create only half the dreidel shape as a template. If you decide on a nonsymmetrical shape, you need to cut out the entire design.
To create a large panel with small cutouts, accordion-fold your piece of freezer paper, folding it lengthwise to create the long rows as done here, or widthwise for shorter rows. Each fold represents a row of the pattern, and the width of the folds determines the distance between the rows.
Place your half-template on each fold. Trace the shape onto the top layer of the folded sheet of freezer paper, eyeballing the spacing or measuring as you go. Carefully cut out the dreidel shapes and unfold the stencil.
If you use a nonsymmetrical design, you need to center the template on the top layer and use a craft knife to cut around it.

2. Apply the Stencils
Place the tablecloth on a durable, heat-resistant surface large enough to hold large sections of it at one time. You want to handle the tablecloth as little as possible, since too much moving can cause some of the stencils to lose their adherence in some spots.
Place the stencils on the tablecloth in the desired position, shiny side down, and carefully adhere them with a dry, medium-hot iron (steam isn’t recommended). Press gently in a circular motion, making sure to keep the iron moving so that the paper doesn’t burn. Use the tip of the iron to adhere any small areas that need extra attention.
3. Apply the Paint
Place a protective nonabsorbent dropcloth on your work area. Using the floor provides the best angle for applying the paint.
Smooth out the tablecloth so that there are no ridges. Cover any areas you don’t intend to paint with cardboard or plastic.
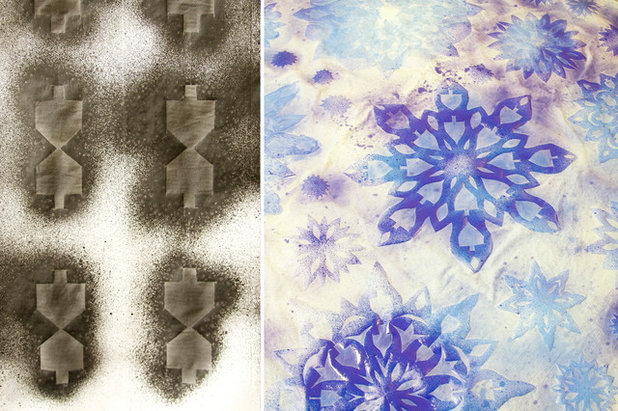
For the snowflake design, the paint is applied to the cutout shapes within the snowflake and to the area surrounding the snowflake.
For the black dreidel design, the paint is applied within the dreidel shape only.
Test the spray paint on something besides your tablecloth. Once you have determined that the bottle is spraying properly, start to spray your tablecloth. Nonaerosol fabric spray paint can drip, but in the case of something like the snowflake design, that just adds to the artful look — so don’t worry about it. Apply paint in a few light coats with drying time in between.
Once you have applied paint to fill the space within your stencils or around them, let the tablecloth dry in place overnight. Once dry, enjoy peeling off the freezer paper to reveal your design. Set the paint if needed.
More: Get other ideas for holiday DIY decor
Place a protective nonabsorbent dropcloth on your work area. Using the floor provides the best angle for applying the paint.
Smooth out the tablecloth so that there are no ridges. Cover any areas you don’t intend to paint with cardboard or plastic.
For the snowflake design, the paint is applied to the cutout shapes within the snowflake and to the area surrounding the snowflake.
For the black dreidel design, the paint is applied within the dreidel shape only.
Test the spray paint on something besides your tablecloth. Once you have determined that the bottle is spraying properly, start to spray your tablecloth. Nonaerosol fabric spray paint can drip, but in the case of something like the snowflake design, that just adds to the artful look — so don’t worry about it. Apply paint in a few light coats with drying time in between.
Once you have applied paint to fill the space within your stencils or around them, let the tablecloth dry in place overnight. Once dry, enjoy peeling off the freezer paper to reveal your design. Set the paint if needed.
More: Get other ideas for holiday DIY decor


With over 8 years of experience serving the Columbus and surround area, Hoffman Exteriors, is your solution for... Read More
What are you working on?


Related Products

We specialize in small to medium-sized remodeling projects and an array of home repairs. Read More
Related Stories
Holidays
5 Ways to Avoid Holiday Season Burnout
By Patricia Lee
You can enjoy the traditions and activities that matter to you and let go of the rest
Full Story
Feel-Good Home
How to Recharge Over the Holidays
Try these easy ideas to let go of stress and enjoy the festivities more
Full Story
Houzz Call
What New Holiday Traditions Are You Trying This Year?
By Erin Carlyle
Activities like cooking, decorating and sprucing up your home may offer new paths to joy in this unusual holiday season
Full Story

Holidays
Ideas to Inspire Your Hanukkah Table and Decor
Add a creative touch to your holiday decorating with these favorite looks for the Festival of Lights
Full Story

Houzz Call
Show Us Your Hanukkah Decor
By Anne Colby
Share pictures of your holiday table, mantel and other decorations and tell us about them
Full Story
Holidays
DIY: Colorful Hanukkah Crafts Shine a New Light on Quilling
Create gorgeous paper filigree using only thin strips of colored paper and tiny dots of glue
Full Story
Holidays
Create Hanukkah Decor With This Age-Old Technique
Use wool felt to make 3 attractive decorations and gifts this holiday season
Full Story

Holidays
Celebrate and Recycle With a DIY Menorah
Glass bottles, a little paint and candles create a menorah for any Hanukkah celebration
Full Story
DIY Projects
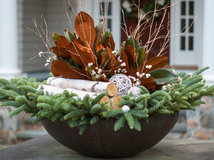
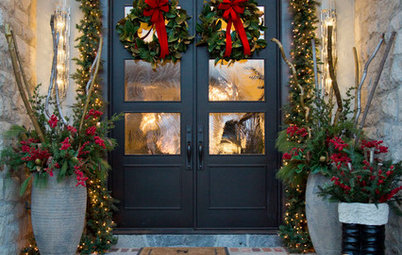
Holiday DIY: Woodland Door Swag Welcomes Guests
By Faith Towers
Create a nature-inspired decoration that you can enjoy throughout the holiday season this year and in the future
Full Story
Fantastic idea Brenda, making a floor cloth in this way would be amazing! Just wish I had access in my local art supply store to some pre-gessoed canvas for making floor cloths.
Creative Jewish Mom...you can purchase canvas and gesso it yourself. A great resource is "The Complete Book of Floorcloths" by Kathy Cooper and Jan Hersey. The book goes into the history of floorcloths and gives step by step instructions on how to create your own.
Thanks Jan, Yes I know, I have made floor cloths in the past, but gesso here in Israel costs a small fortune....I had a floor cloth once that I painted over multiple times. Come to thing of it, as an alternative to the crocheted rag rugs I make that can be thrown in the washing machine, floor cloths are a great way to go as it is just too dusty where I live to actually have real rugs.......all the best!