


Celebrate and Recycle With a DIY Menorah
Glass bottles, a little paint and candles create a menorah for any Hanukkah celebration

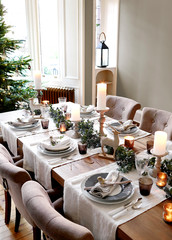
Decorate and reuse your glass bottles with this DIY menorah from Julie Albert and Lisa Gnat, two sisters who love to share their party and cooking advice. Then see how the duo completed their tablescape with a dash of Hanukkah decor.
This tablescape can be created in about the time it takes for spray paint to dry, say Albert and Gnat, co-CEOs of the recipe site Bite Me More. The DIY menorah, featured in the middle of the table, is adjustable to any table size, making it great for any gathering.
Create a Menorah From Recycled Bottles
What you’ll need:
2. Spray-paint the bottles. You can use any color, but Albert and Gnat chose a glossy white paint. Wait for the bottles to dry before starting the next step.
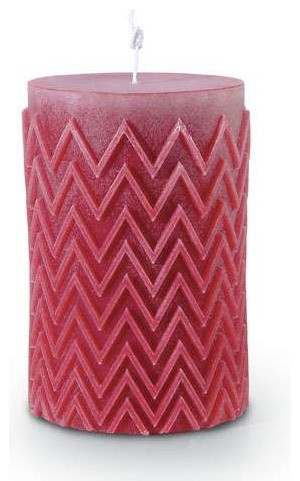
3. Add the candles. They used alternating light and dark blue candles for their menorah, with a silver candle in the middle. You can use any candle with a width roughly the same size as the bottle opening. If the candle doesn’t fit exactly, Albert and Gnat say to use a knife to carve around the bottom of the candle until it fits snugly into the mouth of the bottle.
4. Accent the candle with ribbon. You can use any ribbon for this step. Measure around the base of the candle, and then cut it to size and glue it around the base. “The ribbon is pretty but also serves the purpose of hiding the bottom of the candles that may have been hacked a bit with a knife,” Albert says.
5. Arrange your menorah on the table. Once you’ve created each candleholder, line them up on your event table. “The idea of creating a deconstructed menorah that can run the length of any table is so great — all guests get to benefit from the simple beauty, no matter where they’re seated,” Albert says.
What you’ll need:
- Empty glass bottles (Albert and Gnat used small and large Perrier bottles)
- Glossy white spray paint
- Candles to fit bottle openings (use dripless candles if you’re worried about the wax)
- Paring knife, if needed to trim candles
- Ribbon
- Scissors
- Hot-glue gun and glue sticks
2. Spray-paint the bottles. You can use any color, but Albert and Gnat chose a glossy white paint. Wait for the bottles to dry before starting the next step.
3. Add the candles. They used alternating light and dark blue candles for their menorah, with a silver candle in the middle. You can use any candle with a width roughly the same size as the bottle opening. If the candle doesn’t fit exactly, Albert and Gnat say to use a knife to carve around the bottom of the candle until it fits snugly into the mouth of the bottle.
4. Accent the candle with ribbon. You can use any ribbon for this step. Measure around the base of the candle, and then cut it to size and glue it around the base. “The ribbon is pretty but also serves the purpose of hiding the bottom of the candles that may have been hacked a bit with a knife,” Albert says.
5. Arrange your menorah on the table. Once you’ve created each candleholder, line them up on your event table. “The idea of creating a deconstructed menorah that can run the length of any table is so great — all guests get to benefit from the simple beauty, no matter where they’re seated,” Albert says.
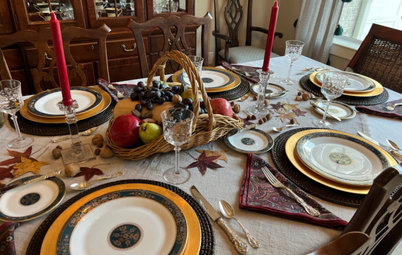
Complete the Hanukkah Tablescape
Place cards. Albert and Gnat stuffed bags from Creative Bag with blue and silver confetti. Inside, they also included an oversize dreidel. They added names to the bags with stickers and placed them next to the table settings.
Plate accents. A mirrored “oy,” a Yiddish exclamation, adorns each plate. Albert and Gnat created these festive pieces by purchasing mirrored “joy” signs and snapping off the J to complete the joy-to-oy decor.
Gelt. Albert and Gnat also bought chocolate-filled coins to sprinkle around the table. The gelt works as both decor and a sweet snack.
More
A DIY for Each Day of Hanukkah
Browse more Hanukkah decorating ideas