
Holiday DIY: Block-Printed Gift Wrap
Create your own gift wrap with an easy-to-make rubber stamp

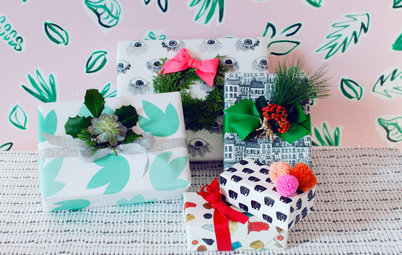
It’s the time of year when gift buying, gift making and gift wrapping are in full swing. To add a personal touch to the gifts you give this season, try creating your own holiday gift wrap. With some cost-friendly materials and a few simple steps, you can make gift wrap that looks professional and personalized. This block-printed gift wrap comes from Kathryn Zaremba, an illustrator and surface designer who co-owns The Lemon Bowl in Washington, D.C.
Block printing is the perfect way to create beautifully designed gift wrap that is cost- and time-friendly.
Supplies
- Pencil
- Rubber stamp carving block
- X-Acto knife
- Cutting mat or other protective surface
- Block-printing ink
- Tray for ink
- One or two brayers (a rolling and straightening tool found at craft and art stores)
- Plain gift wrap or large sheets of paper
Instructions
1. With a pencil, draw or trace your design on the carving block.
1. With a pencil, draw or trace your design on the carving block.
2. Using an X-Acto knife on a cutting mat or other protective surface, carefully cut out the design to create a rubber stamp. Set aside.
3. Apply block-printing ink to the tray. If desired, mix two or three inks together to create different shades.
4. Roll the brayer along the tray to mix any combined colors. Cover the roller of the brayer with ink.
5. Apply the ink to your stamp using the brayer.
6. Place your inked stamp directly on the paper.
7. If you have another brayer, gently roll it on top of the stamp to help transfer the ink to the paper.
Or simply use your hands and lightly press on the stamp.
8. Carefully lift the stamp directly up and off the paper to avoid smudging.
9. Repeat steps 1 through 8 until you are happy with your pattern.
Tip: When you first lift the stamp, there may be some white streaks through the design, as can be seen on the left. However, as the ink dries, these streaks should disappear, and the end result will resemble that on the right.
Allow plenty of time for the ink to dry. Consider hanging the paper to dry as seen here in the studio of The Lemon Bowl.
You can also block-print a separate smaller piece of paper to use as a coordinating card, as seen here.
Once the ink has dried, you are ready to use your personalized block-printed gift wrap to wrap your holiday gifts.
Zaremba, who designed this project, is known not only for her unique gift wrap but also for her wallpaper, pictured here.
Zaremba, center, poses with her Lemon Bowl colleagues and co-owners, Linny Giffin, left, and Holley Simmons, in their studio.
“We are truly influenced by each other’s work,” Zaremba says. “We all really love and respect what each of us makes, and the space is filled with our art.”
Browse more DIY projects
“We are truly influenced by each other’s work,” Zaremba says. “We all really love and respect what each of us makes, and the space is filled with our art.”
Browse more DIY projects