

DIY Silver Stars for a Glittering New Year’s Eve
Here’s a simple and spectacular decoration to delight your guests on winter holidays

I’ve loved hosting New Year’s Eve dinner parties over the past few years. I don’t like sit-down dinners that much — I think they’re too demanding for the hosts, who may have to get up many times throughout the dinner, and for the guests, who on the contrary may feel obliged to remain seated all evening. For this reason, I usually organize a standing buffet and take particular care to create comfy corners for both junior and senior guests.
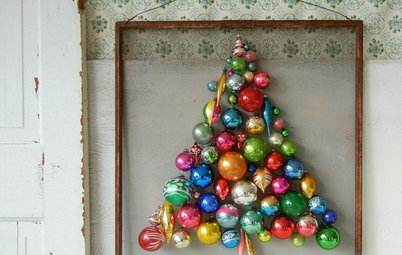
I think the key to a great New Year’s Eve party lies not only in the variety of dishes you offer, but also in the decorations. The Christmas tree and candles all around aren’t enough: A New Year’s Eve party worthy of its name needs something special, something with pizazz! For this year’s party, I made silver stars, some huge and some small. They really make for a magical atmosphere.
I think the key to a great New Year’s Eve party lies not only in the variety of dishes you offer, but also in the decorations. The Christmas tree and candles all around aren’t enough: A New Year’s Eve party worthy of its name needs something special, something with pizazz! For this year’s party, I made silver stars, some huge and some small. They really make for a magical atmosphere.
Here you see the stars hanging on the wall at different heights to emphasize a corner of the room, maybe the one that will host the midnight toast.
It takes very few supplies and little time to create these stars (no matter what size).
Materials
Materials
- 8½-by-11-inch (A4) silver paper; six sheets make one large and two small stars
- Scissors
- Ruler
- Hot-glue gun and glue sticks
- String for hanging stars
Instructions
1. Cut a square from the rectangular sheet of paper by folding the lower left corner so that the short edge on the left lines up with the long edge at the top. This will give you a triangle. Cut off the extra length with scissors. Repeat five times. Each sheet of paper will form one point of a six-pointed star.
1. Cut a square from the rectangular sheet of paper by folding the lower left corner so that the short edge on the left lines up with the long edge at the top. This will give you a triangle. Cut off the extra length with scissors. Repeat five times. Each sheet of paper will form one point of a six-pointed star.
2. Fold the triangle in half and lay it on a surface with the longest edge pointing down and the open edge pointing right. Lay the ruler about a quarter-inch (half-centimeter) from the left edge and slightly fold the paper.
3. Make four cuts parallel to the long edge, from the right side of the triangle to the fold you just made with the ruler. The cuts should be about one-half inch (1 centimeter) apart.
4. After making the cuts, unfold the triangle and turn it so that the uncut center line runs horizontally. You will notice five concentric squares of increasing sizes, linked together only by the center line you made earlier with the ruler.
5. Overlap the opposing corners of the smallest square in the middle and glue them together with a touch of hot glue.
6. Keeping the sheet in the same position, repeat the process with the third and fifth squares, gluing the opposing edges over the underlying square. Then turn the sheet over and repeat the process with the second and fourth squares.
7. Repeat steps 2 through 6 with the remaining five points of the star.
8. Stick two points together with a bit of hot glue at the bottom (left) and directly in the middle (right).
9. Repeat with the remaining four points. When you have three pairs of points, glue them all together in the same way.
Here is the finished star.
10. Attach the string with a touch of hot glue.
Here you see my stars hanging together with gleaming Christmas lights. In total, I created three big stars, and then I made six small stars out of scraps from step 1. The scraps from one big star are usually enough to make two little stars.
What do you think? They’re beautiful and impressive, aren’t they? You can also make some from white and gold paper to achieve a très chic effect.
More: Simple Pleasures: Welcoming the New Year
More: Simple Pleasures: Welcoming the New Year