


Storage Shortage? Make an Industrial-Style Shelving Unit
Outfit your kitchen, basement or garage with handy new shelves to help keep your stuff neat and within reach
Julie Ranee
February 22, 2013
Houzz Contributor. I am a photographer with a passion for interior design. My favorite moments to capture are families enjoying the spaces in which they live.
Houzz Contributor. I am a photographer with a passion for interior design. My favorite... More
I've been anxious to fill up an empty corner in my family's kitchen with an industrial shelving unit that matches the other open shelving there. So together with my dad, we took a weekend afternoon to make one. A little decorative, but mostly practical, this wheeled unit brings added storage to complement the industrial-farmhouse style of our house.
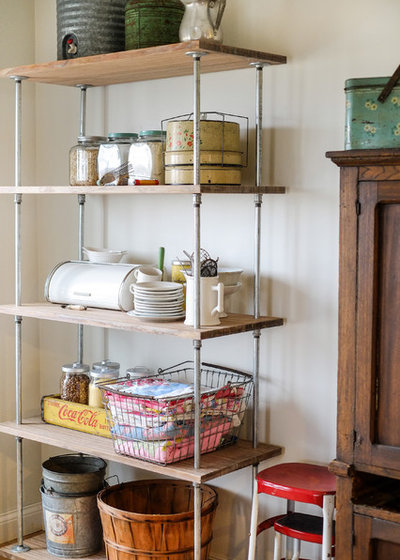
My eye is very drawn to galvanized metal, with its sleek silver finish, and warm wood tones. One day I'd like to fill all the shelves with white dishes, because it seems I can never get enough of white. But for now I like the option of displaying food we use regularly in glass jars.
Time: 5 hours plus drying time
Skill level: Moderate
Cost: $150 plus wood (our wood was salvaged and free)
Time: 5 hours plus drying time
Skill level: Moderate
Cost: $150 plus wood (our wood was salvaged and free)
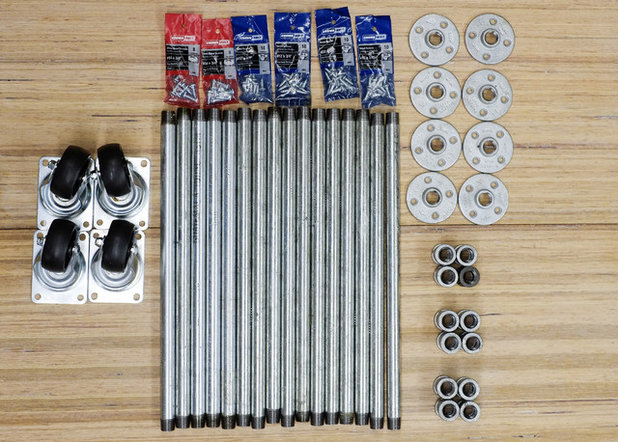
Materials we used:
- 5 wood shelves
- (16) 1/2-inch galvanized pipes cut to the desired length and threaded on both ends. We purchased 10-foot pipes at Home Depot; a staffer cut them into 18-inch pieces and threaded them for free.
- (8) 1/2-inch galvanized floor flanges
- (12) 1/2-inch galvanized couplings
- (4) 3-inch industrial casters
- (32) #12 3/4-inch wood screws (to attach floor flanges)
- (16) #14 3/4-inch sheet metal screws (to attach wheels)
- Wood sealer
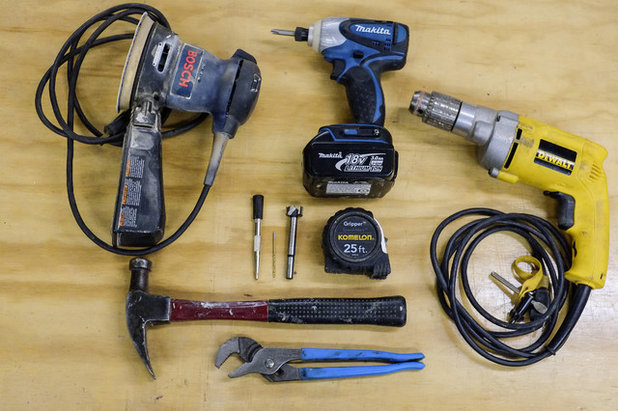
Tools:
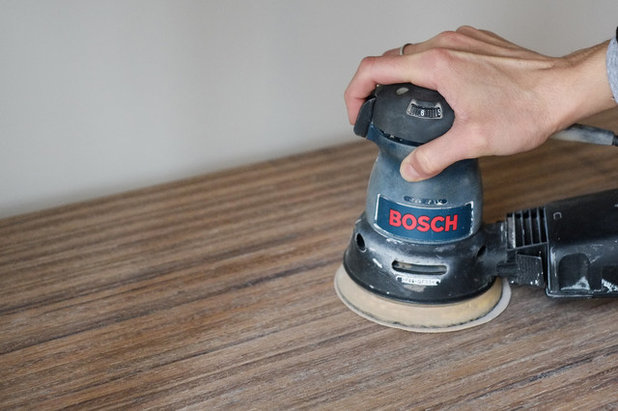
- Electric sander
- Cordless drill
- Electric drill (you could also use this instead of a cordless drill)
- 1/8-inch drill bit (for drilling pilot holes)
- 7/8-inch drill bit
- Hammer
- Center punch
- Wrench
- Tape measure
Choose and Prepare the Wood Shelves
1. Pick your wood. We used 1-inch-thick salvaged wood that was 42 inches long and 18 1/2 inches wide for our shelves. The wood we used is actually thin strips of wood glued together, which gives it a nice striated look.
Tip: You can buy wood at your local hardware store if reclaimed wood is hard to come by.
2. Sand and seal the wood to ensure a smooth finish. I sealed our shelves with Monocoat, because we had some left over from another project. However, several coats of a water-based polyurethane will work well too. You can purchase it at your local hardware store and follow the directions on the can.
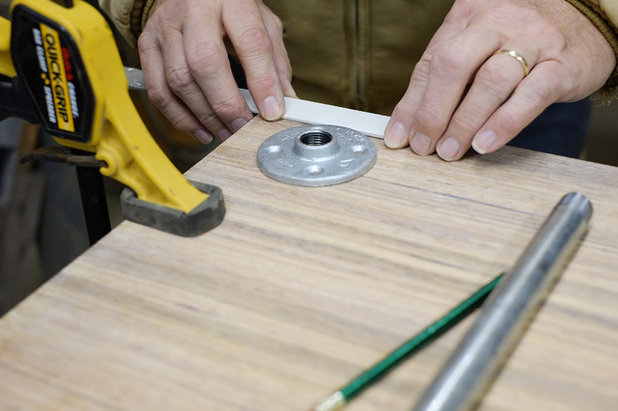
3. After the shelves are dry, mark the placement of the floor flanges on the bottom shelf (photo). You will use four floor flanges on the top of the bottom shelf (one in each corner) and four more floor flanges on the underside of the top shelf. We used a painter's stirrer to measure our placement. You can use a tape measure and mark with a pencil if you prefer. You want the edges of the flanges to be about 1 inch in from the edges of the wood.
4. Mark the placement of the flanges with a pencil.
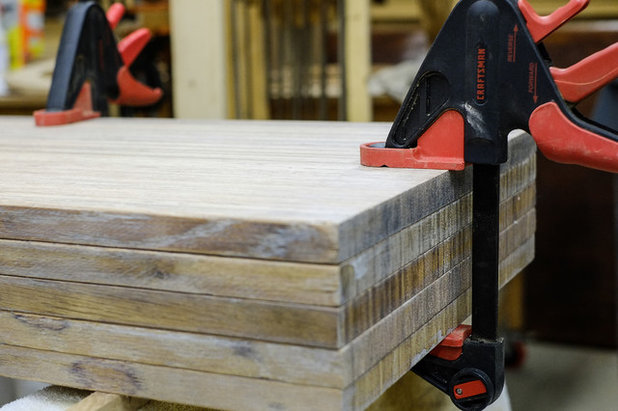
5. Now it is time to drill the pilot holes in the shelves. Stack the shelves on top of one another (bottom shelf with flange placement markings on top) and clamp them together. This is so the holes you're about to drill will line up — it's very important!
Mark the order and orientation of each shelf. Keeping them in order will assure the holes will line up.
6. Use the 1/8-inch drill bit and electric drill to drill pilot holes through the center of the flange placement marks. Be sure to drill through the first shelf and into the second.
Remove the first shelf, reclamp the shelves and continue drilling through the second and third shelves. Continue this process until all the shelves have pilot holes drilled through them. This method allows you to use a regular-length drill bit and still line up the holes.
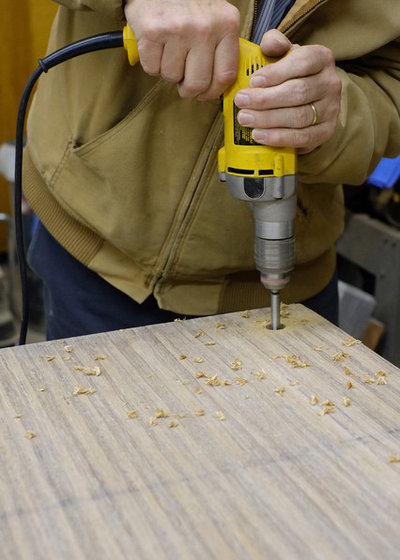
7. Using your pilot holes as guides, grab the 7/8-inch drill bit and drill holes through the second, third and fourth shelves only. These are the only shelves that require large holes, through which the pipes go. We used the same stack-clamp method as before.

Assemble the Shelving Unit
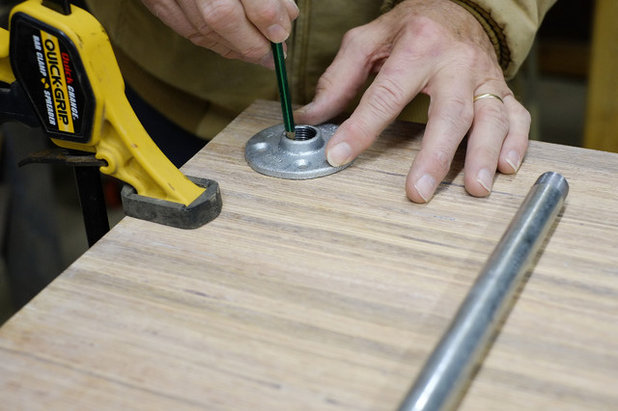
1. Center each floor flange over the pilot holes drilled in the bottom shelf (four holes total). Use a center punch and hammer to make a small indentation where the screws should be placed. Use a cordless drill (or electric drill) and the #12 3/4-inch wood screws to attach flanges to the wood shelf.
1. Center each floor flange over the pilot holes drilled in the bottom shelf (four holes total). Use a center punch and hammer to make a small indentation where the screws should be placed. Use a cordless drill (or electric drill) and the #12 3/4-inch wood screws to attach flanges to the wood shelf.
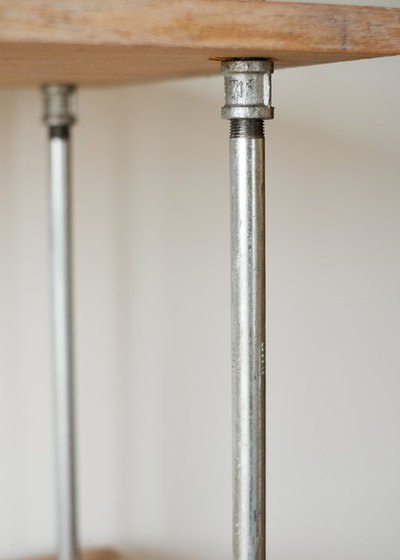
2. Once the floor flanges on the bottom shelf are screwed in place, screw four 1/2-inch galvanized pipes into the floor flanges.
3. Screw a 1/2-inch galvanized coupler to the top of each pipe (photo). Set the next shelf on top of the couplers. Take four more pipes and put them through the holes in the shelf, and screw them into the couplers below. Use a wrench to tighten the couplers. Once you have used all 16 pipes, screw the remaining four floor flanges to the tops of the pipes.
3. Screw a 1/2-inch galvanized coupler to the top of each pipe (photo). Set the next shelf on top of the couplers. Take four more pipes and put them through the holes in the shelf, and screw them into the couplers below. Use a wrench to tighten the couplers. Once you have used all 16 pipes, screw the remaining four floor flanges to the tops of the pipes.
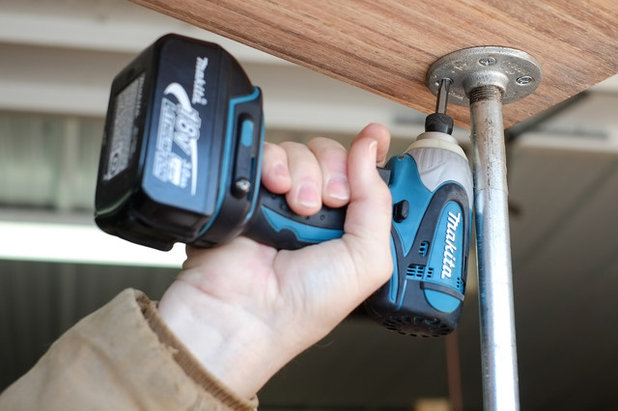
4. You are now ready for the top shelf. Set it on top of the floor flanges, centering the pilot holes with the center of the flanges. Use a cordless drill (or electric drill) and the #12 3/4-inch wood screws to attach flanges to the wood shelf.
Attach the Wheels
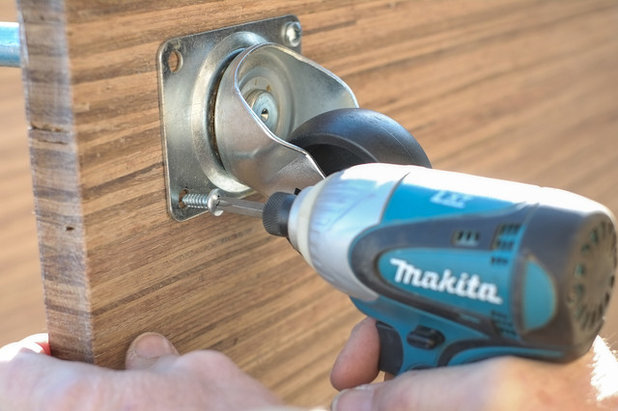
Turn the unit on its side or back. Mark the desired placement of the wheels on the bottom shelf. Use the #14 3/4-inch sheet metal screws to attach the wheels.
Note: If you know you won't need to move your shelving unit, you can leave off the wheels and bottom shelf, and screw the floor flanges directly into the floor.
For added stability, use L-brackets underneath a few shelves; attach them to the wall studs.
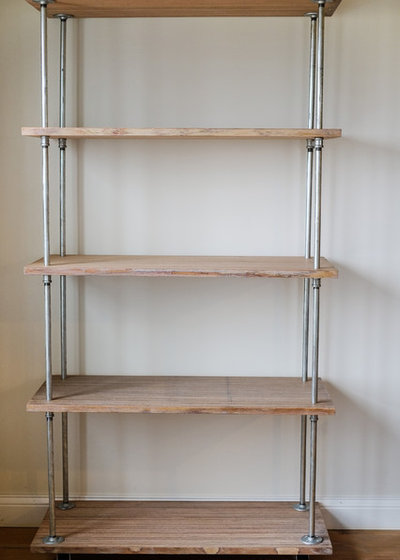
Stand your unit upright and enjoy the result of your efforts!
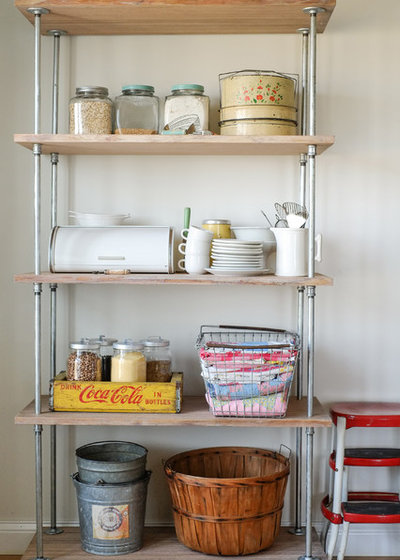
Here is the finished product in my kitchen.
Your turn: Please show us your industrial-cool DIY project below.
Your turn: Please show us your industrial-cool DIY project below.


Our philosophy at Kitchen Kraft is to make home remodeling convenient. We are your one-stop shop for kitchen... Read More
What are you working on?
Related Products
Related Stories
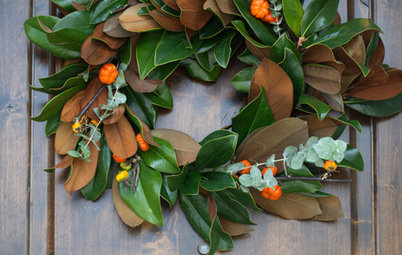
Fall and Thanksgiving
DIY: Make a Fresh Magnolia Wreath
Learn how to add a statement piece to your front door with these easy-to-find evergreens
Full Story
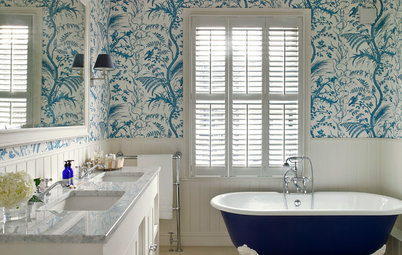
Bathtubs
10 Times When Painting a Claw-Foot Tub Refreshed a Bathroom
See how designers and homeowners use colorful paint to give tubs and bathrooms a fresh look
Full Story
Decorating Projects
6 Fun Ways to Decorate With ... Tape?
By Janet Paik
Add a new accent wall, a midcentury closet detail and more with this budget-friendly, multipurpose wonder
Full Story

Decorating Guides
How to Hang a Heavy Mirror
By Erin Carlyle
Here’s what to know about your mirror, wall and hanging hardware to do it right
Full Story

Mother’s Day
Surprise Mom With an Elegant DIY Bouquet
For Mother’s Day, use flowers and branches from your local market or backyard to create this pastel beauty
Full Story

Decorating Projects
12 Projects to Indulge Your Spring Fever
Get busy beautifying your home with one of these budget-friendly DIY decorating projects
Full Story

Entryways
DIY: Corral Your Boots With This Handy Entryway Tray
By Faith Towers
Follow along to make this easy and chic tray to protect your floors when it’s soggy outside
Full Story

Valentine’s Day
Put Together a Romantic and Whimsical Valentine’s Day Bouquet
By Becky Harris
Use American-grown branches and blooms for a truly individual way to show your love
Full Story

Crafts
Create a Festive, Colorful Mardi Gras Bead Wreath
Reuse collected beads from parades for an easy-to-make front door accent
Full Story
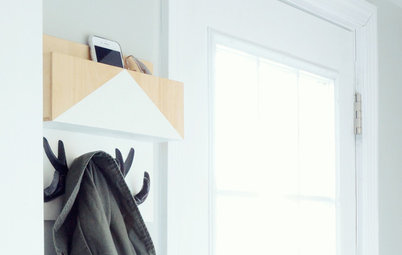
Organizing
DIY: Make a Wooden Wall Organizer to Curb Entryway Clutter
By Faith Towers
Create a hanging catchall for hats, coats, keys and phones
Full Story
I recommend to put in at least 1 or 2 long horizontal pipes. It improves stability a lot.
Amazing project! Well done!