
Black-and-White Pumpkins for a Scandinavian-Style Halloween
Paint splattering offers a frightfully tempting alternative to traditional orange pumpkins. Once you start, you just may keep going

If you think traditional orange-and-black Halloween decor messes with your sense of style, you may like this painterly approach from our team in Sweden. Here’s how to do it.
Materials
- Mini pumpkins
- Masking tape
- White lacquer paint (spray or brush-on)
- Splattering tools (dish scrubber, paintbrush)
- Black acrylic paint
- Newspaper or cardboard
1. Cover the stalks. If you love the look of natural pumpkin stalks, cover them with masking tape before you start painting.
2. Paint the pumpkins white. Brush or spray on your white paint in two or three thin layers. Allow each layer to dry thoroughly (give it about an hour) between coats.
If you use spray paint, read the guidelines on the can and be sure to apply it outside or in a place with plenty of ventilation.
If you use spray paint, read the guidelines on the can and be sure to apply it outside or in a place with plenty of ventilation.
3. Start splattering. We used two tools with different results. A plastic dish scrubber produced the effect shown on the left. A softer paintbrush produced the splatter on the right.
To use the dish scrubber: Cover it generously in paint, then hold it with the bristles toward the pumpkin. Use your fingers to move the bristles toward you, then quickly let them go. This method works for smaller color splashings but with a longer reach. Experiment on a piece of newspaper or scrap cardboard until you get the effect you like.
To use the paintbrush: You may find the paint too thick to splatter properly. Depending on the kind of paint you use, dilute if necessary. We used 3 tablespoons of water for about 3 ounces (100 ml.) of acrylic paint. When you have your consistency right, dip the brush generously and, in one distinct move, splash for a graphic pattern. Let the pumpkins dry overnight.
4. Remove the masking tape. When the tape is gone, your pumpkins are ready to display around the house however you like.
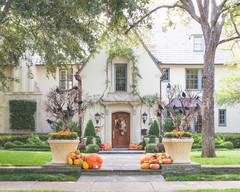
Decorating ideas. How about a welcoming pumpkin at the front door, or a decoration on the coffee table accompanied by autumn flowers? Or create a splatter-pumpkin still life on top of a chest of drawers or in the window.
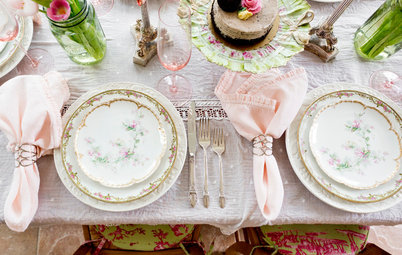
The pumpkins are basically all you need to decorate your table for the Halloween dinner. Along with napkins in washed linen, held together with hemp string, you get a traditional Halloween theme with a modern and rustic twist.
Paint splashing is pretty smashing, and one easily gets inspired to keep going. This humble shoebox, transformed with white lacquer and black acrylic paint, now takes pride of place.
A few magazines and other odd bits add to the shoebox as an arresting interior detail. Who would’ve guessed this is an old shoebox?
Show us: Are you a pumpkin painter? Please show us your creations in the Comments below.
How to make glittery bat napkin rings
Show us: Are you a pumpkin painter? Please show us your creations in the Comments below.
How to make glittery bat napkin rings