


Houzz TV: How to Make Over a Thrift Store Stool
Try this DIY method for turning a run-down piece of furniture into a vintage statement piece — no reupholstery required
Mitchell Parker
October 11, 2016
Houzz Editorial Staff. Home design journalist writing about cool spaces, innovative trends, breaking news, industry analysis and humor.
Houzz Editorial Staff. Home design journalist writing about cool spaces, innovative... More
There are many ways to bring a rundown piece of furniture back to life. But the following method of restoring a vintage thrift store stool is something almost anyone can do with confidence, even if the only thing you’ve ever DIYed is a microwave dinner.
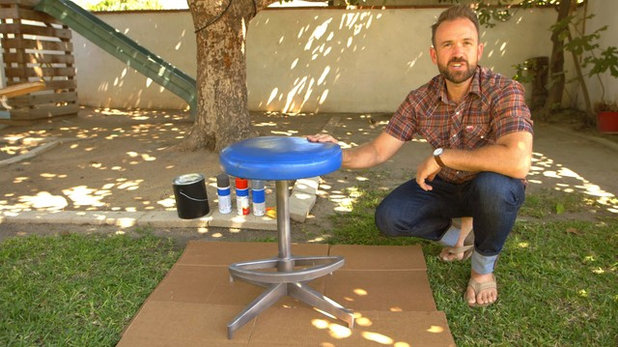
Watch now: How to Make Over a Thrift Store Stool
What You’ll Need
1. Set up your vintage stool on a piece of cardboard or another clean work surface. If you’re outside and it’s windy, be mindful of things around you. You don’t want the wind to blow a mist of shiny red paint onto your white car, for example.
If inside, be sure to set up proper ventilation or wear a respirator.
What You’ll Need
- Stool
- Cardboard or other clean work surface
- Respirator (optional)
- Sand paper (medium grit)
- Screwdriver or other tool to disassemble the stool
- Clean, empty paint can or other stand
- Spray primer
- Spray paint in two colors (consider glossy for a more polished look)
1. Set up your vintage stool on a piece of cardboard or another clean work surface. If you’re outside and it’s windy, be mindful of things around you. You don’t want the wind to blow a mist of shiny red paint onto your white car, for example.
If inside, be sure to set up proper ventilation or wear a respirator.
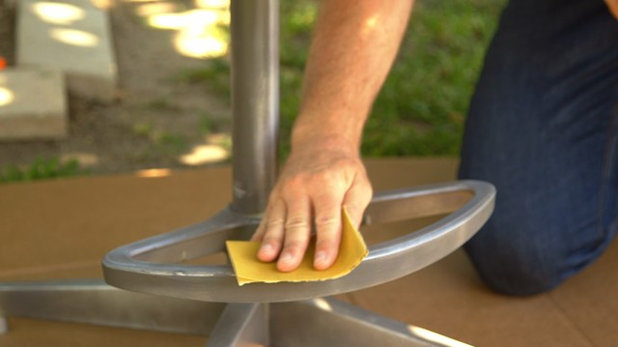
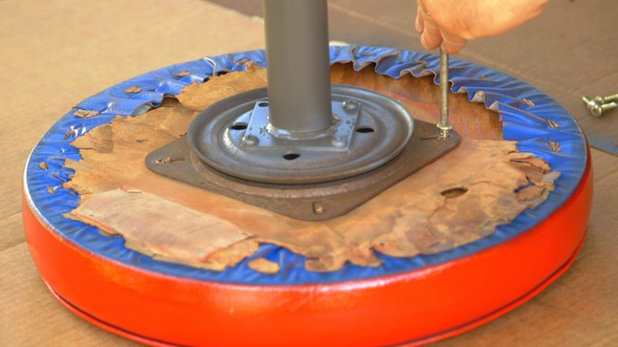
2. Use medium-grit sandpaper to take off any bumps and rough spots from the base of your stool.
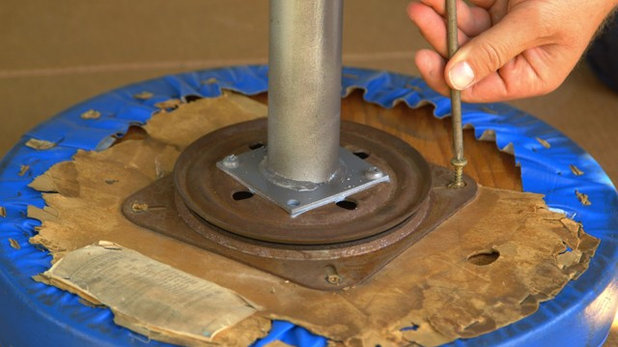
3. Use a screwdriver to remove the seat cushion from the base. This way you can paint each section separately, which is a bit easier than masking off with tape.
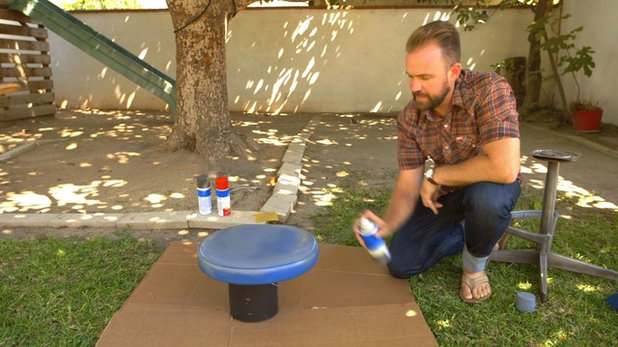
4. Before painting, set the cushion on a clean, empty paint can or another stand to give you something to touch while rotating the piece during spraying. Coat with primer first. This establishes a good foundation for the spray paint to adhere to.
Tip: Use quick, short bursts, misting your cushion to gradually build up color. This helps ensures even coloring. Don’t be worried if it looks spotty on the first go. Fill in the spots during another round of spraying.
Tip: Use quick, short bursts, misting your cushion to gradually build up color. This helps ensures even coloring. Don’t be worried if it looks spotty on the first go. Fill in the spots during another round of spraying.
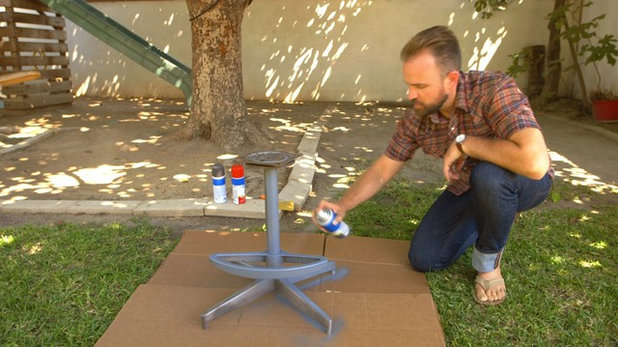
5. Use the same technique for the base. Make sure you get into all the little nooks and crannies. Remember to flip the piece over to get the undersides, as well. Set your pieces aside to dry.
Tip: A sunny spot outside is great for speeding up the drying process.
Tip: A sunny spot outside is great for speeding up the drying process.
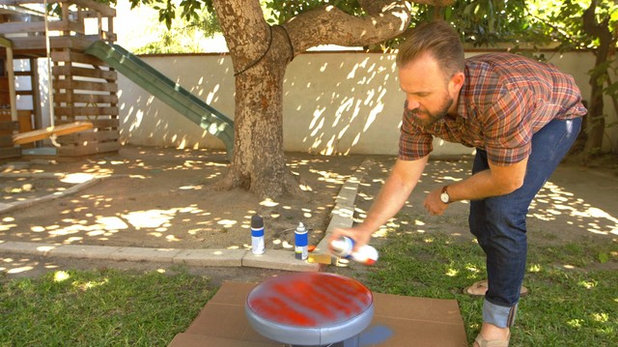
6. Once the primer is dry, begin painting. Use the same quick, short-burst method for the paint. If you’re not sure what color to choose, look around your room and find a color that works well with the rest of your decor.
Tip: Consider going with a glossy finish for a more polished look that pops.
Tip: Consider going with a glossy finish for a more polished look that pops.
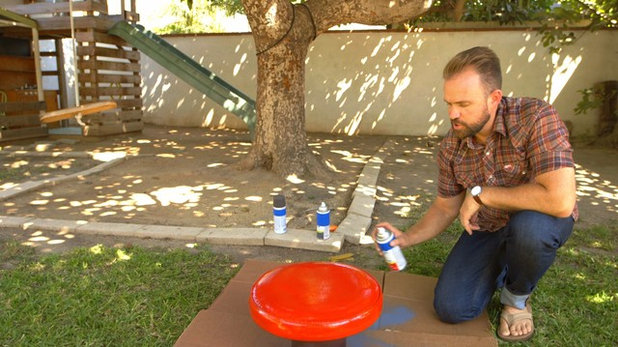
7. Use the stand to rotate your cushion, spraying until it’s fully coated. Then set it aside to dry.
Watch now: How to Spiff Up a Thrift Store Stool
Watch now: How to Spiff Up a Thrift Store Stool
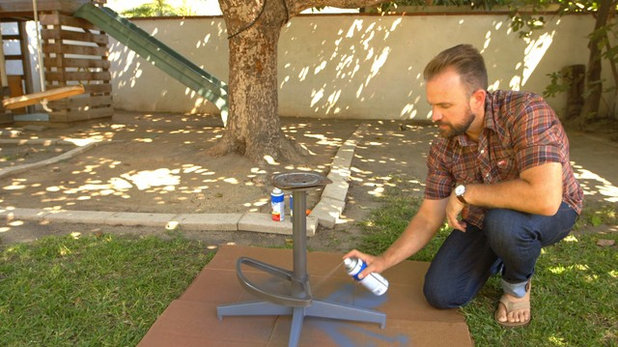
8. Do the same for the base using your second color. Again, make sure you spray into all the nooks and crannies.
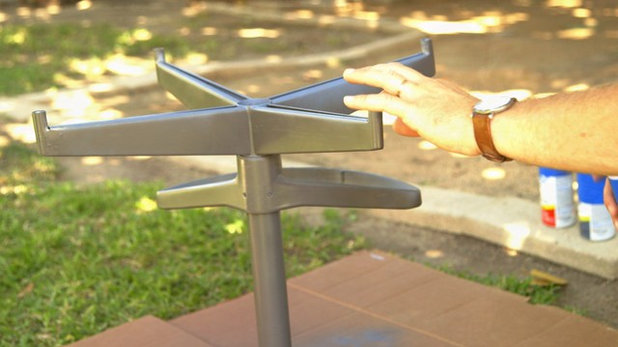
9. When you flip the piece upside down, try to touch the base in an area that’s already dry, or an underside portion, so you don’t get fingerprints on it.
Set the base aside to dry.
Set the base aside to dry.
10. When it’s completely dry, reassemble your stool. Make sure you use a fresh piece of cardboard or other clean work surface other than the one you just worked on to ensure that you don’t get wet paint speckles or debris on your freshly painted stool.
Tip: Consider leaving the underside of the old stool unpainted to serve as a window into its vintage past.
Tip: Consider leaving the underside of the old stool unpainted to serve as a window into its vintage past.

11. Voilà! Your stool has a brand-new look. Use this technique on other vintage furniture to add budget-friendly style to your home.
Watch now: How to Make Over a Thrift Store Stool
Your turn: Have you given an old piece of furniture a snappy new look? Please share your before-and-after photos in the Comments!
Browse more DIY projects
Watch now: How to Make Over a Thrift Store Stool
Your turn: Have you given an old piece of furniture a snappy new look? Please share your before-and-after photos in the Comments!
Browse more DIY projects


We believe that the transition of a house into a home is a sense of history and a piece of the future. It tells... Read More
What are you working on?


Related Products
Peabody Landscape Group was founded in 1979 by Douglas & David Peabody. Our commitment is to carefully listen and... Read More
Related Stories
Houzz TV Live
5 Design Ideas From the Most Popular Photos So Far in 2024
In this video and article, see clever design tricks that helped make these among the most-saved new spaces on Houzz
Full Story
Events
5 Trends for Kitchen and Bath Products in 2024
See fascinating new features for showers, tubs, faucets and more launched at the 2024 Kitchen and Bath Industry Show
Full Story
Houzz TV Live
5 Kitchen Design Trends Worth Considering
Learn about open-concept kitchens, long islands and more trends happening now from the latest Houzz research data
Full Story
Houzz TV Live
5 Home Design Trends on the Rise in 2024
Watch a short video and read about the design and remodeling features set to dominate in the coming year
Full Story
Houzz Tours
Tour a Contemporary London Home Full of Light and Garden Views
See and read how an architect on Houzz dramatically brightened once-dark spaces to create an airy contemporary home
Full Story
Houzz Tours
Peek Inside a Desert Home With a Natural Look and Storage Galore
See and read how a designer helps a couple update interiors with durable materials and features for entertaining
Full Story
Entertaining
5 Design Ideas Pros Recommend to Create a Home for Entertaining
Pros say you should consider these elements when looking to create a party-friendly home atmosphere
Full Story
Houzz Tours
Light and Airy Home With a Playful Spirit and Durable Details
See and read how a designer on Houzz helped a couple create lively interiors with natural materials and fun elements
Full Story
Kitchen Backsplashes
5 Kitchens With Beautiful Backsplashes
Watch and read how designers on Houzz use tile, color and pattern to create impressive backdrops worth a second glance
Full Story
Trending Now
5 Design Trends Rising Now
See and read what designers say are the top colors, materials, styles and other elements homeowners are asking for
Full Story
SEM is a brand of paint that is used in various areas, including
automotive. It is somewhat "flexible" as is used on arm rests, steering
wheels and horn covers, leather refinish "vinyl and nyleather". Also
good on plastic.
https://www.semproducts.com/
One thing
that would make an item like this look rather neat is a "hammered"
finish paint. Many older Jags used this finish on a lot of under hood
items, like the breather assembly. I've re-finished many items, the
hammered finish can make a old ceiling fan look really good.
As
for brands of paints for most any refinish, re-purpose, I've found in
my over 30 years, especially on many metals and plastics that
Rust-O-Lium is one of the easiest to work with and get a good finish.
you need to spray a couple coats of clear unless you won't the color to wear off. Especially on the seat and foot rest.
If you use a good quality, like Rustolium, Clear isn't necessary really, but it can't hurt. Just use same brand of clear coat.
With SEM product on seat, don't think clear is recommended on some of the colors/products. I certainly wouldn't use a product on seat that has no elasticity, there are probably others, I just refuse to use "cheap time", only to have it look bad after it's sat on after several weeks.
What would be really cool, if it's for a real shop, go easy rut and add non stick tape like say used on a trailer fender or mower deck for tops of legs/feet, (kinda like sandpaper, not as harsh) or, tape them off and add a truck bed liner type product. You can buy Rhino products in spray cans, or like me, buy larger quantity and use a HPLV top load sprayer, it's like a oversized air brush. This would also make for a non slip like surface on tops, and your feet won't slide off to easily.
I actually have one of my air brush sets with a large glass cup. Likely hold enough to do 2 coats with one filled bottle.