


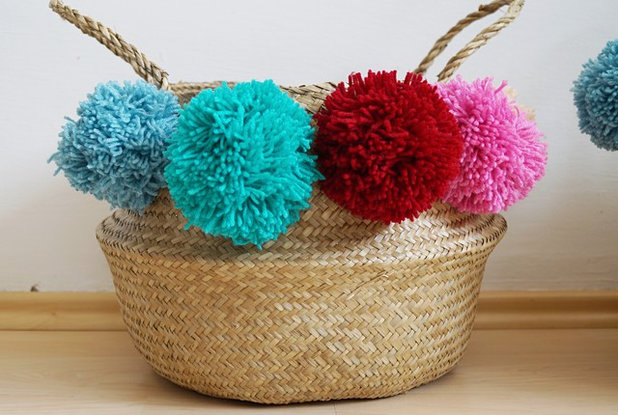
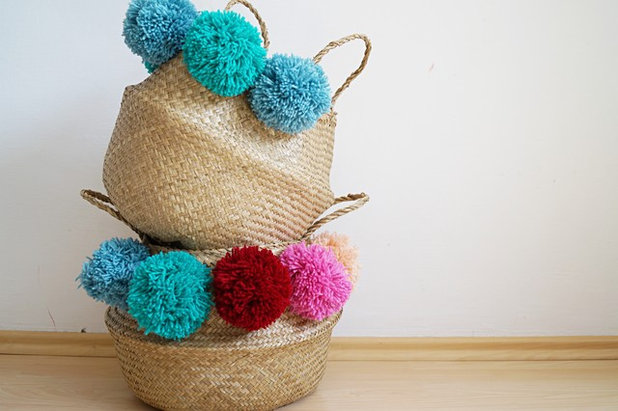
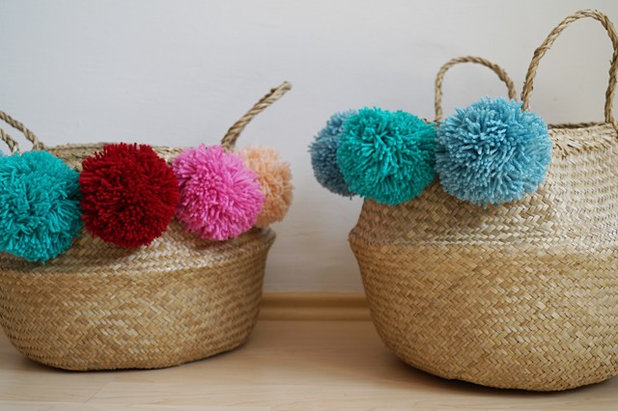
DIY: Fun Frills for Your Storage Basket
Turn a simple sea grass basket into a colorful piece of decor with handmade pompoms in your favorite colors
Sarah Arlt
November 23, 2016
As a mother of two young girls, I know that it can get a bit messy at home. I’m constantly having to pick up toys and other things. For me, the best way to tidy up is to have a few baskets around for quick storage of loose items. I found some simple sea grass baskets for that, but I wanted to make them prettier. Since one of my daughters recently started making pompoms, this DIY idea came to me.
Materials
- Compass
- Cardboard
- Scissors
- Yarn
- Basket
- Embroidery needle (optional)
Instructions
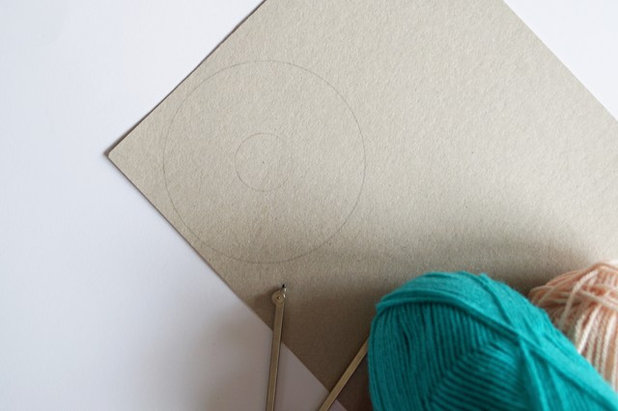
1. Make the pompom form. Using a compass, draw two doughnut shapes on cardboard. They should be about 4 inches (10 centimeters) in diameter, with the hole in the center about 1 inch (2.5 centimeters). To make smaller pompoms, adjust the size of the circles. I wouldn’t make them much bigger because they’d get too fluffy and unstable.
1. Make the pompom form. Using a compass, draw two doughnut shapes on cardboard. They should be about 4 inches (10 centimeters) in diameter, with the hole in the center about 1 inch (2.5 centimeters). To make smaller pompoms, adjust the size of the circles. I wouldn’t make them much bigger because they’d get too fluffy and unstable.
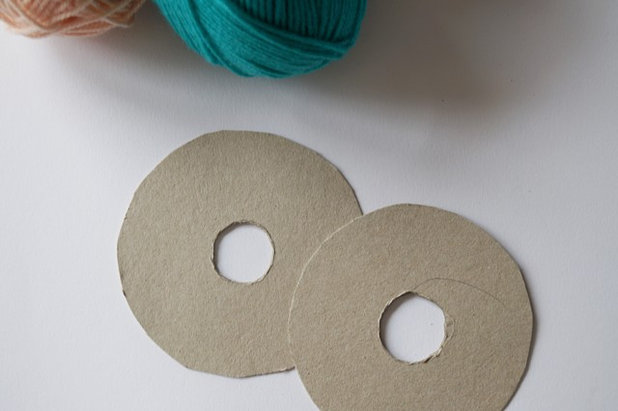
Using scissors, cut out the circles and stack them on top of each other.
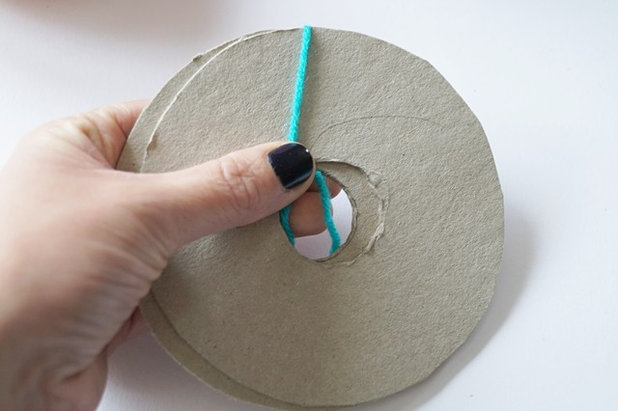
2. Wrap the yarn. Now take your yarn and start wrapping it around the two stacked cardboard circles, securing an end as you go.
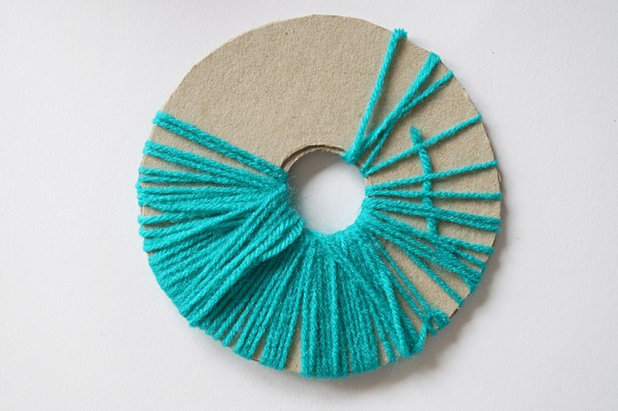
After a while, it should look like this.
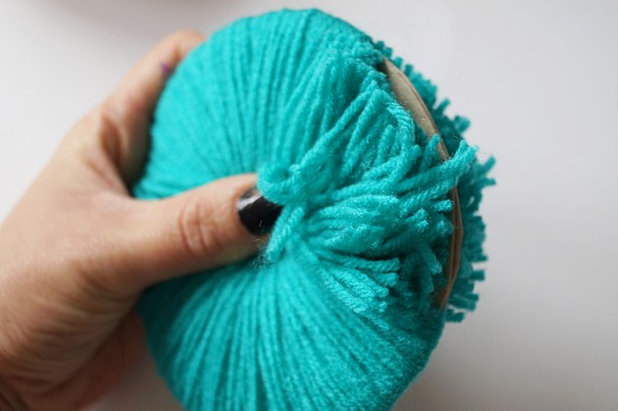
Keep wrapping the yarn until you have a thick doughnut, then cut the yarn and secure. Grasp the doughnut firmly or press it against a table. Slide a blade of the scissors between the circles and cut the strands of yarn at the same length all the way around.
3. Tie it up. To make a pompom from all these short pieces of yarn, cut another strand of yarn and slide it between the two cardboard circles, pull the ends tight and tie them together. This strand should be fairly long because we will need it to attach the pompom to the basket.
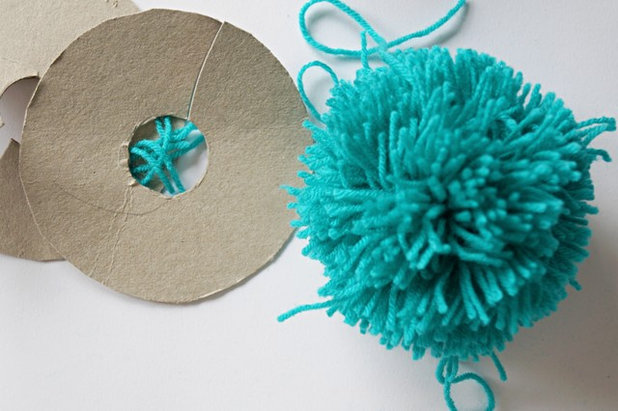
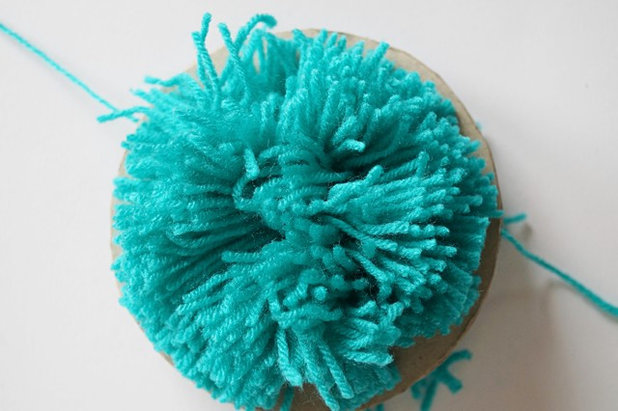
4. Cut away the cardboard. Now you can cut through one side of the cardboard circles and remove them. To make the pompom nice and round, trim any pieces of yarn that stick out. Take care not to cut the long strand of yarn you used to tie the pompom together.
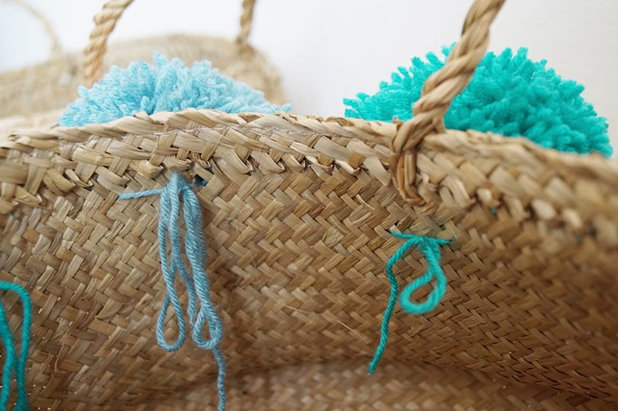
5. Attach the pompom. With this long strand, tie the pompom on the basket. Run the ends of the strand through gaps in the weave. You can also use an embroidery needle if the weave is tight. Knot the ends of the strand on the inside of the basket.
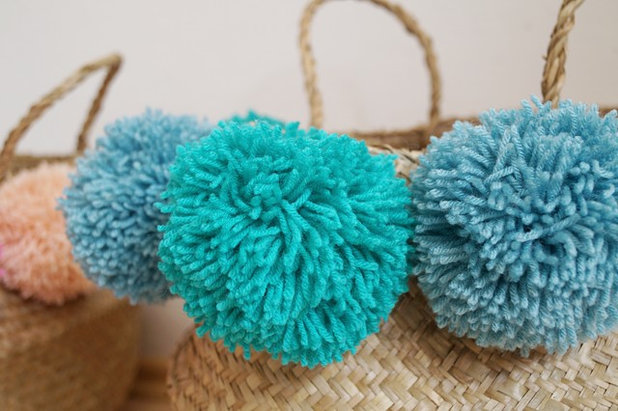
Add as many pompoms as you like, and your fluffy border is finished.


Because every home deserves an amazing kitchen: A beautiful, welcoming and functional space that’s designed for... Read More


Related Products


Related Stories
Fall and Thanksgiving
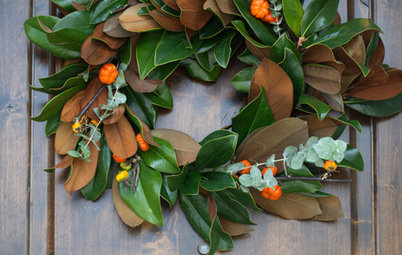
DIY: Make a Fresh Magnolia Wreath
Learn how to add a statement piece to your front door with these easy-to-find evergreens
Full Story

Bathtubs
10 Times When Painting a Claw-Foot Tub Refreshed a Bathroom
See how designers and homeowners use colorful paint to give tubs and bathrooms a fresh look
Full Story
Decorating Projects
6 Fun Ways to Decorate With ... Tape?
By Janet Paik
Add a new accent wall, a midcentury closet detail and more with this budget-friendly, multipurpose wonder
Full Story

Decorating Guides
How to Hang a Heavy Mirror
By Erin Carlyle
Here’s what to know about your mirror, wall and hanging hardware to do it right
Full Story
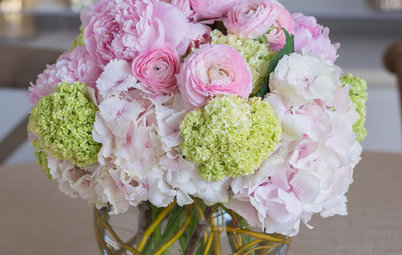
Mother’s Day
Surprise Mom With an Elegant DIY Bouquet
For Mother’s Day, use flowers and branches from your local market or backyard to create this pastel beauty
Full Story
Decorating Projects
12 Projects to Indulge Your Spring Fever
Get busy beautifying your home with one of these budget-friendly DIY decorating projects
Full Story

Entryways
DIY: Corral Your Boots With This Handy Entryway Tray
By Faith Towers
Follow along to make this easy and chic tray to protect your floors when it’s soggy outside
Full Story
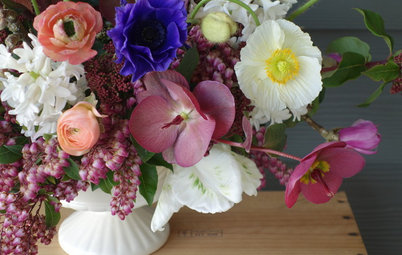
Valentine’s Day
Put Together a Romantic and Whimsical Valentine’s Day Bouquet
By Becky Harris
Use American-grown branches and blooms for a truly individual way to show your love
Full Story

Crafts
Create a Festive, Colorful Mardi Gras Bead Wreath
Reuse collected beads from parades for an easy-to-make front door accent
Full Story

Organizing
DIY: Make a Wooden Wall Organizer to Curb Entryway Clutter
By Faith Towers
Create a hanging catchall for hats, coats, keys and phones
Full Story
Too cute and easy!! Thanks for sharing, can't wait to try this in my 5yr old daughters room, she would love these Happy Thanksgiving to all!!