


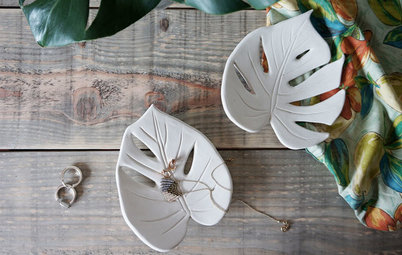
Rough-and-Ready Concrete Storage for the Counter
DIY expert Lovisa Häger shows how to create stylish storage made of humble concrete

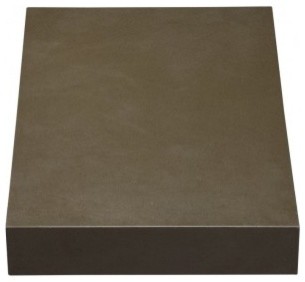
Concrete is one of my favorite materials to work with, so when I realized that we needed some new storage for the bathroom, the choice of material was obvious. In the bathroom, cosmetics, toiletries and jewelry seem to multiply and then take over whatever free space is available. Using concrete to create storage space is a fun way to give these things a stylish place of their own.
Instructions
1. Cut a circle of sturdy paper or flexible cardboard with a diameter of about 8 inches (20 centimeters). Form it into a cone shape. Test to see if you have the right size by slipping your rings, watches and bracelets over the cone. They should rest somewhere in the middle.
1. Cut a circle of sturdy paper or flexible cardboard with a diameter of about 8 inches (20 centimeters). Form it into a cone shape. Test to see if you have the right size by slipping your rings, watches and bracelets over the cone. They should rest somewhere in the middle.
For a smaller cone, start with the same 8-inch-diameter circle but bend it tighter for a narrower shape. Reinforce the paper cones with masking tape to help them withstand the pressure of the concrete that will be poured in them.
3. To create a tray, you will need a two-piece mold. The bottom of a box can work for the outside of the mold, or you can make one out of cardboard. I taped together two paper milk cartons for the inside of the mold, but you can use almost anything sturdy.
4. I made sure that the outside mold was about 1 inch (2 centimeters) wider and longer than the milk cartons so that the tray edge would be about a half-inch (1 centimeter) thick all the way around. Tape the edges and corners to prevent the concrete from leaking out of the mold.
5. Time to mix the concrete! I normally mix 1¼ cups of concrete powder with two-fifths cup of water. You can adjust those measurements and add more water to get the texture you want. The runnier the concrete, the smoother the end result.
To create the cones, place the paper molds upside down in a glass and fill them with concrete. Stop when the concrete is about a half-inch (1 centimeter) from the top.
To create the cones, place the paper molds upside down in a glass and fill them with concrete. Stop when the concrete is about a half-inch (1 centimeter) from the top.
6. For the tray, first fill the bottom of the outside mold with concrete. I made a layer about a half-inch (1 centimeter) thick. This will be the bottom of your tray. Shake and tap the filled mold to help the concrete settle and get rid of any air bubbles.
7. Put the milk cartons on the concrete, leaving at least a half-inch (1 centimeter) on all sides. Press gently to secure it to the bottom layer. Add more concrete until it is all the way to the top of the outside mold. Smooth the concrete using a spoon, putty knife, craft stick or another similar tool.
8. Let the concrete dry for at least two days before removing the molds. The edges of the dried concrete will most likely be rough, so sand them using two kinds of sandpaper: Start with coarse sandpaper and finish with a fine grade.


Sponsored
Your Custom Bath Designers & Remodelers in Columbus I 10X Best Houzz
Materials