


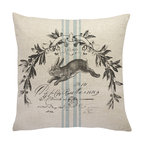
DIY: Create a Dream Tree for Fall
Hang your wishes and thanks on a heartfelt arrangement of branches and leaves
Shoshana Gosselin
September 20, 2011
Our company has a fresh forward thinking approach to interior design. We offer livable luxury that reflects our clients’ personality and lifestyle. We use products that offer high quality and beauty. Our designs are personalized and as unique as you! Whether your project is large or small scale, requires cosmetic changes or includes construction work, we work with contractors and vendors that are talented and experienced. Our greatest benefit is our Full Service. From the initial design concept, to ordering materials and furnishings, coordinating deliveries, advising installations during the construction phase, to setting up your magazine worthy room down to the throw pillows, we help you enjoy the process by taking care of all the little details. It's time to love your room!
Visit...
Our company has a fresh forward thinking approach to interior design. We offer livable... More
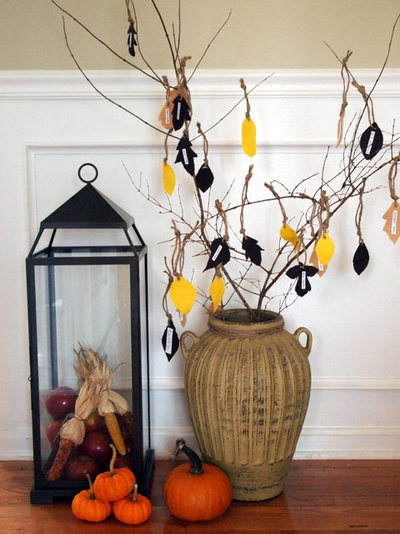
Fall begins Friday, and with this new season you may be hoping new dreams come true for you. Whether that wish is for peace on Earth, finding love, finding a new job, or something else that would make your life happier, this DIY Dream Tree is a fun way to keep those dreams near to remind you of who you want to become and where you want your life to go. Every leaf on each branch will contain a dream (wish) handwritten by you. It is easy (you can do it in a day) and inexpensive, and it adds a warm feel to a room.
Make a Dream Tree for yourself, have your family help, or give one as a gift for someone special.

Place it by the fireplace or in the foyer, or create a smaller version for a tabletop.
This is a kid friendly project too!!
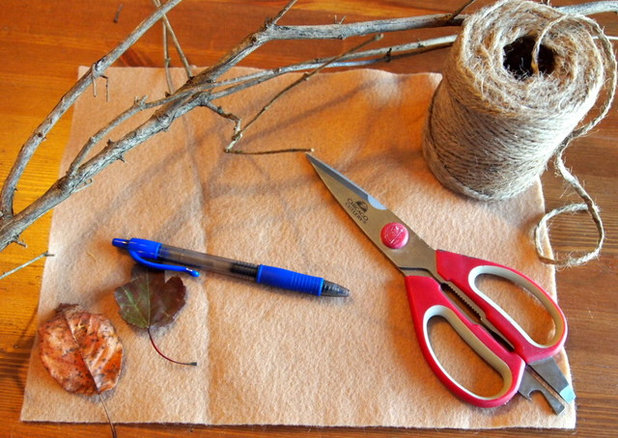
Supplies you will need:
You can find fallen branches and leaves outside your home or at a park. The remaining materials can be found at a craft store. Choose a vase deep enough to support your branches. It can be small for a tabletop, or larger for the floor.
- Felt
- Scissors
- Jute twine
- Branches
- Leaves
- Vase
- White copy paper
- Fine-tip permanent pen (such as a Sharpie)
- Clear tape
- Double sided tape
You can find fallen branches and leaves outside your home or at a park. The remaining materials can be found at a craft store. Choose a vase deep enough to support your branches. It can be small for a tabletop, or larger for the floor.

Step 1. Decide how big you want your Dream Tree to be, and find an appropriate sized vase for it. Then arrange your branches in it and trim as needed.
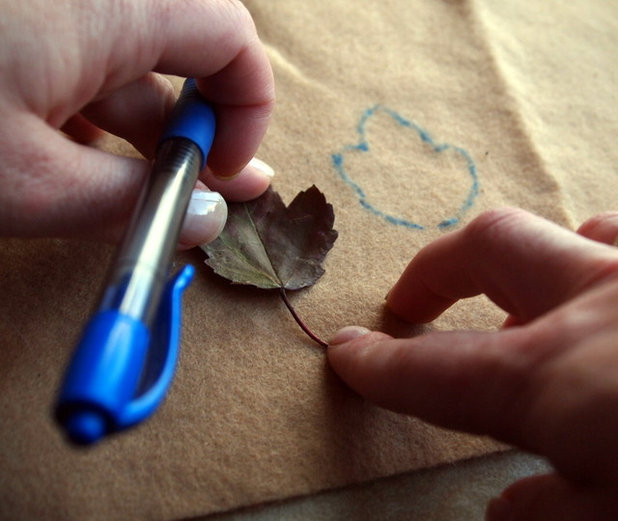
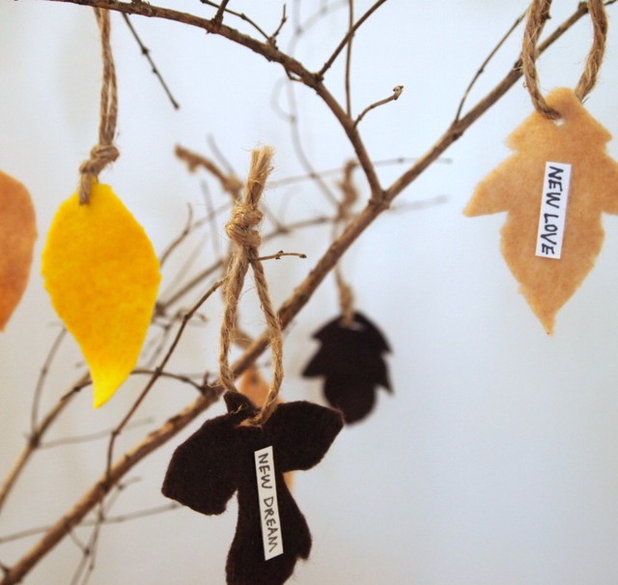
Step 2. Create your collected leaves! Using a pen, trace around your leaves, drawing their shape onto the felt. Cut out your leaf shape, trimming just inside the outline to remove the pen marks.
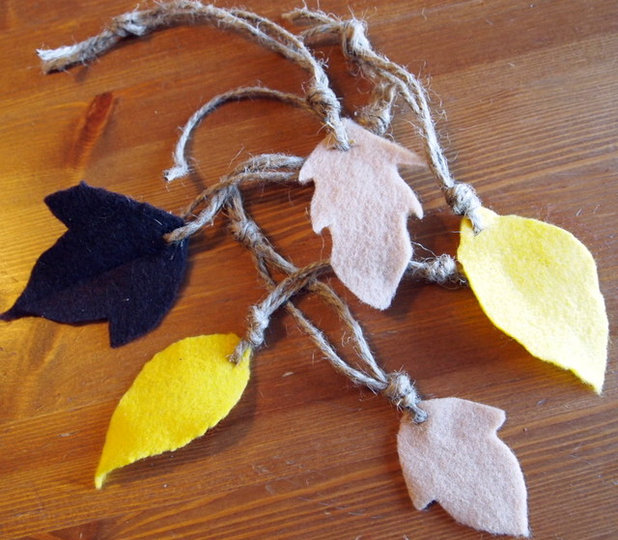
Step 3. Make a hanger for each leaf. Cut a little hole toward the top of the leaf with the point of your scissors. Then loop a piece of jute twine through the leaf and secure it to your leaf with a knot at the base (see photo). Leave three inches, then make another knot to create a loop. Cut off the excess.

Step 4. Grab a fine-tip permanent pen, white copy paper and clear tape.
Write your wishes on the paper. The height of your words should be shorter than the height of a piece of tape.
Write your wishes on the paper. The height of your words should be shorter than the height of a piece of tape.

Cut around each written wish.

Cut a piece of tape long enough to cover each cut piece, place over the paper, and trim away the excess.
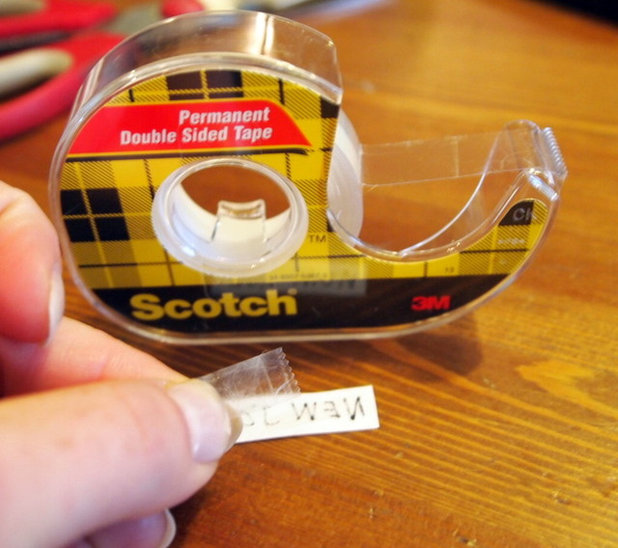
Step 5. Grab your double sided tape. Place a piece on the back side of your wish paper.
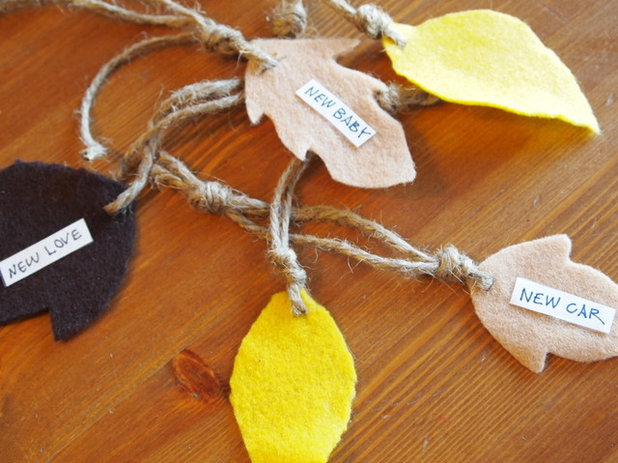
Then press the back side down on the felt leaf.

Step 6. Hang your leaves on the branches. Now I hope your dreams come true!

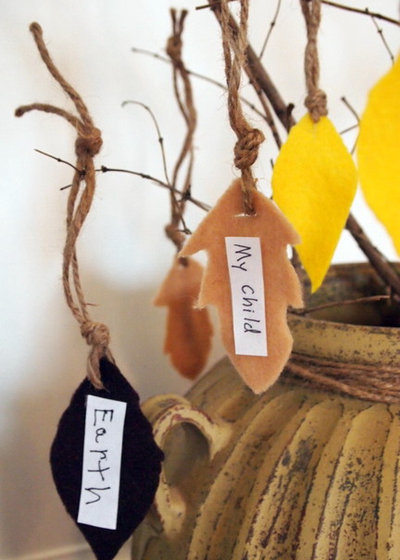
Use this project as a learning tool for kids by renaming it "The Thankful Tree." Instead of writing wishes, everyone can write what they are thankful for. This is a great idea to do on a rainy day or as a Thanksgiving project.
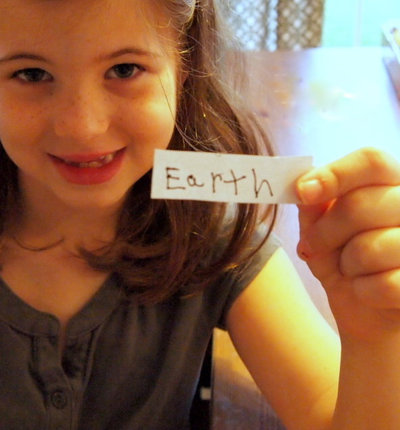
"I am thankful for the Earth!"
Happy Fall everyone!
More DIY:
Frilly Floral for a Child's WallPizza-Box Wall Stencil
Sit Pretty With Mismatched Chairs
More DIY:
Frilly Floral for a Child's WallPizza-Box Wall Stencil
Sit Pretty With Mismatched Chairs


With over 30 years of experience working with families from all over the Columbus, Ohio area, we're confident... Read More
What are you working on?


Related Products


Because every home deserves an amazing kitchen: A beautiful, welcoming and functional space that’s designed for... Read More
Related Stories

Holidays
10 Easy Ways to Give Your Entryway and Front Yard a Holiday Boost
Make your entry inviting this season with decorations, lighting, furniture and more
Full Story
Holidays
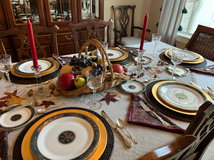
Houzz Call: Share Your Thanksgiving Tablescape!
By Becky Harris
Please share photos and tell us about your Thanksgiving decor and traditions
Full Story

Holidays
10 Ways to Shower Your Home With Gratitude
Give your home some love with these thoughtful ideas and watch it return the favor
Full Story

Holidays
Porch Decorating Ideas From Thanksgiving to New Year’s
Long-lasting wreaths, potted plants and more can cheer up your entryway from fall through winter
Full Story

Holidays
Your Complete Holiday Season Planner
By Anne Colby
Use this checklist to stay organized as you get ready for Thanksgiving, Hanukkah, Christmas, Kwanzaa and New Year’s
Full Story

Landscape Design
8 Ideas to Give Your Yard a Boost for Fall
Make easy refreshes to your porch and landscape to extend your outdoor enjoyment
Full Story

Housekeeping
Start the Season Right With Some Fall Cleaning To-Dos
Take these steps to freshen up rooms and get rid of summer’s dust and grime
Full Story

Houzz Call
Houzz Call: Share Your Thanksgiving Tablescape!
By Becky Harris
Will your holiday table be set for two or 12 this year? Tell us about your meal and post a picture
Full Story

Most Popular
Thanksgiving Tales: When the Turkey Tanks
Houzz readers prove adept at snatching victory from the jaws of entertaining defeat
Full Story

Feel-Good Home
Simple Pleasures: A Cozy Home in Cold Weather
Stock up on these treats and essentials to make even blustery days and snowed-in time feel special
Full Story
We did a table tree branch and had everyone write what they were thankful for on Thanksgiving. Everyone really liked the idea!