


When to Harvest Vegetables and Fruits
Get the most from your garden by knowing the best times to pick different edibles
Marianne Lipanovich
August 15, 2021
Houzz Contributor. I'm a California-based writer and editor. While most of my projects are garden-based, you might also find me writing about home projects and classical music. Away from the computer, I'm found in the garden (naturally), on my bike, or ice-skating outdoors (yes, that is possible in California). I'm also willing to taste-test anything that's chocolate.
Houzz Contributor. I'm a California-based writer and editor. While most of my projects... More
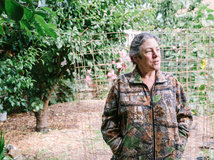
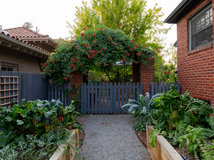
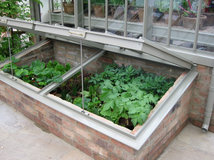
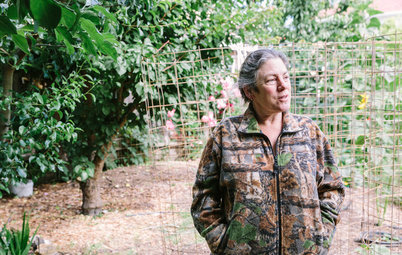
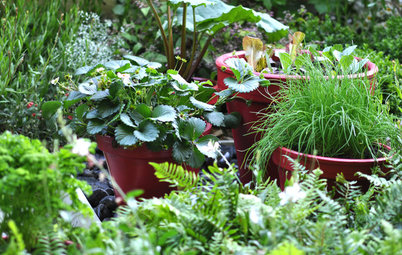
One of the joys of growing your own vegetables is enjoying them when they’ve been freshly picked at the peak of their flavor. One of the conundrums of growing your own vegetables, especially for beginners, is knowing just when that moment is. If you’re wondering if your crop is ready to pick, or worried that it’s beyond its prime, here’s a quick guide to determining harvest time for some of the most popular edibles in home gardens.
Harvest notes: Err on the side of caution, and use clippers or sturdy scissors when harvesting.
Summer Crops
Summer crops like the heat and long days of summer. You’ll most likely get started with these plants in late winter or early spring, after the threat of frost has passed.
Learn more about growing summer fruits and vegetables
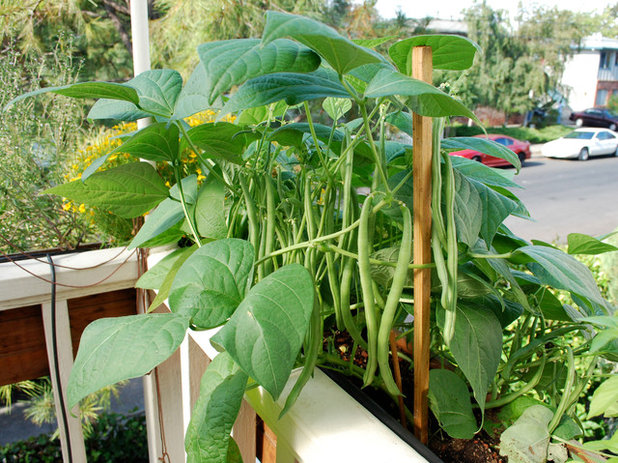
Beans. Pick green beans, or string beans, and shelling beans when they’re long but still thin. Don’t let either get too large or mature for the best flavor. Harvesting every couple of days will keep your plants producing longer.
Learn more about growing beans
Summer Crops
Summer crops like the heat and long days of summer. You’ll most likely get started with these plants in late winter or early spring, after the threat of frost has passed.
Learn more about growing summer fruits and vegetables
Beans. Pick green beans, or string beans, and shelling beans when they’re long but still thin. Don’t let either get too large or mature for the best flavor. Harvesting every couple of days will keep your plants producing longer.
Learn more about growing beans
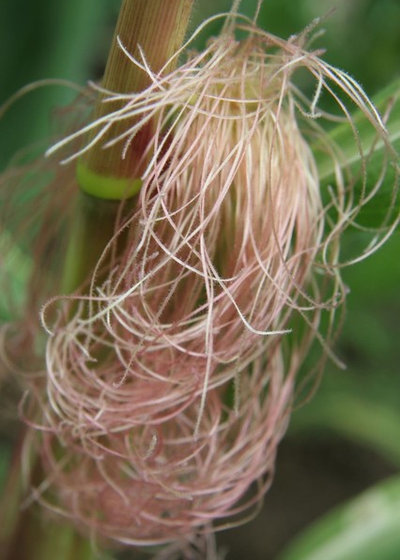
Corn. The silks are the first indicator that the corn is ready to harvest — they should have turned brown but should still be silky and not dry. The husk should also still be green, but the end should have become more rounded. Just to be sure, peel back the husk and poke at a kernel. It should be milky inside.
For best eating, use immediately. If that’s not practical, keep the husks on until you’re ready to cook the ears.
Bonus: Harvest the cornstalks, set them in a cool, dark place to dry and then use them as part of your exterior decor in the fall.
Learn more about growing corn
Find a landscape designer on Houzz
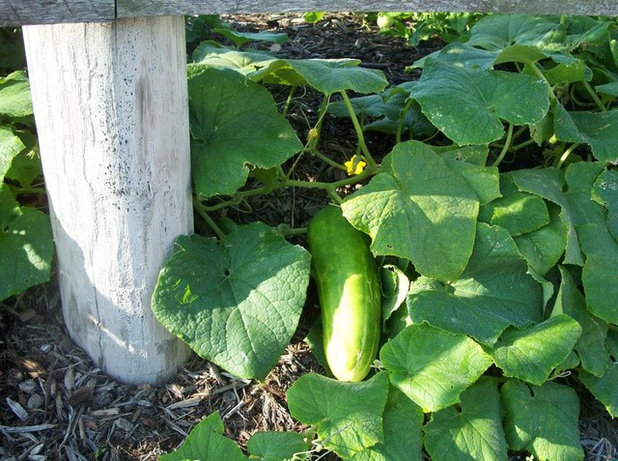
Cucumbers. Cucumbers are ready to harvest once they’ve reached a size you can use. The older cucumbers get, the more bitter they become, so harvest when they’re still firm and the skin is still glossy. Keep picking to keep the plant producing.
Cucumbers should always be cut from the plant with clippers or sturdy scissors. If you aren’t using your picks immediately, leave a bit of stem to help keep them from rotting.
Learn more about growing cucumbers
Cucumbers should always be cut from the plant with clippers or sturdy scissors. If you aren’t using your picks immediately, leave a bit of stem to help keep them from rotting.
Learn more about growing cucumbers

Eggplant. If the skin of an eggplant is purple and shiny, it’s ready to harvest. Letting it continue to grow won’t produce a more mature fruit. Instead, it will tend to make it more bitter.
Snip or clip the stem when harvesting to avoid damaging the plant itself.
Learn more about growing eggplant
Snip or clip the stem when harvesting to avoid damaging the plant itself.
Learn more about growing eggplant
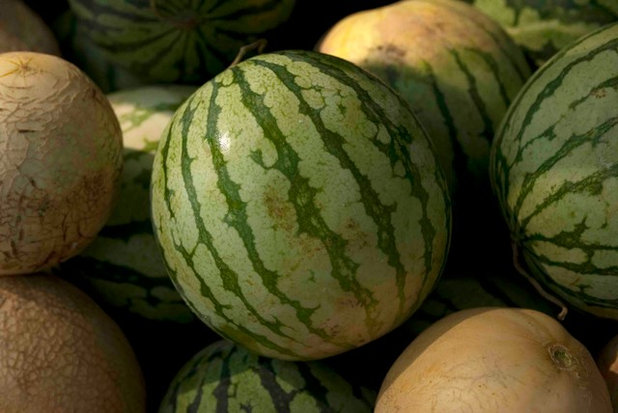
Melons and watermelons. Melons can be tricky, as anyone who has ever harvested (or bought) a nonjuicy melon can tell you. Fortunately, there are a few ways to tell if your particular melon is ripe.
Cantaloupes should be harvested when they are fragrant, look like they have a net over them and can easily be lifted and separated from the plant. For other melons, pick when they have a strong and sweet aroma. Another sign is when the blossom end is slightly soft.
You should hear a “thunk” when you rap on a watermelon. To double-check for ripeness, see if the tendrils near the stem have begun to wither and darken and if the underside has begun to turn yellow. Watermelons should always be cut, not pulled, from the plant.
Learn more about growing melons and watermelons.
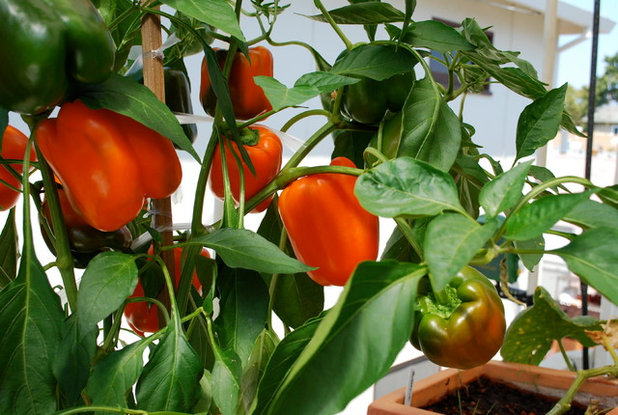
Peppers. Peppers are pretty easygoing when it comes to harvest time. They can be picked once they reach a usable size and are firm, but the longer you leave them on the plant, the more complex their flavors will become. Sweet peppers become sweeter as they change from their initial green color; hot peppers become more intense.
The exception is pimientos; they need to be completely red before harvesting.
Learn more about growing peppers
The exception is pimientos; they need to be completely red before harvesting.
Learn more about growing peppers
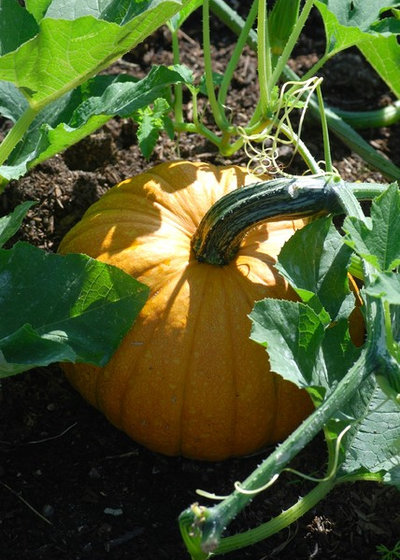
Pumpkins. Don’t worry if your pumpkin crop is running a little behind on the harvest schedule; they can even handle a light frost as long as you pick them before the heavy frosts hit.
Harvest pumpkins once they are full size and firm and the stems have started to dry out. Stop watering a week before you plan to harvest, then cut each stem about 4 inches from the pumpkin itself. Store in a warm and airy outdoor spot for a couple of weeks to let them cure.
The stems can snap, so hold your pumpkins underneath when moving them from place to place.
Learn more about growing pumpkins
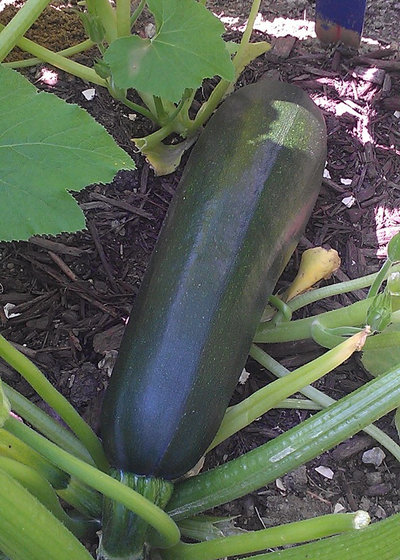
Squash. The hardest part of harvesting squash, especially summer varieties, is staying on top of it. Summer squashes will be ready to harvest about two months after you sow seeds. They also grow quickly, so be prepared to check your squash patch daily. Cut the crooked-necked varieties when they are about 2 to 3 inches long; straight squashes should be about 4 to 6 inches long.
Winter squashes, those that can be stored up to six months, give you a little more breathing room. Wait until the skin is hard and the vines have dried up before cutting them from the vines. Set them outdoors in a cool spot until the stems have shriveled, and then store them indoors in a cool, dry area.
Learn more about growing squash
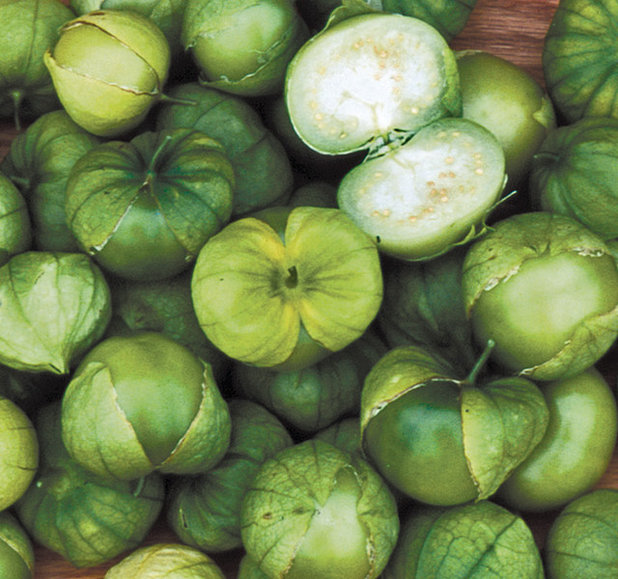
Tomatillos. A ripe tomatillo, even though it is still green in color, is easy to identify. Pick when the fruit has filled the husk but the tomatillo is still firm. The husk should also have started to turn brown and begun to split.
Learn more about growing tomatillos
Learn more about growing tomatillos
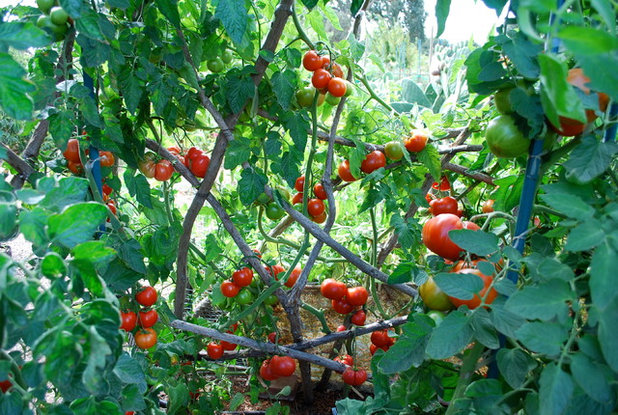
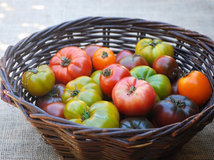
Tomatoes. Nothing really beats a homegrown tomato, so picking them at their peak is a delight. For most tomatoes, they should be completely colored and just a bit soft. Because they tend to crack when they’re fully mature, heirlooms and cherry tomatoes should be picked a bit earlier; just let them ripen out in the open rather than refrigerating them. All tomatoes should be easy to pull from the plant.
But an added joy of tomatoes is that you don’t have to wait until they’re ripe to enjoy them. Fried green tomatoes are a real recipe (not just a movie title), and if the fall and winter frosts are rapidly approaching, you can always harvest the green fruits and let them ripen in a cool spot indoors. Or simply pull up the entire plant and hang it upside down in a cool, dry place to get the last of the summer’s crop.
Learn more about growing tomatoes
Cool-Season Crops
These favorite edibles prefer the shorter days and cooler weather of fall and spring. Some even do their best with a touch of frost. Most gardeners will plant these crops at the end of summer or early in the year.
Learn more about cool-season crops
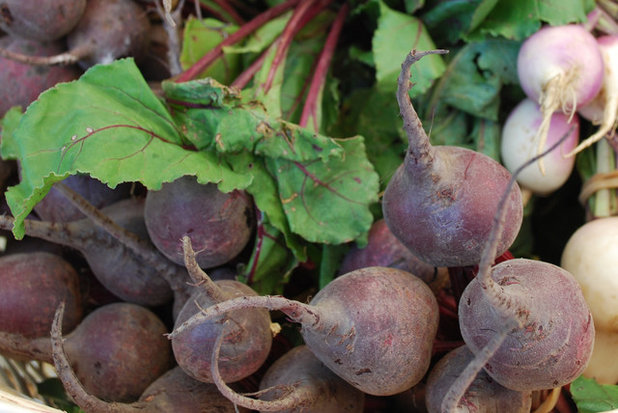
Beets. When their shoulders are 1 inch to 3 inches across, it’s time to start digging up the roots. Don’t overlook the leaves while you’re doing this — they’re equally edible and tasty.
Learn more about growing beets
These favorite edibles prefer the shorter days and cooler weather of fall and spring. Some even do their best with a touch of frost. Most gardeners will plant these crops at the end of summer or early in the year.
Learn more about cool-season crops
Beets. When their shoulders are 1 inch to 3 inches across, it’s time to start digging up the roots. Don’t overlook the leaves while you’re doing this — they’re equally edible and tasty.
Learn more about growing beets
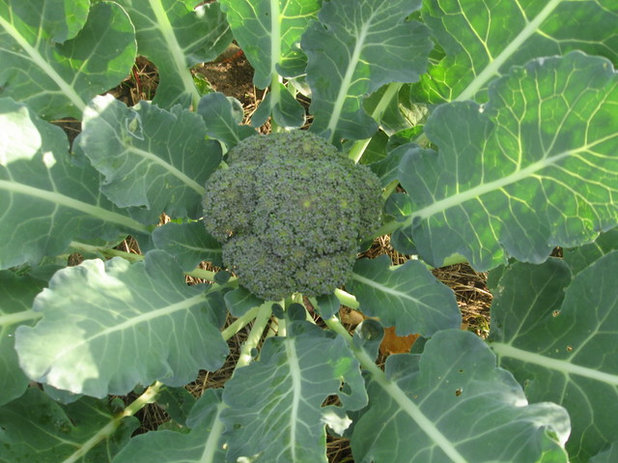
Broccoli. Broccoli is ready to harvest in about two and a half to three and a half months after you’ve sown the seeds. The trick is to harvest when the head is fully grown but the plant hasn’t yet flowered.
Cut the stem about 6 inches below the head (don’t pull).
Learn more about growing broccoli
Cut the stem about 6 inches below the head (don’t pull).
Learn more about growing broccoli
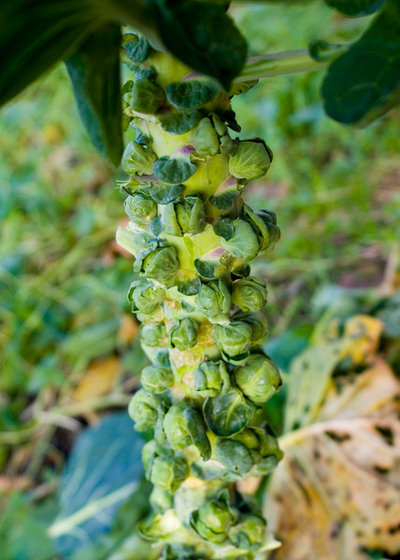
Brussels sprouts. These miniature heads are ready to pick when the large leaves on the plant have turned yellow and the heads themselves are firm and almost the size of a golf ball but haven’t yet opened.
Start from the bottom and snap off the individual heads — these are part of one vegetable that you don’t want to cut unless you’re harvesting the entire stalk.
Learn more about growing Brussels sprouts
Start from the bottom and snap off the individual heads — these are part of one vegetable that you don’t want to cut unless you’re harvesting the entire stalk.
Learn more about growing Brussels sprouts
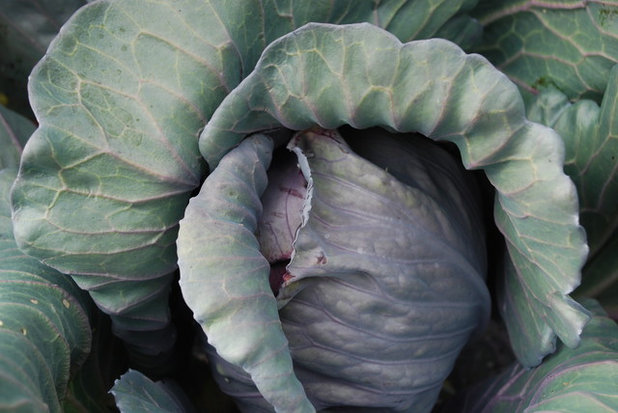
Cabbage. Harvesting the perfect head of cabbage requires paying attention. Most cabbages are ready in about two and a half to three and a half months after sowing, depending on the variety. You want to leave them on the plant until they’re fully grown, but harvest them before the heads split. Check regularly to see how each plant is doing.
Learn more about growing cabbage
Learn more about growing cabbage
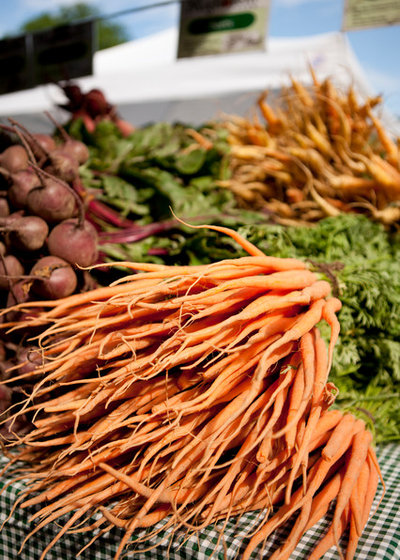
Carrots. Carrots come in a range of lengths, from very short to very long, so before you start pulling, double-check the expected size of your variety. If you aren’t sure, another easy way to see if they’re ready is to check the shoulders of the root; they should be about three-quarters of an inch to 1 inch in diameter.
Learn more about growing carrots
Learn more about growing carrots
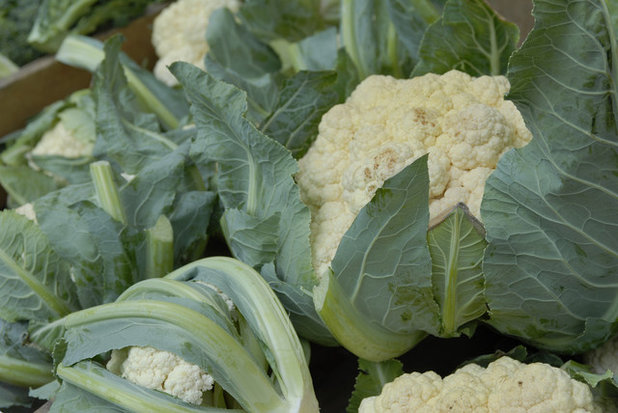
Cauliflower. Cut off cauliflower heads when they’re full and firm and still holding together. Cut just below the head itself and leave a few leaves in place.
Learn more about growing cauliflower
Learn more about growing cauliflower
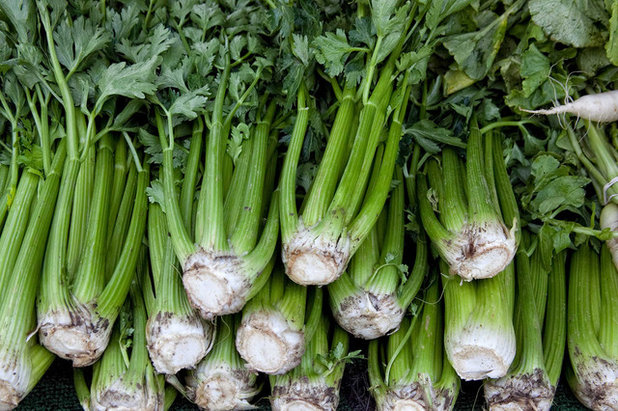
Celery. If you’ve gone to the trouble of growing, and possibly blanching, celery, then you want to know when it’s time to harvest. They’re generally ready about four months after you’ve sown the seeds, but you’ll need to start blanching them about three to four weeks before that. This process involves blocking the celery stalks from the sun with soil or cardboard to prevent them from developing a bitter flavor.
You can harvest individual stalks or cut off the entire plant at the base.
Learn more about growing celery
You can harvest individual stalks or cut off the entire plant at the base.
Learn more about growing celery
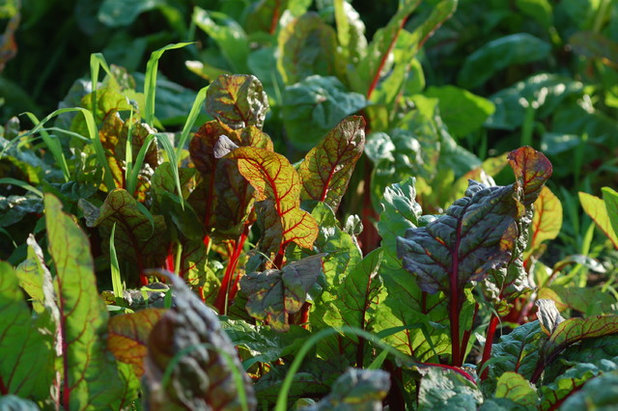
Chard. The younger the leaves and stems, the more tender they are, so continually harvest from the outer edges to get the newest leaves and also to keep your plant producing. Another option is to cut the entire plant back to about 2 inches from the ground — you’ll have plenty of leaves and stems to cook with now, and the plant will rejuvenate.
Gardeners in warm-winter climates may find that their plants last well into winter, and maybe beyond.
Learn more about growing chard
Gardeners in warm-winter climates may find that their plants last well into winter, and maybe beyond.
Learn more about growing chard
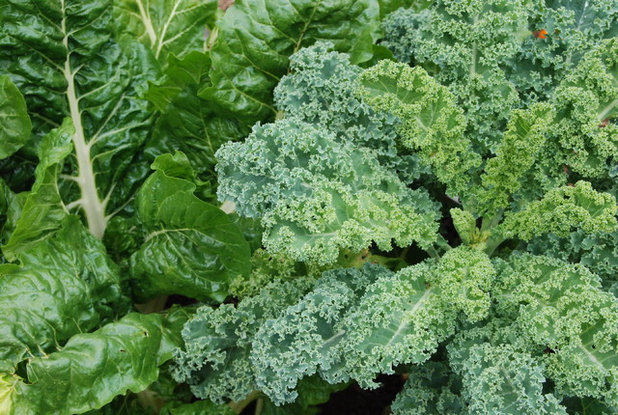
Kale. Want a lot of kale throughout its growing season? Simply cut the outer leaves and let the plant continue to grow. Need a lot at once? You can cut the entire plant back. Either way, kale is a remarkably prolific producer during the cooler months.
Learn more about growing kale
Learn more about growing kale
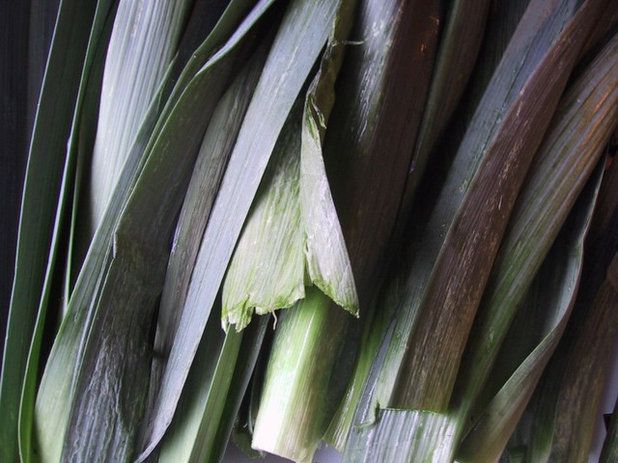
Leeks. Leeks are a vegetable for the patient. It can take more than six months for them to mature, though some may be ready in as little as three months. When they’re one-half inch to 2 inches thick, you can start harvesting.
Learn more about growing leeks
Learn more about growing leeks
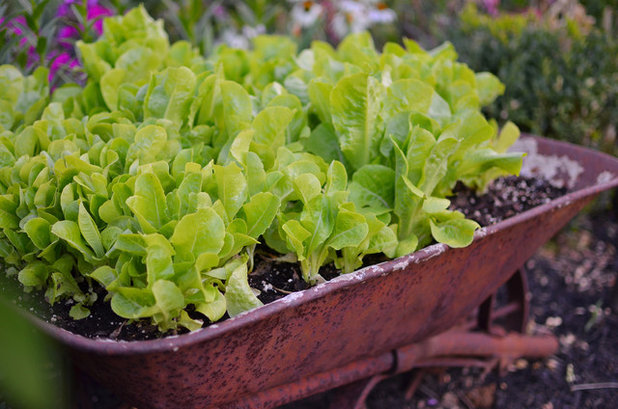
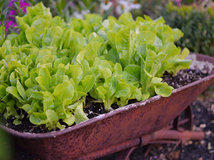
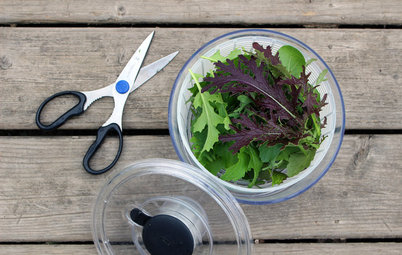
Lettuce. You can start harvesting lettuce the minute the leaves are big enough to use. The more you harvest, the longer your crop will last. For varieties like butterhead and iceberg, you can also wait until the heads are completely formed.
No matter which approach you take, once the plants begin to form flowers, they have passed their prime and will be bitter.
Learn more about growing lettuce and other salad greens.
No matter which approach you take, once the plants begin to form flowers, they have passed their prime and will be bitter.
Learn more about growing lettuce and other salad greens.
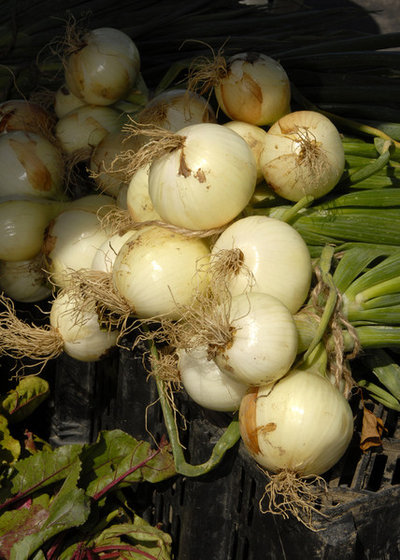
Onions and shallots. Green onions are the easiest members of the onion family to harvest; simply pull them up once they’re big enough to use. Mature onions require a little more care. When about half the foliage has turned yellow, push all the foliage to the ground. Wait about three weeks, then start harvesting.
Shallots are heady to harvest when the shoots have died.
Learn more about growing onions and shallots
Shallots are heady to harvest when the shoots have died.
Learn more about growing onions and shallots
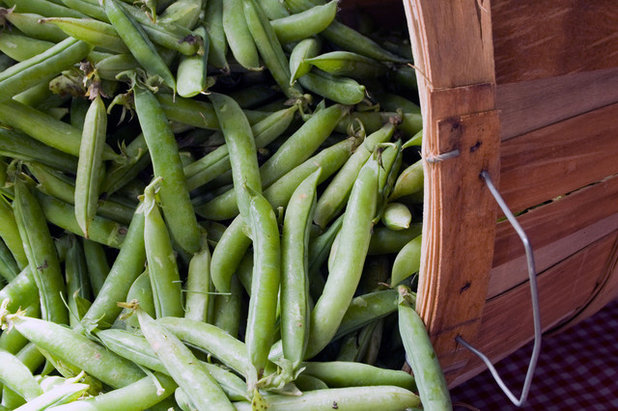
Peas. Both shelling peas and edible-pod peas are best harvested early. Shelling peas, or English peas, are ready when they’re bright green and the peas inside the pods have formed but are not too large. You’ll know that edible-pod peas are ready when the peas inside have just started to appear.
Harvest often for a long-lasting crop.
Learn more about growing peas
Harvest often for a long-lasting crop.
Learn more about growing peas
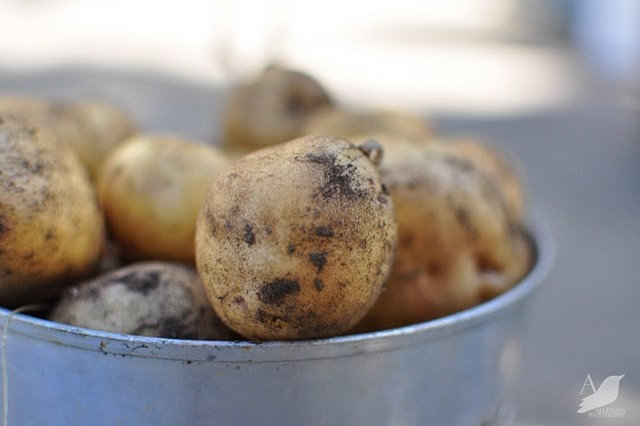
Potatoes. When you harvest depends on what type of potato you want. If you’re looking for new potatoes, dig them about two months after setting out the starts or when the vines start to flower (for those varieties with flowering vines).
More mature potatoes are ready in three to four months. Before harvesting, cut away the vines and wait five to seven days, then dig up the potatoes.
Learn more about growing potatoes
More mature potatoes are ready in three to four months. Before harvesting, cut away the vines and wait five to seven days, then dig up the potatoes.
Learn more about growing potatoes
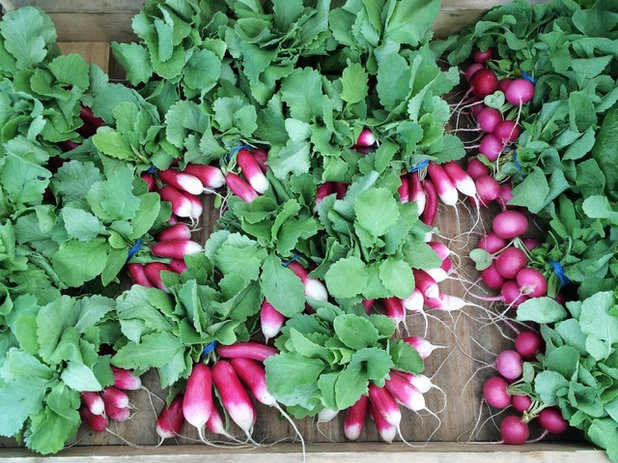
Radishes. These quick-growing edibles can be ready in as little as three weeks. You’ll want to harvest as early as possible, because the younger they are, the sweeter they are.
Learn more about growing radishes
Learn more about growing radishes
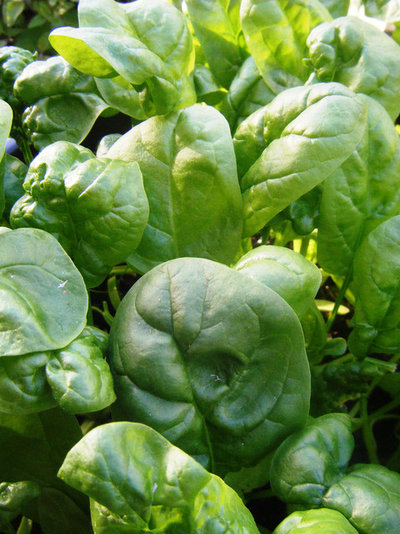
Spinach. Harvesting spinach is pretty foolproof. Once the leaves are big enough to use, you can start cutting them at the stems. They plants will continue to produce until it becomes too warm for them.
Learn more about growing spinach
More on Houzz
Read more edible-gardening guides
Find a landscape designer near you
Shop for gardening tools
Learn more about growing spinach
More on Houzz
Read more edible-gardening guides
Find a landscape designer near you
Shop for gardening tools


Scott Davidson founded Davidson Builders in 1998. Scott graduated from Michigan State with a BS in Construction... Read More
What are you working on?


Related Products


J.S.Brown & Co. is an award winning, full service Design / Build remodeling contractor with more than three... Read More
Related Stories
Gardening Guides
6 Things to Know Before You Start Growing Your Own Food
It takes time and practice, but growing edibles in the suburbs or city is possible with smart prep and patience
Full Story
Urban Gardens
To Get the Food They Believe In, These Urbanites Grow Their Own
Home gardeners farming on their city lots find that local, organic food isn’t the only reward
Full Story
Gardening Guides
How to Plan Your Edible Garden
Get organized before you plant to ensure that your fruits and vegetables have a chance to thrive
Full Story
Edible Gardens
How to Farm Your Parking Strip
Get an up-close look at a thriving street-side edible garden, one of many sprouting up in Seattle
Full Story
Most Popular
Hello, Honey: Beekeeping Anywhere for Fun, Food and Good Deeds
We need pollinators, and they increasingly need us too. Here, why and how to be a bee friend
Full Story
Container Gardens
How to Grow Vegetables in Containers
Get glorious vegetables and fruits on your patio with a pro’s guidance — including his personal recipe for potting mix
Full Story
Gardening Guides
The 8 Tools That Help Bring the Farm to Your Table
Vegetable gardeners get a big assist from these essential helpers
Full Story
Earth Day
Grow a Beautiful Garden With Ecofriendly Greywater
Reducing home water waste means lower bills and a healthier planet. Here's how to set up a greywater home irrigation system that can help
Full Story

Green Building
How to Harvest Rainwater for Your Garden
Conserve a vital resource and save money by collecting stormwater for irrigation in a barrel or tank
Full Story

Gardening and Landscaping
Build a Raised Bed to Elevate Your Garden
A bounty of homegrown vegetables is easier than you think with a DIY raised garden bed to house just the right mix of soils
Full Story
Great info!
I love cucumber and tomato. Glad to see them represented in this article.
Ppppppp PPP pop ppp pop pick pp