


Sew a Pair of Easy Sag-Top Curtains
Create a custom window treatment on the cheap with this simple DIY curtain panel project
Meg Padgett
January 23, 2013
Houzz Contributor. Meg is a budget-minded DIY lifestyle blogger at Revamp Homegoods (http://www.revamphomegoods.com). Her design philosophy is based on the concept that combining thrifty finds with a little blood, sweat and (sometimes) tears a stylish home can be achieved without breaking the bank
Houzz Contributor. Meg is a budget-minded DIY lifestyle blogger at Revamp Homegoods... More
Paint may be the easiest way to update the look and feel of a room, but textiles come in a close second. Textiles add color, sophistication and texture to a room and can quickly change the style and feel with minimal effort.
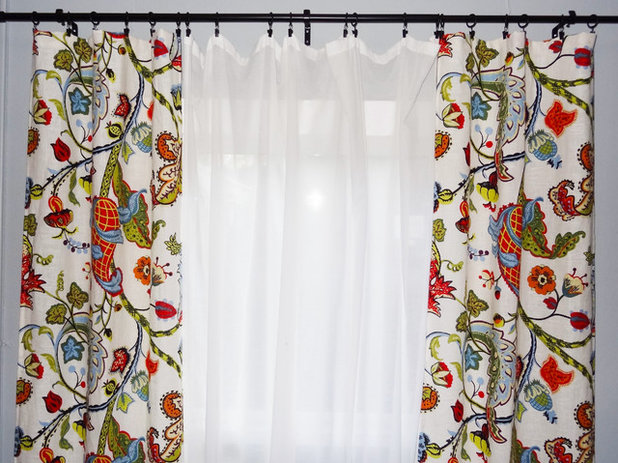
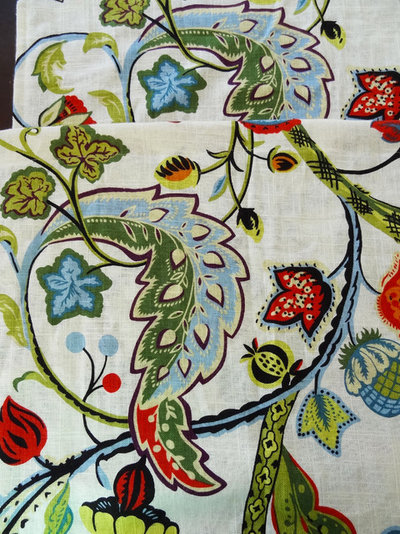
I've been on the hunt for the perfect fabric for our living room for months. I wanted something that complemented the soft blue-gray walls but also added pattern and color. I stumbled upon Covington's Wilmington Multi Fabric and knew it would be the perfect addition. While the paisley pattern can be too traditional for some, it can feel quite modern when you pair it with the right decor and accessories.
I've been on the hunt for the perfect fabric for our living room for months. I wanted something that complemented the soft blue-gray walls but also added pattern and color. I stumbled upon Covington's Wilmington Multi Fabric and knew it would be the perfect addition. While the paisley pattern can be too traditional for some, it can feel quite modern when you pair it with the right decor and accessories.
Before you make a single cut on fabric for new window treatments, consider the many styles and customization options. What height will you mount the curtain rod at? How wide will the curtains span? What style curtain top is right for your room's style? Is there a repeat on the fabric's pattern to take into account?
I created simple sag-top panels to flank our window using Covington's Wilmington Multi Fabric and clip-on curtain rings. To utilize the fabric best and stay on budget, I created narrow curtain panels to flank a basic white curtain by cutting the fabric in half lengthwise. This gave me two panels that were 25 inches wide when finished.
Materials and supplies:
- Fabric (I purchased 3 yards of fabric to create two 91- by 25-inch curtain panels)
- Thread
- Scissors
- Pins
- Curtain rings
- Sewing machine or no-sew hemming tape
When you have a solid plan, have taken measurements and have inspected your fabric, you're ready to cut the fabric to the proper length and width.
Note: Add a few inches to each measurement to allow for hemming. Since I was creating sag-top curtains to flank the window, I added 5 inches to the length and 2 inches to the width. Be sure to take the curtain top into account, as the style of top will either add or take away length from the final dimensions.
Typically, panels should look ample and should drape when closed, so they should have a combined width that is two to two and a half times the width of the window. If you’re hanging curtains just to frame a window, like I did, you can go down to one and a half times the width.
To keep the fabric edges from fraying and to give you a clean hem, begin by folding each edge over by 1/2 inch. Fold it over onto itself another 1/2 inch and pin in place — this will take up 1 inch of fabric total on each edge.
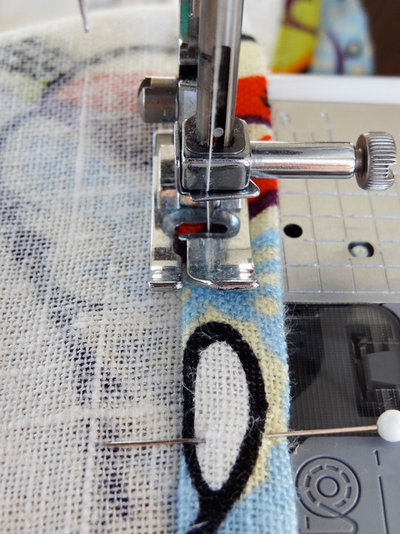
Using your sewing machine, sew a straight stitch to hold each edge in place, about 1/8 inch from the inside edge. Don't have a sewing machine? Use no-sew hemming tape, like Stitch Witchery, to create the same finished look.
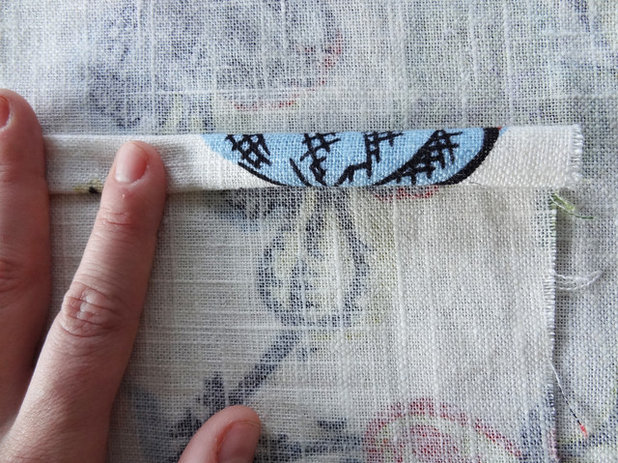
Repeat the same process with the top and bottom. I created a 1 1/2-inch top hem — 3 inches of fabric total — and a 1/2-inch bottom hem. The specific hem measurements will depend on the curtain-top style you have chosen.
Here's a shot of the finished top hem.
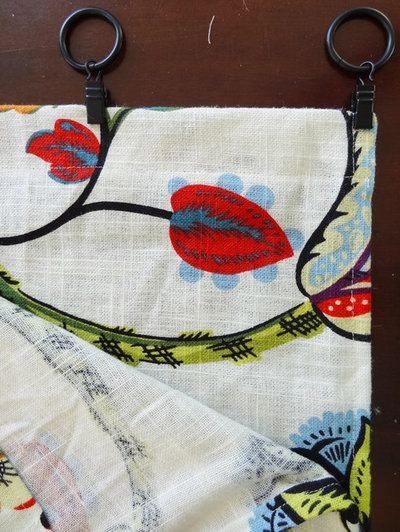
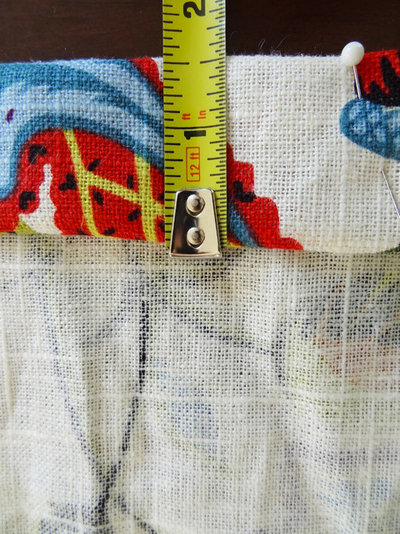
Attach the curtain rings equal distance apart, starting from the outer edge.
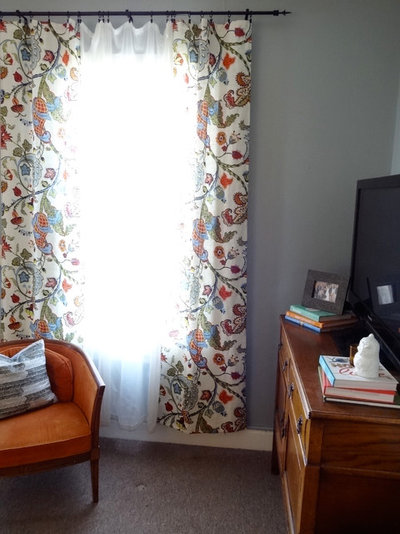
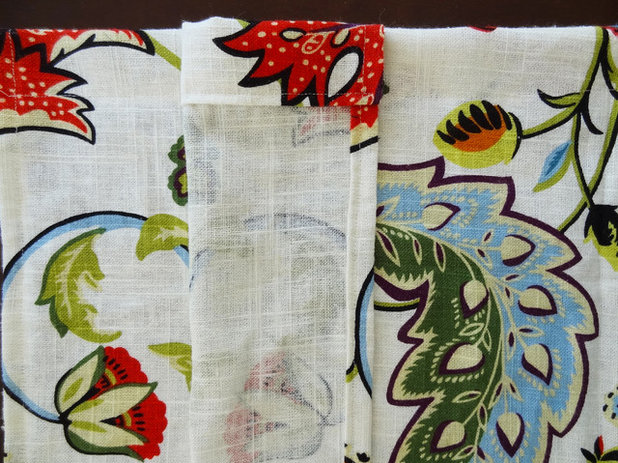
These simple curtains are just the right touch of color and pattern to make our room more sophisticated but still look young and vibrant.
Have extra fabric left over? Use it to make coordinating pillows or tiebacks.
Have extra fabric left over? Use it to make coordinating pillows or tiebacks.


Landscape Management Group was founded in 2011 by owner Mike Farrell. Our team is committed to excellence in... Read More


Related Products

J.S.Brown & Co. is an award winning, full service Design / Build remodeling contractor with more than three... Read More
Related Stories

Fall and Thanksgiving
DIY: Make a Fresh Magnolia Wreath
Learn how to add a statement piece to your front door with these easy-to-find evergreens
Full Story
Bathtubs
10 Times When Painting a Claw-Foot Tub Refreshed a Bathroom
See how designers and homeowners use colorful paint to give tubs and bathrooms a fresh look
Full Story
Decorating Projects
6 Fun Ways to Decorate With ... Tape?
By Janet Paik
Add a new accent wall, a midcentury closet detail and more with this budget-friendly, multipurpose wonder
Full Story

Decorating Guides
How to Hang a Heavy Mirror
By Erin Carlyle
Here’s what to know about your mirror, wall and hanging hardware to do it right
Full Story

Mother’s Day
Surprise Mom With an Elegant DIY Bouquet
For Mother’s Day, use flowers and branches from your local market or backyard to create this pastel beauty
Full Story

Decorating Projects
12 Projects to Indulge Your Spring Fever
Get busy beautifying your home with one of these budget-friendly DIY decorating projects
Full Story

Entryways
DIY: Corral Your Boots With This Handy Entryway Tray
By Faith Towers
Follow along to make this easy and chic tray to protect your floors when it’s soggy outside
Full Story

Valentine’s Day
Put Together a Romantic and Whimsical Valentine’s Day Bouquet
By Becky Harris
Use American-grown branches and blooms for a truly individual way to show your love
Full Story

Crafts
Create a Festive, Colorful Mardi Gras Bead Wreath
Reuse collected beads from parades for an easy-to-make front door accent
Full Story

Organizing
DIY: Make a Wooden Wall Organizer to Curb Entryway Clutter
By Faith Towers
Create a hanging catchall for hats, coats, keys and phones
Full Story
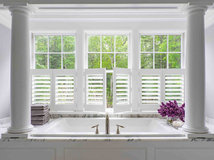
How can I do a large picture window? It has a center big pane with a window on each end. These windows are about 18 inches wide.
I should mention the whole window is 120 inches wide.
Thank you so so much for this article - it's exactly what I'm looking for and just needed confirmation that I wasn't committing a design crime! Our 3 windows need 95" panels and the fabric I'm in love with is over $30 a yard. I would spend at least $700 doing 2 full width panels for each window. My plan was to have them open all the time with sheers so it's wonderful to see that I can put the sheers on clips on the same rod.