


Build a Refreshingly Alternative Plywood Christmas Tree
Let others have their traditional pine. This wooden version you make yourself celebrates modern DIY style
Susan Stieglitz
December 13, 2012
Build a new holiday tradition with this fun two-dimensional tree. Made from plywood and a few metal braces, it defies gravity by cantilevering from the wall. You can wrap lights or ribbons around it to hang ornaments on, and its depth is shallow enough to keep the holiday dance floor open.

Time: 6 hours
Skill level: Intermediate
Cost: Less than $80
My family designs and creates a unique alternative tree every year. One year a rustic trestle ladder found on the roadside served as our tree. Another family favorite was a large paper tree built on a ribbed PVC frame with Christmas lights that poked through pinholes. The versatile two-dimensional plywood tree I'll show you how to make here can work for either indoor or outdoor display.
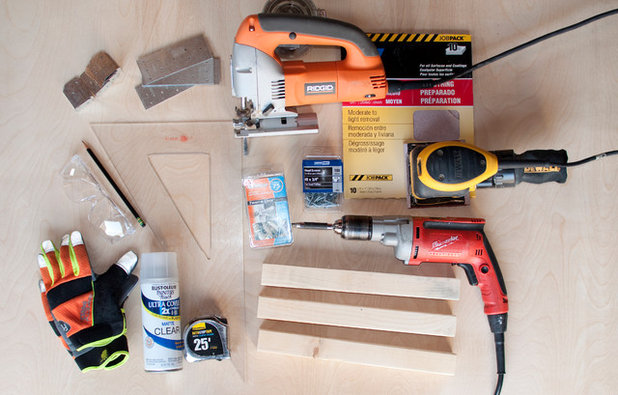
Materials
- 4- by 8-foot plywood sheet, 3/4 inch
- 6-foot length of 2-by-2 pine, cut into three 14-inch pieces
- Six 90-degree rigid angle braces
- 3/4-inch wood screws
- 1 1/2-inch wood screws
- Drywall anchors (or other appropriate screws if your wall is plaster, wood or brick
- Flat metal braces, rigid (optional)
- Clear-coat spray paint, matte or gloss (optional)
- Jigsaw
- Palm sander and sandpaper
- 2 sawhorses
- Drill
- Sharp pencils
- Straight edge
- Tape measure
- Safety goggles
- Gloves
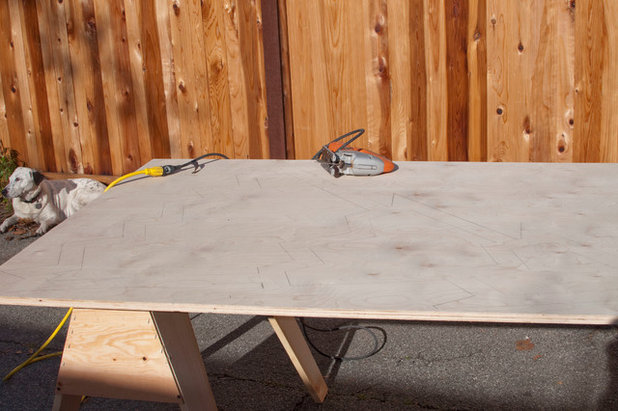
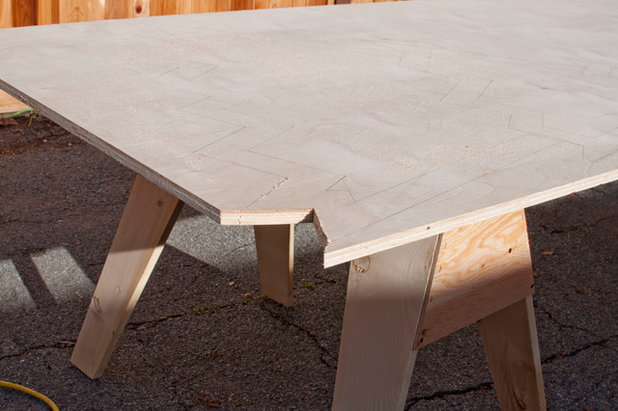
The setup. Make sure you have a large work area. Set up two sawhorses to support your plywood sheet.
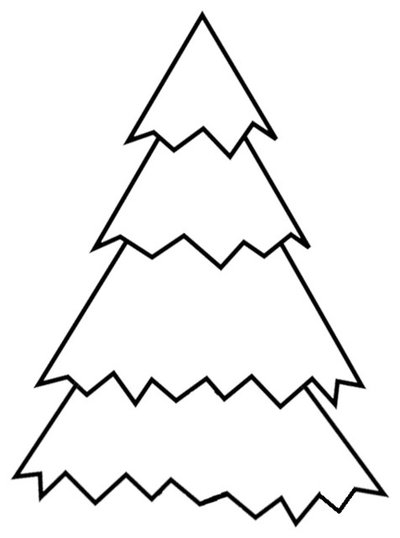
1. Design the tree. I created this tree design with straight lines, so it's easy to cut out with the jigsaw. If you're ambitious, you can try freehand drawing an outline of your tree.
Note: The plywood is 8 feet tall, but consider your room's height. You'll want to leave space for your tree topper and for presents to fit beneath.
Note: The plywood is 8 feet tall, but consider your room's height. You'll want to leave space for your tree topper and for presents to fit beneath.
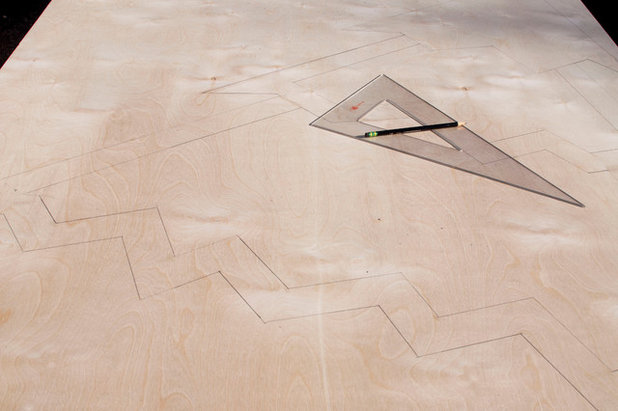
2. Draw the tree. Transfer the outline of your tree design directly onto the plywood. This tree's outline (the wood frame) is 2 1/2 inches wide. With your straight edge, draw nice, dark straight lines with your pencil so you can easily follow them with the jigsaw.
Note: I cut my tree in two parts. The larger three-tiered section is 4 feet wide and 5 feet tall. The bottom tier is 5 feet wide and 2 feet tall, and had to be cut at an angle on the 4-by-8 plywood sheet. This way I can detach the bottom tier for storage after the holiday season.
Note: I cut my tree in two parts. The larger three-tiered section is 4 feet wide and 5 feet tall. The bottom tier is 5 feet wide and 2 feet tall, and had to be cut at an angle on the 4-by-8 plywood sheet. This way I can detach the bottom tier for storage after the holiday season.
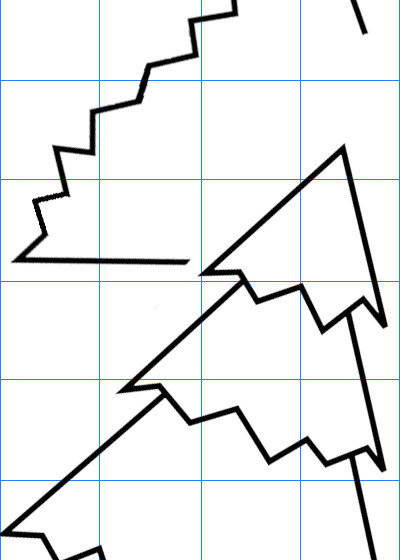
Tip: Draw a light 1- by 1-foot grid on your plywood to help you scale the tree's outline from the printout to the plywood.
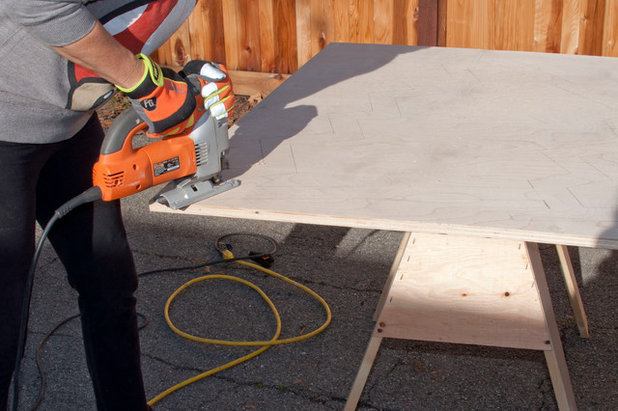
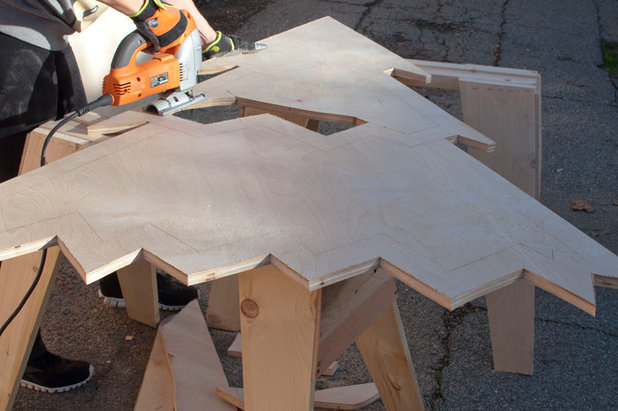
3. Cut the tree. Put on your safety goggles and gloves first. If you're not familiar with using a jigsaw, get used to it by cutting the exterior lines first.
Use a good jig blade with small teeth for a nice, straight, smooth cut.
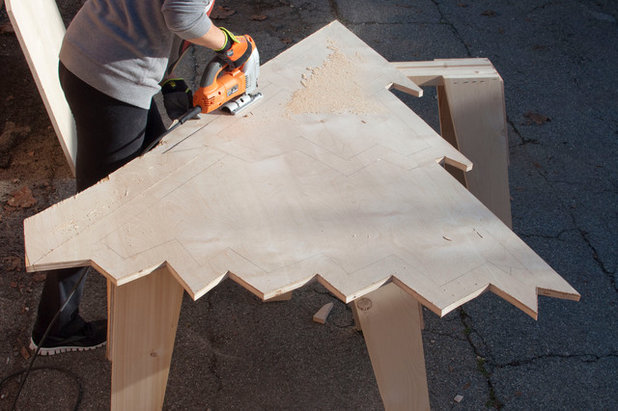
Go slowly and you'll have less work later when you're sanding the edges.
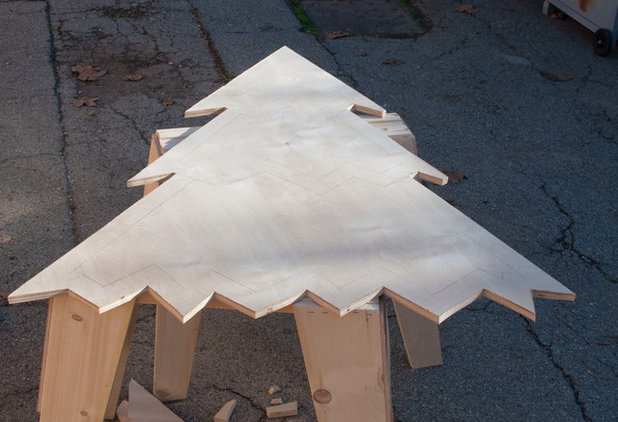
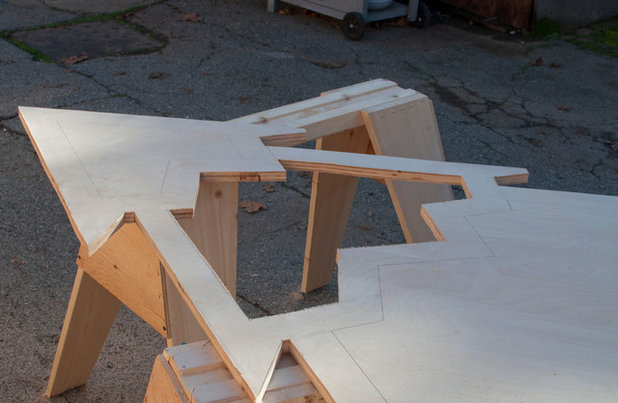
Here is the finished outline of the top three tiers.
After finishing this part, you can cut out the bottom tier from the excess plywood, or save it to do later.
After finishing this part, you can cut out the bottom tier from the excess plywood, or save it to do later.
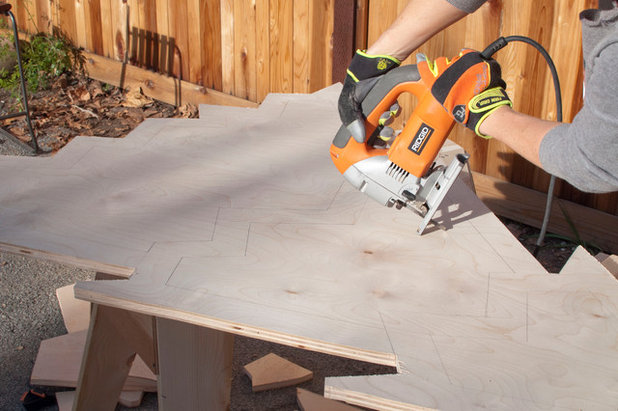
4. Cut out the interior. Now comes the challenge of cutting the interior edges while keeping the tree in one piece. If you are a pro with the jigsaw, you'll need to do what's called a plunge cut by tipping the jigsaw into the center of the plywood to break the surface. If that seems intimidating, drill a hole big enough to accommodate the jigsaw blade, entering the center of the tree instead.
Readjust the sawhorses as you go so that you don't cut into them.
The plywood will bounce a bit as the tree gets lighter; keep the jigsaw firmly flat on the surface.
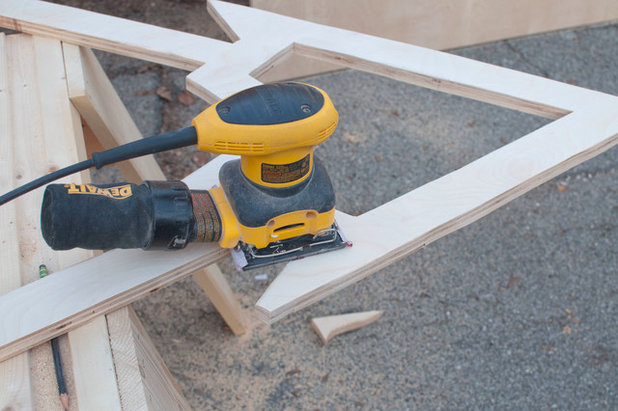
5. Sand the cut pieces. You'll use several sheets of 100-grit sandpaper to smooth the wood out with the sander and erase any existing pencil lines.
Tip: Consider storage. I attached a rigid flat brace on the back between the third and fourth tiers of the tree. This way it can be disassembled and packed away for next year.
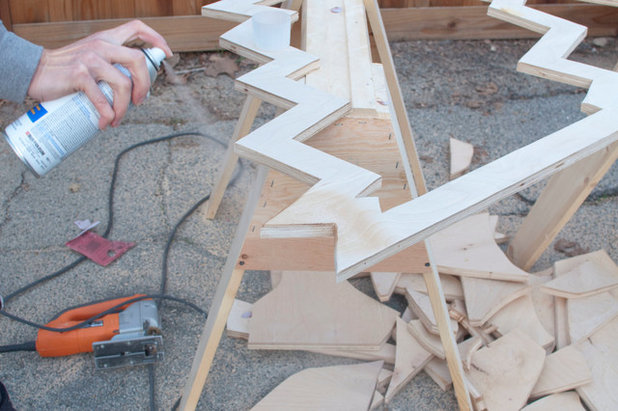
6. Clear coat (optional). A clear coat will protect the tree from scuffs and seal the edges of the plywood. It also brings out the beautiful wood grain. I prefer to use a spray paint version for quick application. Matte or gloss will work, and it dries quickly.
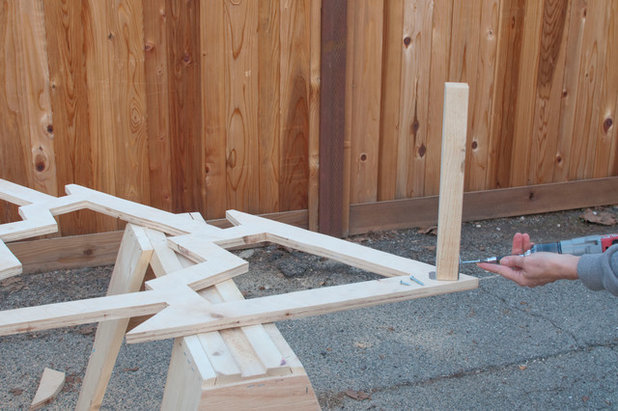
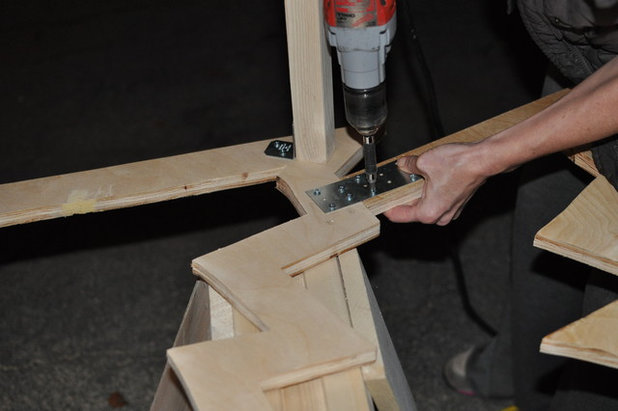
7. Attach the posts. Cut three 14-inch long posts from the 2-by-2 if you haven't yet done so. These will be used to affix your tree to the wall. Most hardware stores have a free lumber scrap bin and a nearby handsaw, so you might be lucky and find a 2-by-2 board to cut these from. Your jigsaw will work, too. Attach the corner braces at three corners of your tree. I attached one at the top and the other two on the left and right of the bottom tier.
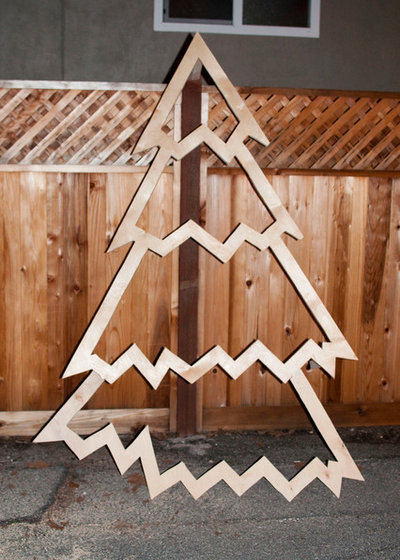
Here is the finished outline of the tree, with the attached bottom tier.
Note: Use strong corner braces to attach the support posts to the tree.
Note: Use strong corner braces to attach the support posts to the tree.
8. Mount the tree. When you're mounting the tree, have a friend hold it up to help you match your post placements with your wall studs. Locating a stud in the wall is best, but wall anchors can also work. If you plan to display your tree in the living room, secure each post to the wall with the remaining three corner braces, using wood screws, drywall anchors or masonry anchors.
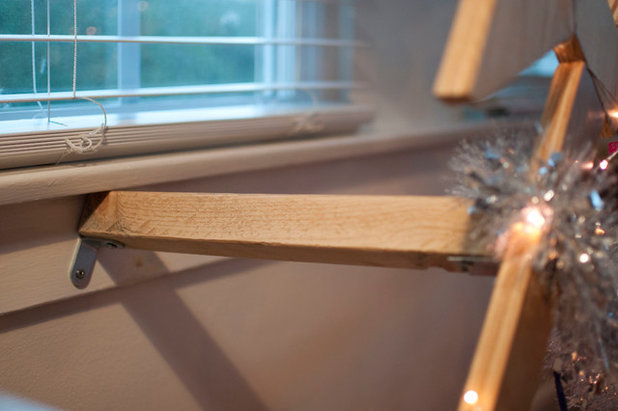
Pictured here is the bottom left post, which I screwed in first. I then affixed the right post, then the top post.
Note: After you remove your tree from the wall later on, you can use light spackling paste to fill the holes. Apply it with a putty knife or a finger, then lightly sand it and dab paint where needed.
Note: After you remove your tree from the wall later on, you can use light spackling paste to fill the holes. Apply it with a putty knife or a finger, then lightly sand it and dab paint where needed.
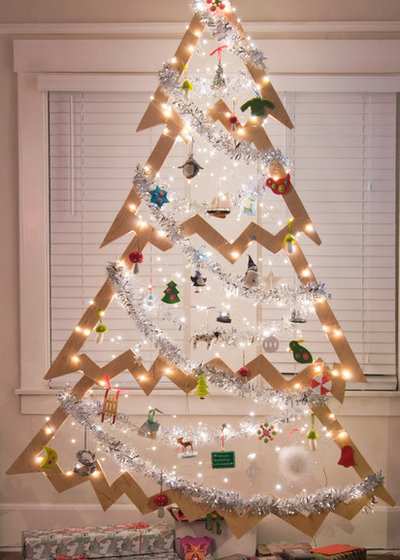
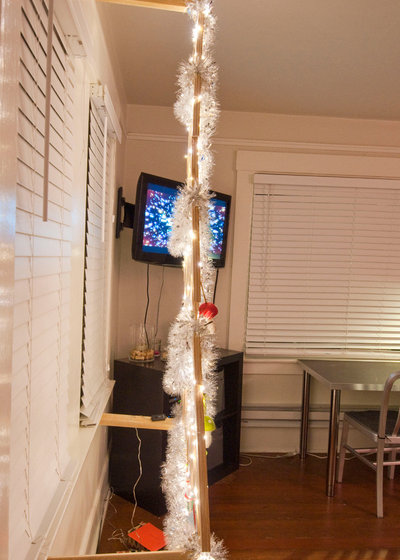
9. Decorate. After mounting the tree to the wall, have fun adding string lights, ornaments and garlands. Notice the room underneath for presents.
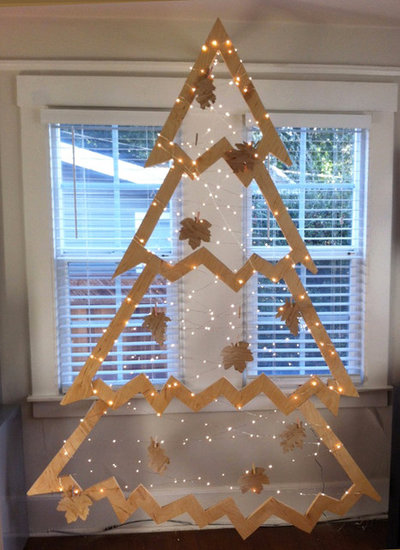
Or, for a more minimalist look, leave it bare. Here I tried using just twinkle lights and paper leaves from Paper Source.
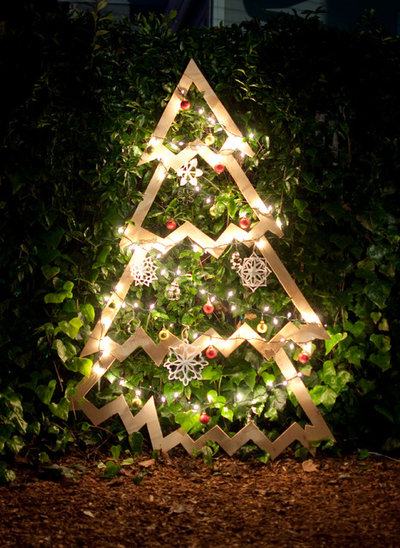
You can place the tree outside. To display this tree on an ivy-covered wall, I tied twine around it and secured it to the fence behind.
Tell us: Do you have an unconventional tree in your house? Share a photo in the Comments below.
Tell us: Do you have an unconventional tree in your house? Share a photo in the Comments below.


Whatever your next project may entail, Whisler Home Improvement is here to help. We are committed to treating our... Read More

Related Products


Here at YellowLite, we are committed to excellence in the design and installation of our renewable energy systems... Read More
Related Stories

Holidays
Houzz Readers Share Their Christmas Trees
By Becky Harris
These 25 trees are infused with memories and holiday cheer
Full Story

Holidays
Last-Minute Ideas for Attractive Winter Container Designs
Create a welcoming holiday entryway with ideas from these 9 looks
Full Story

Fun Houzz
Houzz Cats Get Into the Holiday Spirit
By Becky Harris
Houzz readers’ feline family members love the Christmas tree, the tree skirt and even the rolls of wrapping paper
Full Story
Decorating Guides
14 Easy Last-Minute Holiday Decorating Ideas
These festive decorations for doors, windows, stairs and tables can be created quickly
Full Story
Holidays
5 Ways to Avoid Holiday Season Burnout
By Patricia Lee
You can enjoy the traditions and activities that matter to you and let go of the rest
Full Story

Christmas Trees
Houzz Call: Show Us Your Christmas Tree!
By Becky Harris
Please share your favorite Christmas tree traditions and stories, and post your photos
Full Story

Holidays
20 Festive Christmas Decorating Essentials Made Easy
Dress up your home for the holidays with these inspirational decorating ideas
Full Story
Holidays
10 Ways to Decorate With Outdoor Christmas Lights
Use these techniques to light up your house and garden for the holiday season
Full Story
Holidays
Your Complete Holiday Season Planner
By Anne Colby
Use this checklist to stay organized as you get ready for Thanksgiving, Hanukkah, Christmas, Kwanzaa and New Year’s
Full Story
Christmas Trees
Houzz Readers Share Their Christmas Trees
By Becky Harris
Check out 25 trees and the memories and inspirations behind them
Full Story
What a neat and budget friendly holiday crafts idea!
You could be thrifty too, we always have bits and pieces of plywood around in odd sizes. Why not consider the top section being basically one triangle, a second larger triangle and then a third and/or fourth, use screws to put the sections together.