


DIY: Create a Nature-Inspired Hanging Calendar for Hanukkah
Eight small gifts wrapped in potato-print-stamped paper make a delightful and simple holiday project

DIY projects the whole family can create together are a great way to bring joy to a home during the holiday season. I love to give little prizes and gifts to my kids after we light the menorah on each of the eight nights of Hanukkah. This year, I’m creating a festive wall hanging using small gifts in handmade wrapping paper that’s been potato-print-stamped with an organic pattern of olive branches. The olive branch is also a universal symbol of peace, so the paper can be used throughout the year.
What you’ll need:
- A long stick or dowel
- Brown kraft paper or butcher paper
- Medium-weight black string for hanging the completed project
- Lightweight black string to wrap around each gift
- Blue, green, purple and black stamp pads
- Black acrylic craft paint (optional)
- Black marker
- Potatoes
1. Cut your kraft paper to size before getting to work. With a marker and using a sweeping motion, cover your paper in lines that represent branches. Depending on your preference, the branches can lie in straight lines or curl back on themselves as mine do.
To keep things from getting confusing when you start stamping, decide now which will be the beginning point of each branch and mark that end with a small, elongated triangle.
To keep things from getting confusing when you start stamping, decide now which will be the beginning point of each branch and mark that end with a small, elongated triangle.
2. Make your stamps using potatoes. I found it difficult to make any kind of shape on the potato before cutting, so maybe plan to make vegetable soup with the ones that don’t quite work out.
Using a sharp knife, cut two olive leaf shapes, one larger than the other, and one olive shape. Dab your potato stamps on a piece of paper towel to absorb any moisture. Then, starting at the marked end of each branch, simply press the stamps firmly onto the stamp pads and get stamping, making sure to stamp the leaves in the proper direction.
Use the larger leaf stamp at the base of a branch, then switch to the smaller leaf closer to the end of the branch.
Next, add the olives to each branch. I kept most of my olives in clusters of two or three at the end of each branch, with a few here and there in the middle.
Notes: For the black olives, I used black acrylic paint rather than ink to get a denser black result, but this is purely optional and may not be necessary.
I made some wrapping paper with the traditional green leaves and black olives, but I love the look of aqua leaves and purple olives, so I did other sheets in those colors. Don’t be afraid to have fun with color.
3. Once you’ve filled your paper with stamped leaves and olives, adding some simple details will really transform your printed work into art. In a light-handed and seemingly undeliberate manner, draw spines on some of the leaves or on only a portion of the leaf.
Give every olive a little scribble and a line to define its attachment to the branch. Don’t connect every olive and every leaf to the branches, to keep the look loose and artful.
Make as many sheets of paper as you’d like to keep on hand for gift wrapping throughout the year.
Give every olive a little scribble and a line to define its attachment to the branch. Don’t connect every olive and every leaf to the branches, to keep the look loose and artful.
Make as many sheets of paper as you’d like to keep on hand for gift wrapping throughout the year.
4. Choose eight boxed gifts (or upcycle some boxes found around the house) that are varied in shape and size, keeping in mind the amount of space you have and the size of your stick. Carefully wrap the boxes so the loveliest parts of the paper will be on the front.
Lay your stick on a table or the floor and play around with the placement of the boxes until you have an arrangement that is pleasing and balanced.
Tip: Any heavy items should be placed in the middle of the stick.
Lay your stick on a table or the floor and play around with the placement of the boxes until you have an arrangement that is pleasing and balanced.
Tip: Any heavy items should be placed in the middle of the stick.
5. Wrap black string around each box, either front to back or side to side. Hang each box from your stick, then hang the stick using the medium-weight string.
Write the numbers 1 through 8 on the boxes, or use small numbered stickers if you prefer. You can make the numbers large or keep them small and subtle.
Write the numbers 1 through 8 on the boxes, or use small numbered stickers if you prefer. You can make the numbers large or keep them small and subtle.
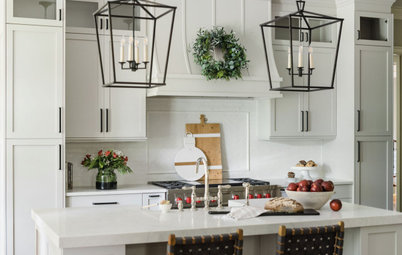
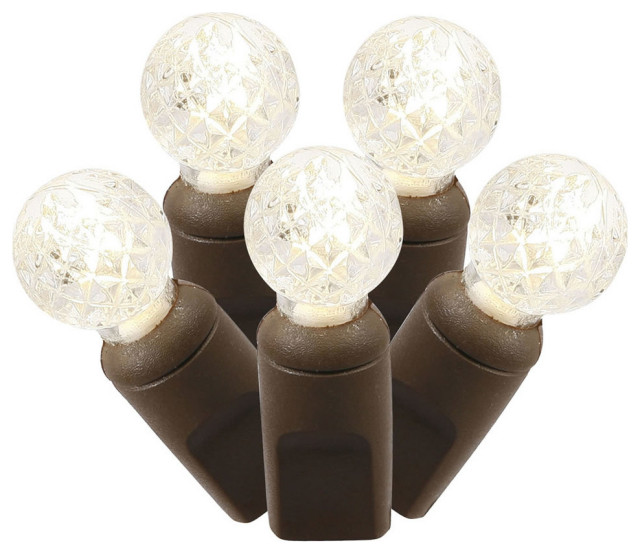
6. Add some white string lights, a Hanukkah menorah, some dreidels and a few other items to create a festive holiday vignette. (And don’t worry, we won’t be lighting any candles on top of the piano near the paper-wrapped presents — they are just for decoration). Enjoy!
More: Decorating and DIY ideas in the Houzz Hanukkah section
More: Decorating and DIY ideas in the Houzz Hanukkah section


And if you’d like a wall hanging that doesn’t disappear over the course of eight nights, consider stamping your patterns on small boxes that can then be easily rehung on the branch once opened.