


DIY Project: How to Re-Cover a Seat Cushion
Makeover a chair with a cool new seat cover, no sewing required
Brian Patrick Flynn
April 26, 2011
I'm a home makeover TV show producer, interior designer and the creator of Decor Demon, lifestyle editorial with an edge. http://www.decordemon.com
I'm a home makeover TV show producer, interior designer and the creator of Decor... More
I have two close friends, both thirtysomething, who seriously don’t know their left from their right. It’s kind of amusing sitting in the passenger seat as one of them, Laura, constantly inquires, “Do I make a Laura or a Brian at the stop sign?” Situations like this make me realize that what’s common sense to some is often incomprehensible to others.
Another example: recovering a simple seat cushion. When a super-smartypants friend recently asked me for a quote to have his barstool cushions recovered, I thought he was kidding, assuming he’d just whip out the staple gun and update ‘em himself. But why should I think that? He doesn’t do this stuff everyday; I do. So for any of you wondering what to do about cool chairs with not-so-cool cushions, here’s the rundown on how to update them yourself.
P.S.: At 34, I still have no idea how the hell to tie a necktie.
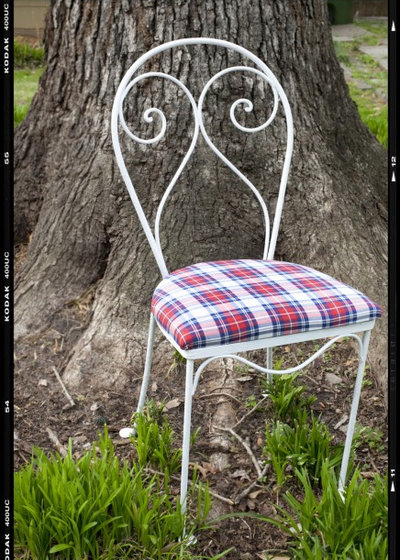
My friend Alexandra and I discovered this dainty wrought-iron scroll-back chair perched aside the recycling bin alongside our photographer’s house. We gave it an update using tartan, a fabric we knew our photographer friend would fall in love with. Now she owes us both free portrait shots. Calculated? Perhaps. Great business move, barter-wise? Well, duh.
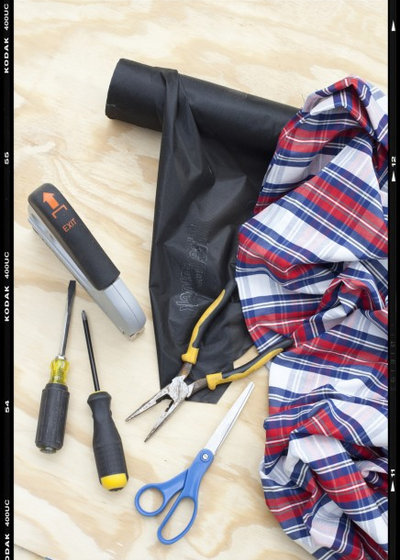
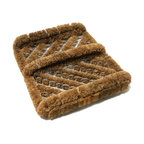
Here’s what you’ll need to recover your own dining chair‘s seat cushion: fabric, flat-head screwdriver, Phillips-head screwdriver, needle-nose pliers, scissors, staple gun, staples and black fabric liner. You may need new batting as well, but, newer chairs don’t always need new batting. We’ll get to that later.
Find the tools you need for any home improvement project
Find the tools you need for any home improvement project
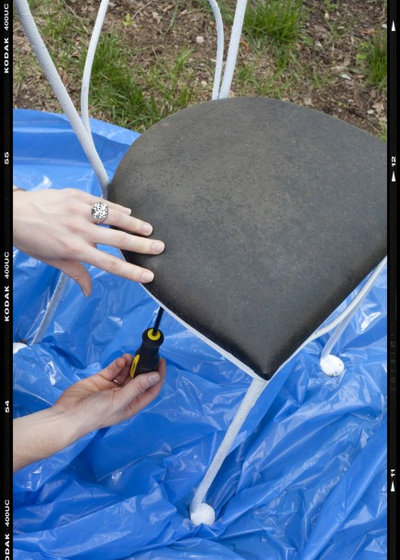
Step 1: Remove cushion. To take the old cushion off, you'll need to use a screwdriver, either flat or Phillips head. This is the easiest step of all. To impress your friends at parties, remove the cushion, then start showboating those DIY skills.
Step 2: Loosen staples. Slide the flat-head screwdriver under each of the existing staples, then partially extract each one by lifting the screwdriver up at an angle.
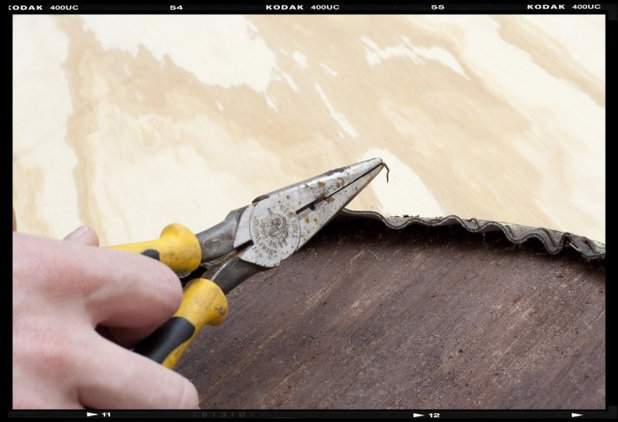
Step 3: Remove staples. Sure, it would seem as though you'd just take out each staple with the screwdriver, but nothing's ever that simple. Older, rusted staples may break off. To fully take them out, use the needle-nose pliers and yank away.
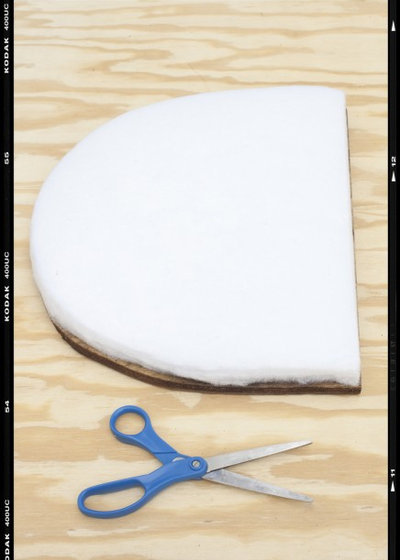
Step 4: Add new batting. Remember when I mentioned batting? Well, here it is. Batting comes in rolls and you can buy it at just about any fabric or arts and crafts store. Our batting was in great shape but if you find yours has disintegrated, simply cut it to the same exact size and shape as your seat.
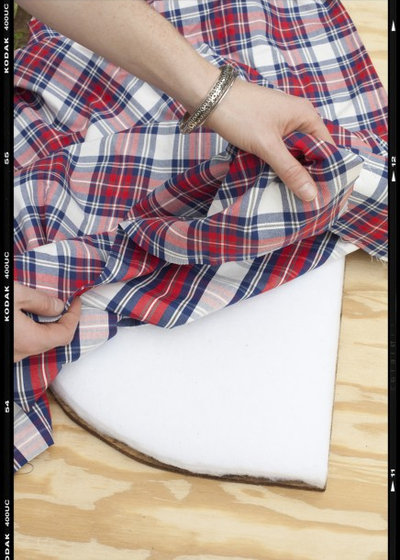
Step 5: Layout fabric. If you’re using a solid fabric, this step is a walk in the park. If you’re going with a pattern, there’s a little more precision involved. With solids, you’ll probably be able to get four seat cushions from a single yard. Depending on the repeat, you’re most likely looking at two cushions per yard when using a patterned fabric.
First, decide which direction the pattern should run, then ensure you’ve got the lines running straight across the seat. Nothing’s worse then thinking you’re finished, then realizing your lines are totally crooked. Plus, it may be jarring and lead your dinner guests to think they are drunk.
First, decide which direction the pattern should run, then ensure you’ve got the lines running straight across the seat. Nothing’s worse then thinking you’re finished, then realizing your lines are totally crooked. Plus, it may be jarring and lead your dinner guests to think they are drunk.
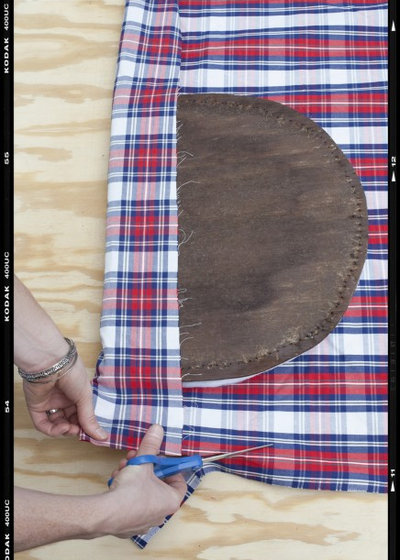
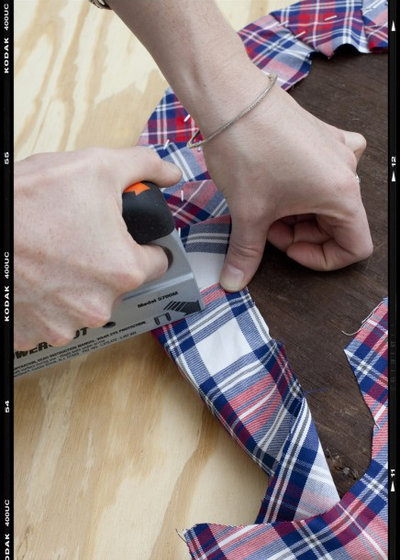
Step 6: Cut the fabric to size. Once the fabric is laid out flat and the cushion is flipped upside-down, cut the fabric following the shape of the seat. Give yourself about two extra inches to wrap around the sides and staple to the bottom. This will come in handy if you have to make any adjustments and don't wanna risk having to cut out an entirely new piece.
Step 7: Check your pattern. Once the fabric is cut, ensure the lines of your print haven't shifted. In this case, the tartan is still pretty much perfectly straight, but a tiny bit of adjusting will be necessary before stapling. This is totally normal.
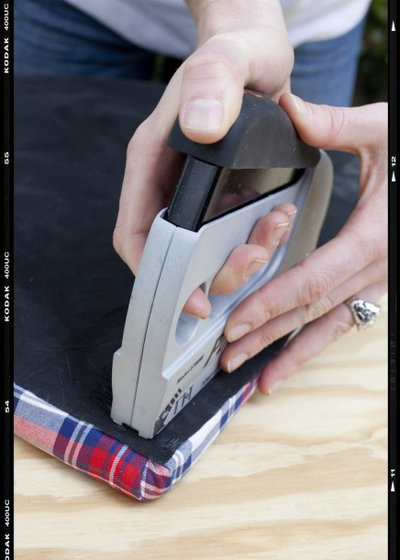
Step 8: Attach with staples. With the pattern perfectly lined up and the fabric pulled taut, attach the fabric to the bottom of the seat with a staple gun, leaving approximately 1/8 inch between each staple.
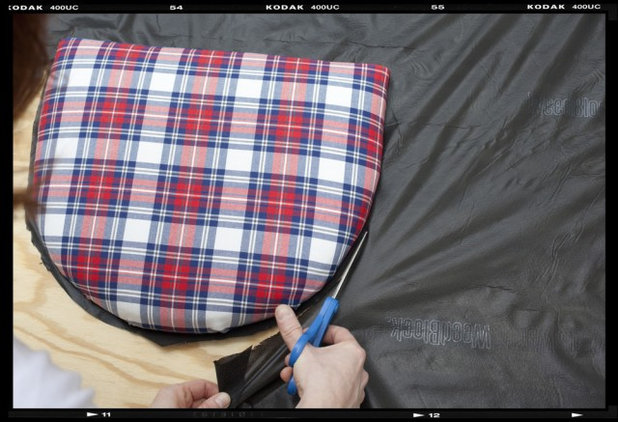
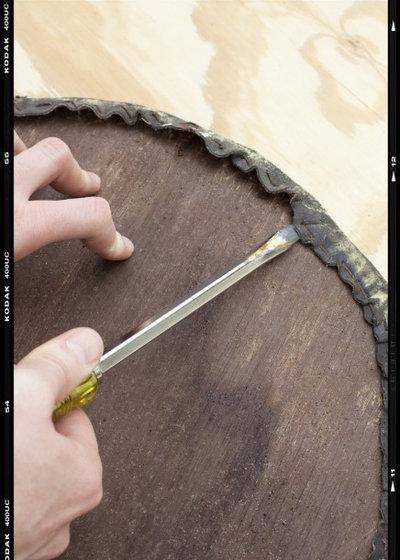
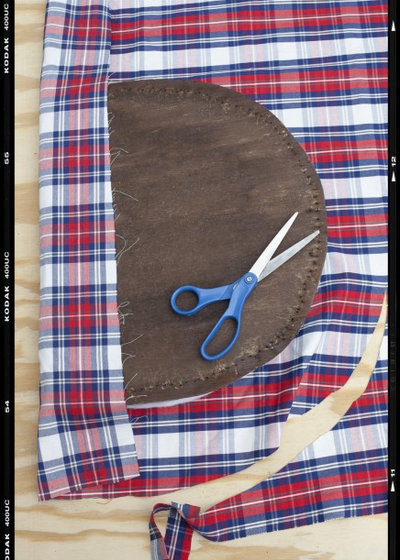
Step 9: Cut the liner. Here’s that final touch that makes the difference between a silly craft project and a professional update. To avoid looking up under the chair and seeing a hot textile mess, conceal the staples and fabric edges with black liner. Lay the cushion out atop the liner, then cut it to size using scissors.
Don’t DIY? Hire an upholstery professional
Don’t DIY? Hire an upholstery professional
Step 10: Dry fit the liner. Once the liner is cut to size, line it up with the underside of the seat.
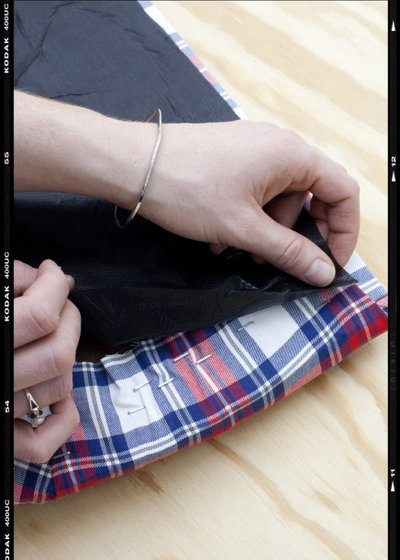
Step 11: Attach liner. Once matched up, use staple gun to attach liner. Keep the staples going horizontally around the perimeter of your seat, spacing them about 1/2 inch apart.
Congratulations, you just saved yourself about $25-$35 in upholstery costs for each chair you chose to recover. With all that money you've kept, you can afford to send me a thank you check to pay for my new cork floors. Hey, thanks!
Next: Mobile wallpaper, portable gardens and more great DIY projects


Dream Baths is a complete design-build-remodel firm located in the Historical German Village area of downtown... Read More
What are you working on?


Related Products


High Point Cabinets is a custom cabinet builder located between Apple Creek, Fredericksburg and Mt. Hope, Ohio,... Read More
Related Stories

Color
4 Ways to Bring Color Blocking Home
By Jennifer Ott
This color trend is all the rage in the fashion world. See how to use it to create a stylish feature in your interiors
Full Story

Living Rooms
New Decor Creates a Sophisticated and Comfortable Family Room
By Erin Carlyle
A designer layers neutral shades with touches of blue for a welcoming and relaxed space in Massachusetts
Full Story

Decorating Guides
Decorating 101: How to Start a Decorating Project
By Fred Albert
Before you grab that first paint chip, figure out your needs, your decorating style and what to get rid of
Full Story
DIY Projects
6 Fun Ways to Decorate With ... Tape?
By Janet Paik
Add a new accent wall, a midcentury closet detail and more with this budget-friendly, multipurpose wonder
Full Story

Decorating Guides
How to Hang a Heavy Mirror
By Erin Carlyle
Here’s what to know about your mirror, wall and hanging hardware to do it right
Full Story

DIY Projects
12 Projects to Indulge Your Spring Fever
Get busy beautifying your home with one of these budget-friendly DIY decorating projects
Full Story

Fireplaces
Fireplace Makeover Ideas for a Cozier Winter
From a new log basket to an entirely new look, these changes will help you snuggle up by the hearth
Full Story
Decorating Guides
Redecorating Lite: 6 Quick Updates to Liven Up Your Living Spaces
By Karen Mills
If a full redecorating project isn’t in your budget, consider these inexpensive ideas to give your room new life
Full Story

Kitchen Cabinets
How to Update Your Kitchen Cabinets With Paint
A pro gives advice on when and how to paint your cabinets. Get the step-by-step
Full Story

Holidays
Houzz TV: Make a Fragrant Wreath for Your Front Door
Bundles of herbs come together to create a beautiful, wonderful-smelling piece of home decor
Full Story
You did a remarkable job, I must say! You are a professional, right!?
I need to do my bar stools.......