


Frame Your Garden With a DIY Arbor for $150
Set the scene for curb appeal or a beautiful backyard detail with this arbor you can inexpensively build yourself

This garden arbor is simple to build and has a beautiful end result — the best of both worlds for a do-it-yourselfer. The base of this arbor consists of a basic structure that can be as simple or as ornate as desired, and the piece can be used in many ways outdoors. Use it to showcase a walkway, create a transition from one place to another, cover a bench or gate, or frame a gorgeous view.
Plan the site and the dimensions for the arbor. We built a 2-foot-long, 5-foot-wide and 7 1/2-foot-tall arbor at the end of our meandering pathway.
Mark the center of the four post holes. Start with one corner of the arbor and measure the width and length from that corner. Ensure that your holes are perpendicular by using either a T-square or a 3-4-5 or 6-8-10 triangle. The diagonals should be the same length.
Dig four post holes centered around your marks to a depth of 2 1/2 feet — dig a few more inches deeper to allow for gravel — and 1 foot in diameter. This depth will provide a solid foundation for the arbor.
Build a support that will keep the posts standing straight, plumb and square while the concrete sets. We built ours with four 2-by-4s and attached them to one another with deck screws so they were easily adjustable.
Don't forget that the holes were measured center to center, so when you're building the support be sure to include the added width of the posts. We added 3 inches to each dimension because we used 4-by-4 posts.
Don't forget that the holes were measured center to center, so when you're building the support be sure to include the added width of the posts. We added 3 inches to each dimension because we used 4-by-4 posts.
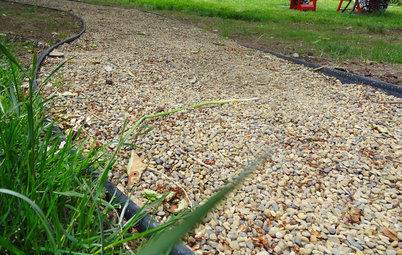
Next, add about 3 to 4 inches of gravel to each hole. Place the posts in the holes against the corner of each support. Ensure that all posts are the same height; add or remove gravel if needed. Check again that all are level, plumb and square.
To keep the posts plumb, attach two scrap 2-by-4 supports with screws to the bottom of each post, as shown. Again, check that all are level, plumb and square.
Measure the outside dimensions of the post and make sure all the corresponding measurements are equal, including the diagonals. Adjust as needed. Use one of the 2-by-6 cedar boards to ensure all the faces are flush to one another by placing it against each pair of posts.
Once the posts are set, add concrete to the holes. Follow the directions on your bag of concrete for specific mixing recommendations. We mixed ours in a wheelbarrow and added water in small increments. We continued mixing and adding water until it reached the consistency of crumbly cake.
Fill each hole with concrete and check that everything is level, plumb and square one last time. Let the concrete dry and cure for the recommended time as listed for your concrete bag.
Next, prepare the front and side cross-pieces. Cut the boards to your desired length. Ours were 7 feet long for the front and back cross-pieces, and 43 inches long for the side cross-pieces.
Add interest to the arbor by making a design cut on each end. There are many design options to choose from — such as the simple dog-eared style, which could be cut with a circular saw, to a cut like the one here, which requires a jigsaw. Use a template to ensure your cuts are the same. Sand each piece until it's smooth and even.
Add interest to the arbor by making a design cut on each end. There are many design options to choose from — such as the simple dog-eared style, which could be cut with a circular saw, to a cut like the one here, which requires a jigsaw. Use a template to ensure your cuts are the same. Sand each piece until it's smooth and even.
After the concrete has cured for at least 24 hours, attach the front, back and side cross-pieces, starting with the sides. Start by attaching one side cross-piece 4 1/2 inches from the top of the tallest post — due to settling, the posts may not be the same height. The distance from the end of the cross-piece to the outside of the post should be equal. This will ensure that it is centered. Check that the cross-piece is level and attach it to the post using deck screws.
To ensure that both side cross-pieces are level, rest a front cross-piece on the attached side cross-piece and adjust the unattached side piece until it reads level. Mark this location. Place the side cross-piece on the mark and attach it with deck screws once it is centered and level.
Note: The cross-pieces look best when they are to scale with one another. We attempted to use cedar fencing that we had on hand for the sides, but the board looked too thin compared to the 4-by-4 posts and 2-by-6 boards, so we swapped out the fencing for 2-by-4 cedar, which gave the arbor a more cohesive look.
Next, attach the front and back cross-pieces by resting each on the side cross-pieces. Ensure that both are centered and level and that they extend above each post. We used rustproof deck screws to attach the front and back cross-pieces. In most cases, lag screws are used.
With the cross-pieces in place, cut the 2-by-2s to your desired length. We created two top rails with 45-degree angles on each end out of one 8-foot-long balluster. To do this, mark the balluster at 47 1/4 inches and cut away from that mark at a 45-degree angle. Cut each end's angle to reflect the first cut, making sure to cut from the very end to keep the length intact.
Use a miter box and a hand saw or miter saw to cut the angles, unless you are adept at cutting angles with the circular saw.
Attach the top rails perpendicularly to the top of the front and back cross-pieces with deck screws. For an open feel, place the top rails farther apart, and for a cozier feel, place them closer together. We mounted six 47 1/4-inch-long top rails 1 foot from each end and 1 foot away from one another on center.
Feeling motivated? You can try your hand at building your own trellis. Otherwise attach a premade trellis to each side of the arbor with galvanized nails.
While the construction of the arbor is complete, the overall finish is still open to personal preference.
Consider painting or staining the arbor to match your home or other garden decor items, or leave it as is for a more natural and weathered look as time passes. We stained ours with Behr's Premium Weatherproofing Semi-Transparent Stain in Cordovan Brown to match our deck.
Consider painting or staining the arbor to match your home or other garden decor items, or leave it as is for a more natural and weathered look as time passes. We stained ours with Behr's Premium Weatherproofing Semi-Transparent Stain in Cordovan Brown to match our deck.
To use the arbor's trellised sides, add a climbing plant like this climbing hydrangea.
Don't be discouraged if your plant isn't climbing as fast as you'd like. Newly planted climbing hydrangea vines are slow to grow and bloom but make up for it once they reach maturity with beautiful green leaves and fragrant, lacy blooms.
Don't be discouraged if your plant isn't climbing as fast as you'd like. Newly planted climbing hydrangea vines are slow to grow and bloom but make up for it once they reach maturity with beautiful green leaves and fragrant, lacy blooms.
Add evergreen hanging plants, like this creeping myrtle, for a year-round boost of color. Finish the look off with a solar-powered outdoor lantern to illuminate the arbor at night.

Materials: