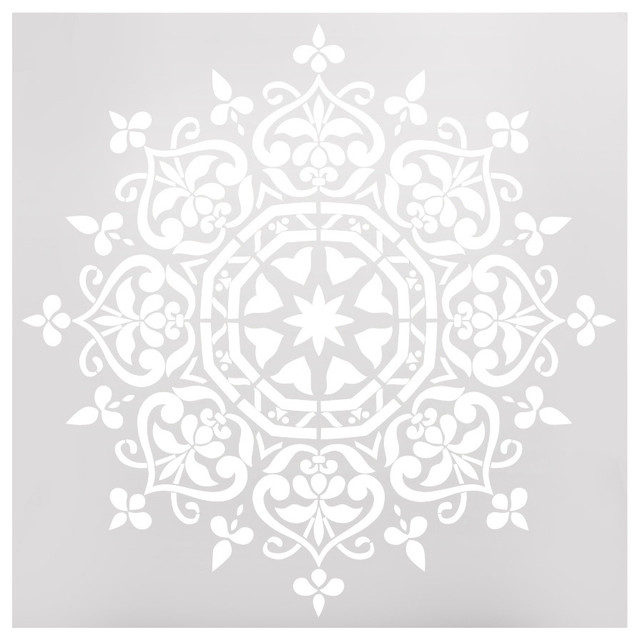
How to Use an All-Over Wall Stencil
Step-by-Step: Punch Up a Wall With a Bright, Bold Stencil Pattern

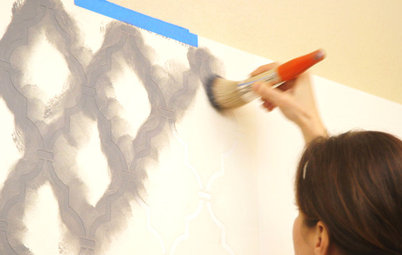
Big, bold graphic wall stencils have caught our eye as a quick way to add drama to a room without the expense and removal worries of wallpaper. Stenciling with a dense foam roller is by far the quickest and easiest way to go, but there are a couple things to keep in mind to make sure the results are perfect. Stencil designer Janna Makaeva, partner in Cutting Edge Designs takes us through it:
First, decide how big you want to go. You can use the same technique to cover an entire wall, or to create a smaller background pattern for a vignette.
Makaeva just uses blue painters tape to secure her stencils to the walls. But if you've never stenciled before or will be working with multiple colors, she suggests using a spray adhesive all over the back of the stencil.
Following the manufacturer's instructions, shake the can well, lightly mist your stencil with spray adhesive, let it dry for a few seconds and place the stencil on the surface you’re working on.
Following the manufacturer's instructions, shake the can well, lightly mist your stencil with spray adhesive, let it dry for a few seconds and place the stencil on the surface you’re working on.
No. 1 Rule of Stenciling: Do not overload your roller with paint, and always blot off excess paint onto a paper towel. "With the right amount of paint on your roller and right pressure there is usually no bleed at all and edges are crisp."
Start rolling over the stencil with your loaded foam roller, applying light to medium pressure.
Start rolling over the stencil with your loaded foam roller, applying light to medium pressure.
If your initial coverage looks a little light, just keep rolling over the stencil in short back-and-forth strokes until you get your desired coverage, Makaeva says. "It is much better to start light and quickly build the opaque coverage, rather than press on the roller too hard right from the start and possibly get paint bleed underneath the stencil. You’ll very quickly get the feel for just perfect pressure."
Check how it’s going by carefully lifting a corner of the stencil and taking a peek. "It’s easy to make any adjustments early into the project. Place the stencil back and continue stenciling."
When you notice you're running out of paint in the roller, it's time to reload. Avoid the temptation of pressing hard on a roller to squeeze out the last bit the paint, she says. "You may get undesirable paint seepage if you use excess pressure. After you reload your roller, remember to blot off the excess on a paper towel."
When you get close to an edge of the stencil, it can be easy to get carried away and roll over the edge. If that happens, simply wipe off the spot with a moist rag or baby wipe. You can also add a little extra painter's tape around the stencil to avoid painting beyond the edge.
Removing the stencil is the most exciting part of the whole thing.
Repeat the steps for as many stencil prints as you want. No need to clean a stencil in between repeats, unless you’re switching colors from dark to light.
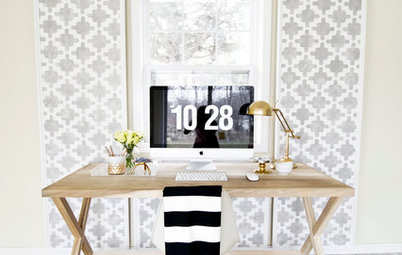
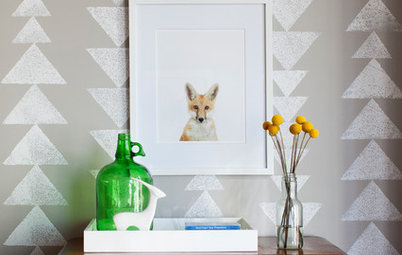
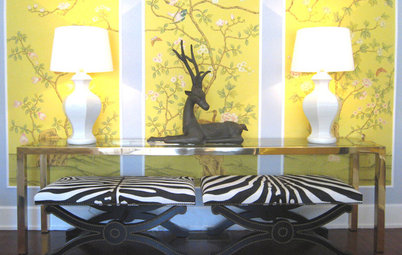
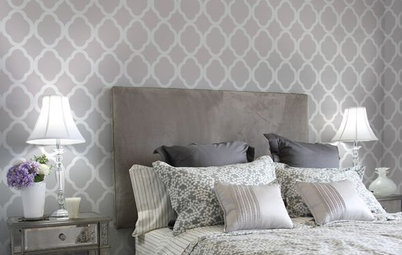
This basic stencil rolling technique works well for large wall art stencils and all-over patterns, such as damasks and trellis patterns.
Have you been thinking about stenciling a wall lately?
More:
See How to Cover an Entire Wall
Stencils: All Grown Up and Sophisticated
When and How to Use a Stencil Brush