

DIY Project: Upgrade That Ugly Door!
Turn a Blah Hollow-Core Door Into Today's Cover Story

My photographer friend Christina had me over to her house recently. Naturally, she inquired as to any ideas I could offer to make her home a bit nicer. Upon entry, I wanted to say, "Well, you can start by tossing those nasty hollow-core doors out the window, then setting them on fire." But instead, the nice part of me decided to offer up a do-it-yourself upgrade — the same nice part that got tricked into staying and actually doing it. One protein bar, two pitchers of ice water and about 6 hours of conversation later, here's how we took Christina's 40-year-old, contractor-grade, hollow-core door from eyesore to showstopper:
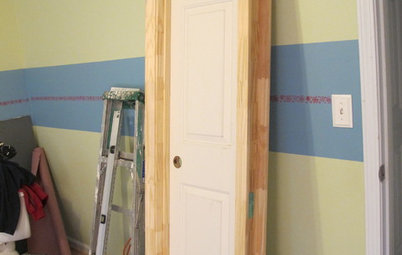
Take a look at my photographer's unphotogenic subject prior to its much-needed makeover. Cover model? I think not!
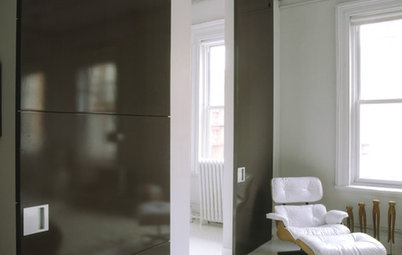
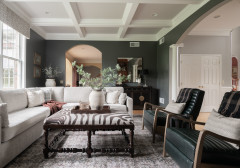
Two coats of white and black semi-gloss paint, two pieces of satin nickel hardware and a few lessons in camera exposure later, the entrance to Christina's dark room went from yesterday's news to today's cover story.
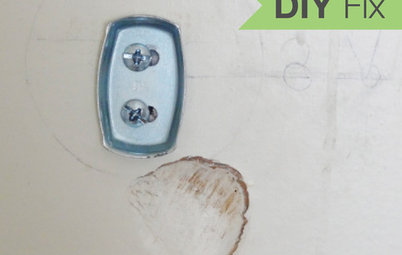
Step 1: Remove the existing hardware with a screwdriver. Next, listen attentively as your room thanks you dearly for removing the knobby eyesore, then chucking it in the trash outside.
Step 2: Use medium-grit sandpaper or a sanding block to remove the existing finish. In cases where a door sports a thick layer of polyurethane, it may be wise to use coarse grit to ensure you get rid of the slick surface entirely.
Step 3: Paint the entire door with the color intended for the accent panel trim tone. It's best to go with two coats so that the wood grain doesn't peek through. This double layer of paint will also serve as a primer.
Step 4: Tape off accent panel trim with 2-inch painters' tape. While it's okay to simply eyeball it, I suggest taking the extra time to measure appropriately, then lay the tape in place to keep everything symmetrical. Two panels work the best; keep the outside lines of the panel trim 3-inches in from the edge of the door and leave 8 to 10 inches between the top and bottom panels. This is a good rule-of-thumb for creating the proper scale.
Step 5: Once the panels are taped off, go all perfectionistic by fine-tuning intersecting pieces of tape, pressing them firmly to remove any air pockets.
Step 6: To ensure perfectly straight lines, cut away excess tape from corners with a utility knife.
Let's take a look at what happens without taking the proper time to prep before painting the door surface color. See the bleeds, smudges and uglies? Yep, those are what you'll end up with if you don't follow steps 5, 6 and 7. Patience, children — it's a virtue. Pace yourself with paint preparation, it will pay off in the end. Pinkie swear.
Step 7: After checking to make sure all edges of tape are perfectly flush with the door, brush the door surface color onto the door with a paint brush starting on the center of the tape, pushing outward onto the door. Why? This will create a perfect line; brush strokes away from the tape ensure nothing creeps underneath it.
Step 8: Once you've used the brush to stroke the door surface color out from the painters' tape, use a roller to cover the remaining surface. NOTE: Avoid motion which pushes the roller down onto the tape, instead rolling up and off of it.
Step 9: After slowly removing the painters' tape, replace the hardware with something more up-to-date. Satin or polished nickel, chrome and oil rubbed bronze usually work best in modern spaces.
In addition to door knobs, consider adding door knockers or graphic coat hooks to dress up the door — like jewelry or accessories with a new outfit.
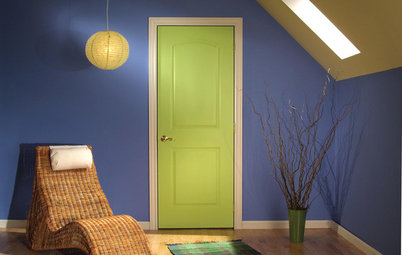
While I recommend this project for hollow-core doors, it works just as well on those made from solid wood. High contrast offers up the most impact. Black and white is classic and goes with everything, but playing up two drastically different shades of your room's wall color works just as well.
As far as what the door used to look like, Christina's clients don't need to know. It can just be Houzz's little secret.
More DIY: Make a Vintage Suitcase Dog Bed
Next: Browse 100,000+ home design photos