


How to Install a Dimmer Switch
New project for a new year: Take control of your lighting to set the right mood for entertaining, dining and work
Mary Jo Bowling
January 8, 2014
Houzz Contributor; writer, reader, serial remodeler.
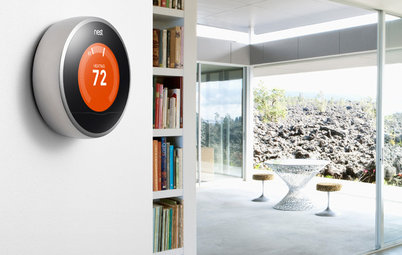
According to electrician Britt Scott, if you haven’t flipped the switch to a dimmer, it’s time to do so. “A dimmer switch can change your whole life,” claims Scott, who owns Lady B Electric in Santa Rosa, California. “Nothing else can set the mood in your home like a light control.” Here’s how to install a dimmer switch in your home.

Project: Add a dimmer switch.
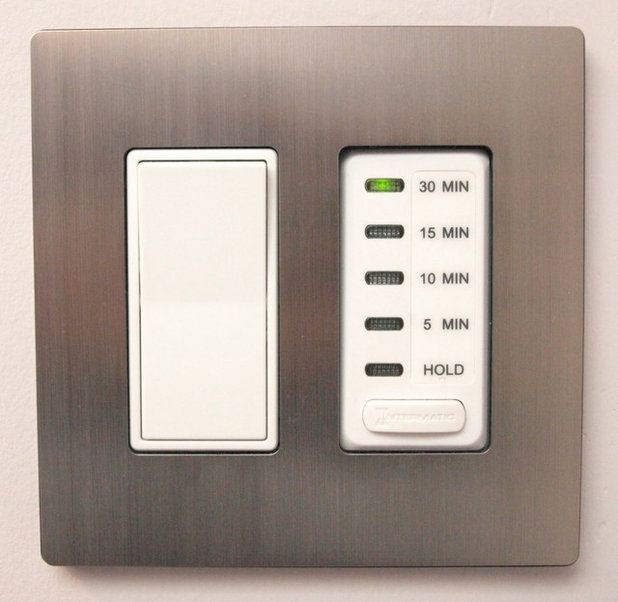
Why: Lighting designers have known this for years: The light level in a room sets the mood and enhances dining and entertaining. Being able to control the lights can also make a room flexible: If you want to relax, you can turn them down. If you need to work, turn them up.
Who to hire: Installing one simple dimmer switch could be a DIY project. Installing more or an entire lighting system is a job for an electrician.
Cost: $30 for a basic dimmer switch from the hardware store; roughly $1,000 for professional labor and materials to install dimmer switches throughout a home.
How: “You can replace an existing switch with a dimmer by yourself if it is a 120-volt, simple up-and-down control,” Scott says. “I would not advise a homeowner to take on more than that.”
How: “You can replace an existing switch with a dimmer by yourself if it is a 120-volt, simple up-and-down control,” Scott says. “I would not advise a homeowner to take on more than that.”
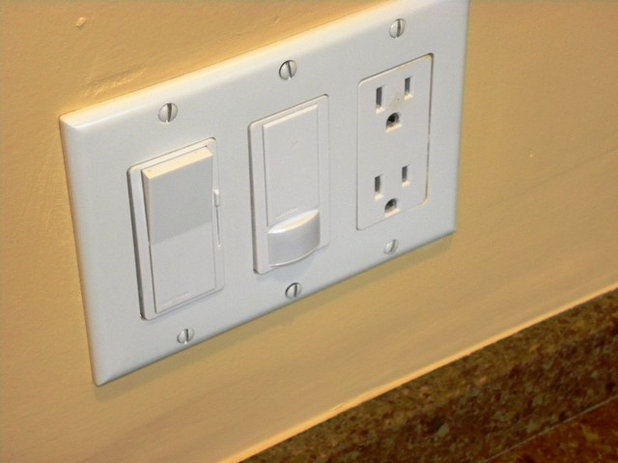
1. Carefully read the instructions that come with the new dimmer switch. “The biggest mistake people make is not reading the instructions,” says Scott. “I’ve been doing this a long time, and even I carefully read all the instructions with a new piece of equipment.”
2. Disconnect the power at the circuit breaker and flip the light switch to ensure that the power is off.
3. Unscrew the switch plate and remove it. It’s a good idea to make sure the wire isn’t carrying any current; use a noncontact voltage detector to check.
4. Remove the screws holding in the old light switch and gently pull it out of the wall. The switch either will be held by wires wrapped around connector screws at its sides, or will have wires coming out of it that are connected to wires coming out of the wall and capped with wire nuts (they look like marker caps).
5. If the wires are looped around connector screws, undo them, snip them and strip them. Follow the package instructions to loop the ends of the wire around the connector screws on the new dimmer switch and tighten them with a screwdriver. If the unit is installed wire to wire, remove the wire nut and untwist the copper strands, then snip and strip the wires coming out of the wall. Following the package instructions, use pliers to twist the new dimmer wires to the wires coming out of the wall. Cap them with a wire nut.
6. Tuck the switch into the box, secure it with screws and reaffix the switch plate. Turn on the power and turn the lights down low.
“If it doesn’t work or you feel unsure at any point in the process, contact an electrician,” says Scott.
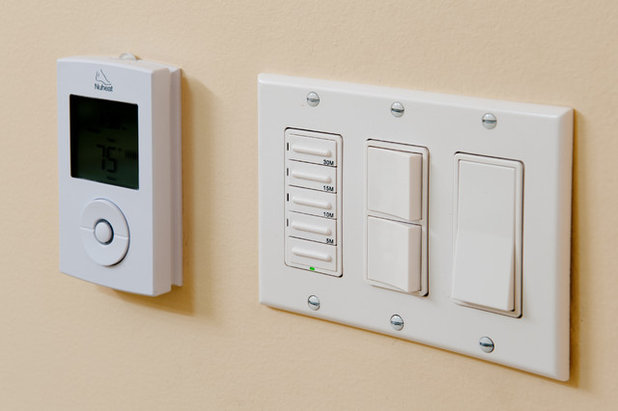
Typical project length: A DIY project with a single switch can take an hour. For a pro to install dimmers throughout the house, it could take as little as four hours.
More: “I recommend buying the best dimmer switch you can afford. The more expensive ones tend to last longer,” says Scott.
Find an electrician in your area
More: “I recommend buying the best dimmer switch you can afford. The more expensive ones tend to last longer,” says Scott.
Find an electrician in your area


What are you working on?

Related Products

Related Stories
Bathtubs
Say Goodbye to the Shower Curtain With a Glass Tub Enclosure
A glass screen or door can make a bathroom look modern and airy, and can be easy to clean if you don’t have hard water
Full Story

Paths
What to Know About Installing a Walkway of Pavers and Pebbles
Find out how to get started, whom to hire, materials to use and costs to expect when adding a path of pavers and gravel
Full Story

Working With Pros
How to Choose a Designer to Refresh Your Living Room
Match professional design services to your goals and needs to get a living room that reflects your style
Full Story

Working With Pros
How to Smooth Out Your Stucco Exterior
By Erin Carlyle
Stucco pros explain how to update a rough or heavy texture for a smoother exterior that looks fresh and clean
Full Story
Green Building
Easy Ways to Save Money on Energy Bills This Winter
By Becky Harris
Simple changes can cut down your electric and gas bills as the days get colder
Full Story

Most Popular
What to Know About Adding a Deck
Want to increase your living space outside? Learn the requirements, costs and other considerations for building a deck
Full Story

Pets
Is a Backyard Chicken Coop Right for You?
By Julie Sheer
Find out the features to include in a backyard chicken coop, and see how to build or buy one
Full Story

Outdoor Projects
Love Your Home Even More With These 8 Outdoor Projects for Summer
Here’s how to build a deck, add a storage shed, plant a living wall, update your garden pathway and more
Full Story

Gardening and Landscaping
How to Get a Built-In Outdoor Grill
Put fresh-air grilling on the menu with a built-in setup that suits your patio or yard
Full Story

Earth Day
How to Build a Greener Driveway
By Jen Dalley
Install a permeable driveway to keep pollutants out of water sources and groundwater levels balanced
Full Story
I recently read that you should make sure the dimmer switch can be used for the kind of bulb AND the total wattage of the light fixture. So some dimmers are for incandescent bulbs and won't dim LED dimmable bulbs. Who knew!!