


Kitchen of the Week: Pro’s Own Kitchen Adds Storage Aplenty
A Montana architect upgrades her kitchen with smart storage solutions, a slim island and a beer stein display case

Like the cobbler whose children go barefoot, Montana architect Angie Lipski designed close to 100 kitchens for clients while the inefficient kitchen in her century-old house went largely untouched. On the upside, by the time it was her turn, she knew exactly what she wanted, which included an island, a showstopping metal hood, a cozy cafe corner and as much customized storage space as possible. Check out the transformation below and see how Lipski put her pro wisdom to work to maximize every square inch for function and charm.
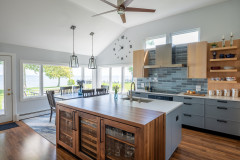
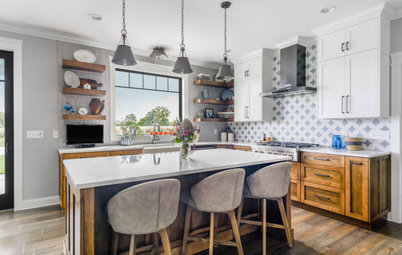
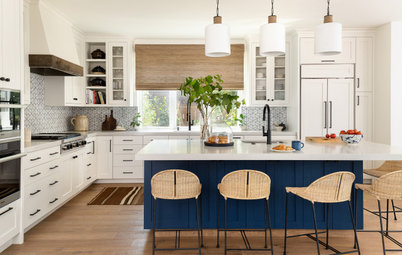
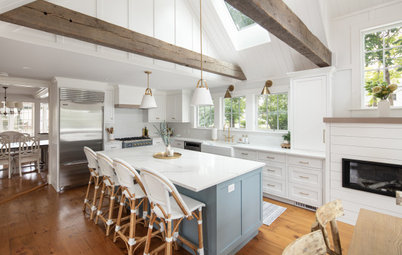
After: Lipski’s top priority was figuring out how to add an island to the kitchen without enlarging the house’s footprint.
“I really take the function of an island seriously, even though nobody else does,” she says with a laugh. “There is a work side and there’s a social side. If you’re not making me a drink, get on the other side!”
Her solution was to make the tread of the basement stairs (which are behind the door at the right of this photo) shorter and their rise taller, which extended the run further into the basement and removed the stairs from the main floor level. The relatively inexpensive modification — made possible by the original L-shaped configuration — allowed her to steal 3 more feet of width for the kitchen without making a noticeable difference to anyone using the stairs. (Scroll to the before-and-after floor plans at the end of the story to compare.)
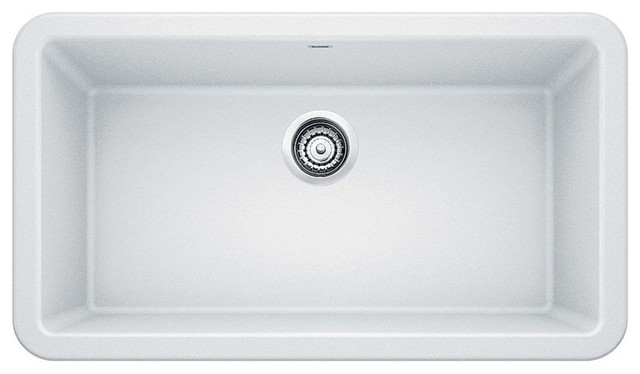
She then replaced the MDF cabinetry with customized paint-grade cabinets manufactured by Columbia Cabinets, painting them Benjamin Moore Cloud White and reusing the old crystal knobs. In place of the square-tile countertops and backsplash, Lipski installed Silestone Eternal Crema Marfil counters and Walker Zanger subway backsplash tile.
The design cues came from the home’s architecture. “This house is beautifully preserved, [with] all original details,” Lipski says. “I just let it be in charge.”
New to home remodeling? Learn the basics
“I really take the function of an island seriously, even though nobody else does,” she says with a laugh. “There is a work side and there’s a social side. If you’re not making me a drink, get on the other side!”
Her solution was to make the tread of the basement stairs (which are behind the door at the right of this photo) shorter and their rise taller, which extended the run further into the basement and removed the stairs from the main floor level. The relatively inexpensive modification — made possible by the original L-shaped configuration — allowed her to steal 3 more feet of width for the kitchen without making a noticeable difference to anyone using the stairs. (Scroll to the before-and-after floor plans at the end of the story to compare.)
She then replaced the MDF cabinetry with customized paint-grade cabinets manufactured by Columbia Cabinets, painting them Benjamin Moore Cloud White and reusing the old crystal knobs. In place of the square-tile countertops and backsplash, Lipski installed Silestone Eternal Crema Marfil counters and Walker Zanger subway backsplash tile.
The design cues came from the home’s architecture. “This house is beautifully preserved, [with] all original details,” Lipski says. “I just let it be in charge.”
New to home remodeling? Learn the basics
The smaller stairwell still has space for deep shelves that hold lightweight recycling bins and serving baskets on one side, which Lipski can access when standing on the top step. She uses a reacher-grabber tool to snag harder-to-get items.
Shop for food containers and storage
Shop for food containers and storage
Before: This is the opposite view from the first “before” photo, looking north past the old refrigerator and stairwell door on the left.
7 Kitchen Design Challenges and How Pros Overcome Them
7 Kitchen Design Challenges and How Pros Overcome Them
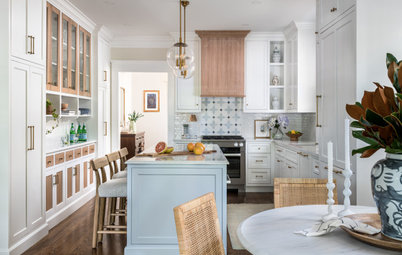
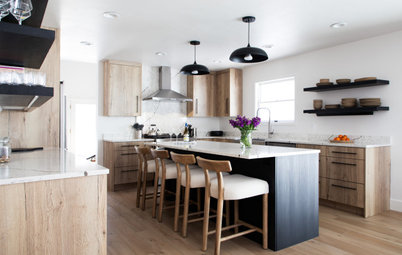
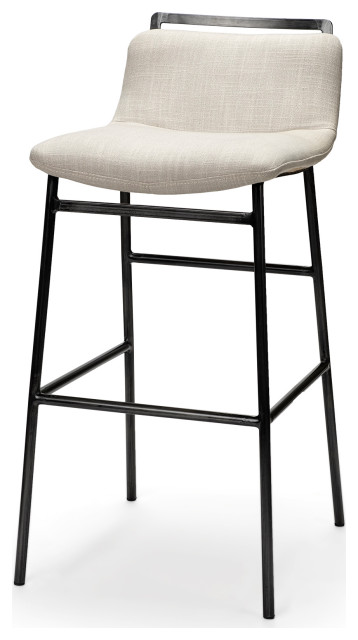
The new 5-by-2½-foot island has a countertop with an ogee edge that’s slightly dressier than the eased edge on the perimeter counters. Graceful turned legs support a 10-inch overhang.
To create enough knee space for those seated on the stools, Lipski made the island’s lower cabinets 21 inches deep versus the more typical 24 inches. She tucked an outlet into that knee space instead of on the end of the island so it’s barely noticeable when you walk into the room.
To create enough knee space for those seated on the stools, Lipski made the island’s lower cabinets 21 inches deep versus the more typical 24 inches. She tucked an outlet into that knee space instead of on the end of the island so it’s barely noticeable when you walk into the room.
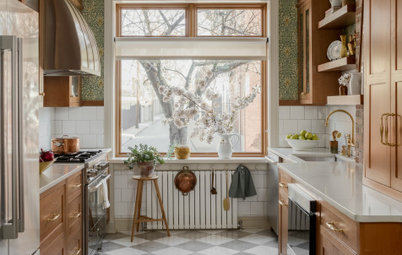
Before: The home’s previous owners had expanded the kitchen by absorbing a mudroom into its northwest corner. In 2009, during a minor renovation focused on the home’s second story, Lipski installed a breakfast nook in the space. While it provided a lot of utility and enjoyment, it was always cold due to insufficient insulation.
After: During this renovation, Lipski toyed with other ideas for the nook.
“I thought about adding a little Euro gas fireplace. I thought about a very lounge-y club chair with footstool and side table. I thought about copious amounts of half high storage (maybe 12 inches deep). However, I couldn’t let go of the gatherings in that cozy little corner and decided to do something ‘gathering’ there,” she says.
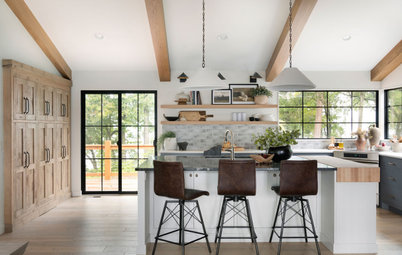
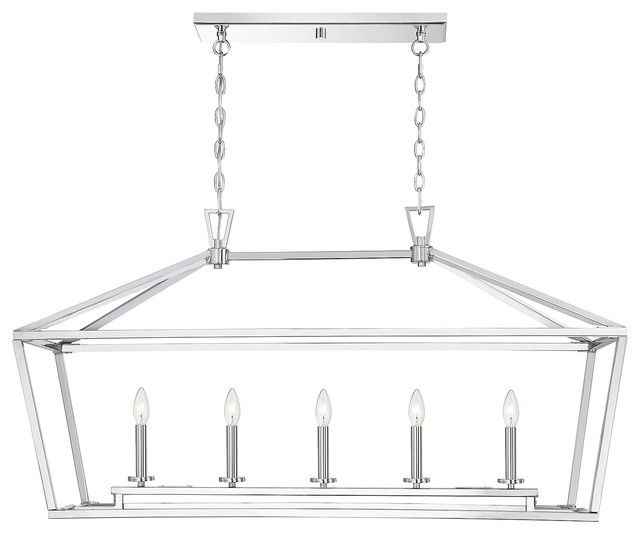
The new cafe corner has a custom curved and sloped bench seat with toekick heaters. Lipski’s husband found the table base in an alleyway several years back, and Lipski gave it new life with brushed nickel spray paint and a custom oval white oak top. She kept the old semiflush-mount ceiling light, which suits the kitchen’s vintage-style design.
“I thought about adding a little Euro gas fireplace. I thought about a very lounge-y club chair with footstool and side table. I thought about copious amounts of half high storage (maybe 12 inches deep). However, I couldn’t let go of the gatherings in that cozy little corner and decided to do something ‘gathering’ there,” she says.
The new cafe corner has a custom curved and sloped bench seat with toekick heaters. Lipski’s husband found the table base in an alleyway several years back, and Lipski gave it new life with brushed nickel spray paint and a custom oval white oak top. She kept the old semiflush-mount ceiling light, which suits the kitchen’s vintage-style design.
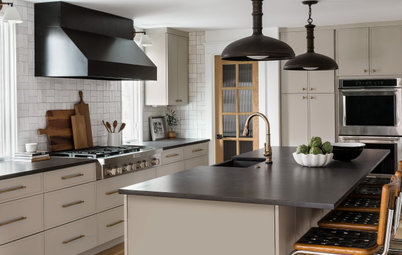
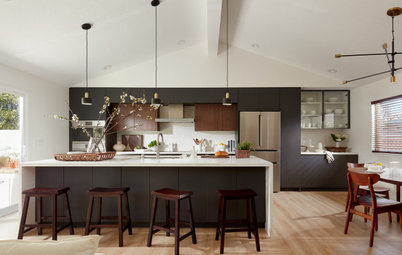
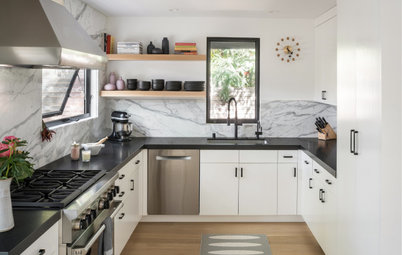
After: Lipski could have spent a few hundred dollars to install a new, discreet hood integrated into the cabinetry. But in her mind, a metal hood was “the moment” in the whole kitchen, she says.
So she splurged, designing a zinc-and-brass hood with banding and rivets and having it custom-made by Mountain Copper Creations in Missoula. At over $5,000, “the hood was the big kahuna,” she says.
At the other end of the spectrum, the small microwave to the right of the hood is an inexpensive countertop model from a big-box store — which will be much easier to replace than would be a built-in model when it inevitably goes bad, Lipski says.
Lipski paid special attention to maximizing storage in the blind corners of the kitchen. In the cabinet nearest to the door at the north end of the room, she installed a pullout for her stand mixer and other small appliances.
Shop for pantry and cabinet organizers
Shop for pantry and cabinet organizers
In the opposite blind corner, Lipski installed a bean-shaped pullout after calculating the space savings between that style and a traditional lazy Susan.
“We’re [only] talking 8 square inches, but in my house I needed every inch,” she says.
The small pullout at the end of the cabinet run holds medicine bottles and other small upright items.
“We’re [only] talking 8 square inches, but in my house I needed every inch,” she says.
The small pullout at the end of the cabinet run holds medicine bottles and other small upright items.
Lipski had just enough space for a trash pullout to the left of the blind corner.
How to Get Your Pullout Waste and Recycling Cabinets Right
How to Get Your Pullout Waste and Recycling Cabinets Right
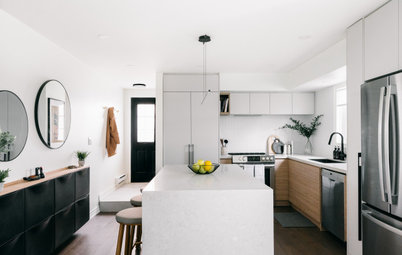
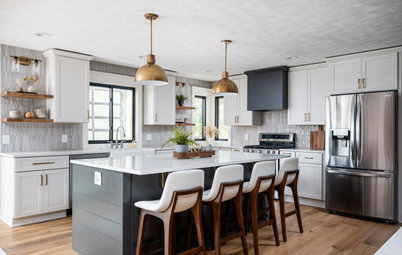
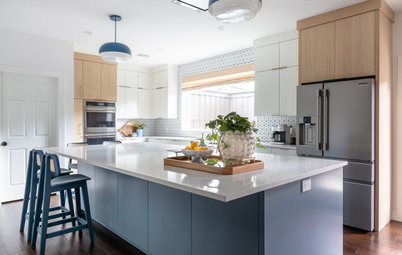
Cookie sheets, cookbooks and tall bottles fit above the refrigerator, which Lipski relocated to the back wall, next to the entrance to the dining room. She chose a paneled front for the fridge and dishwasher for a more harmonious look.
“Now, [are panels] a pain in the butt if you have to replace your fridge or dishwasher? Yes. But I think it’s worth it for the 10 other years until that happens,” she says.
“Now, [are panels] a pain in the butt if you have to replace your fridge or dishwasher? Yes. But I think it’s worth it for the 10 other years until that happens,” she says.
This brings us to a feature that makes this kitchen truly unique: an illuminated wall of Bavarian beer steins.
Lipski’s husband is proud of his German heritage and had a collection of 50 or so steins that he’d collected over the years and kept in boxes.
When considering how to make the best use of the shallow leftover dimension of the southwest wall, Lipski’s mind turned to the steins. Building a curio cabinet into the wall framing allowed them to fit perfectly. Now the glowing collection tells the family story and provides soft illumination at night.
Three doors below the stein collection hide other items that are a few inches in depth, such as water bottles, glass jars and a handheld vacuum.
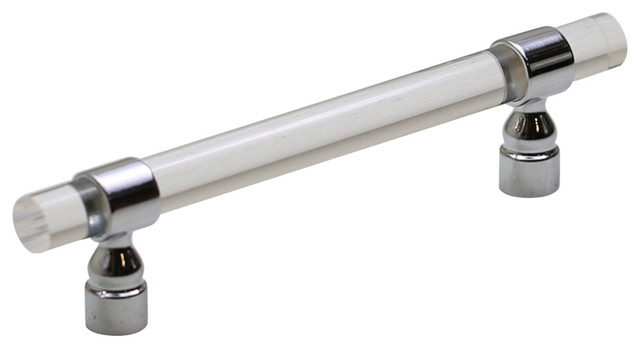
Instead of using knobs, which would have interfered with the pullout pantry, Lipski took inspiration from yacht hardware and installed recessed brass pulls.
“They’re darling. And [the hardware] just makes that space a little bit even more special,” she says.
Shop for cabinet hardware on Houzz
Instead of using knobs, which would have interfered with the pullout pantry, Lipski took inspiration from yacht hardware and installed recessed brass pulls.
“They’re darling. And [the hardware] just makes that space a little bit even more special,” she says.
Shop for cabinet hardware on Houzz
After: The “after” floor plan shows how the streamlined stair design opened up the kitchen and allowed for an island.
More on Houzz
Read more kitchen stories
Browse kitchen photos
Hire a kitchen remodeler
Shop for kitchen products
More on Houzz
Read more kitchen stories
Browse kitchen photos
Hire a kitchen remodeler
Shop for kitchen products


Kitchen at a Glance
Who lives here: Angie Lipski, principal architect at MMW Architects, and her husband and their 10-year-old twins
Location: Missoula, Montana
Size: 184 square feet (17 square meters); 16 by 11½ feet
Builder: Scariano Construction
Before: When Lipski moved into her 1922 bungalow in Missoula, the kitchen had already been attractively remodeled. But two decades later, the inexpensive MDF cabinets had started to warp due to water damage. And the wasted space in the middle of the kitchen — which, at 7 feet between the countertops, was too wide to be efficient but too narrow for an island — had grown irritating.
So after winning over her husband by promising him a display cabinet for his beloved collection of German beer steins, Lipski set out to strategically upgrade the kitchen’s function and style, splurging where the payoff was greatest and preserving what worked.
She started by saving inspirational images to ideabooks on Houzz.
“I like figuring out what I want to do from the feel of photos … and then breaking the goal down into materials and executable moves to get back to the whole,” she says.
Find an architect near you