


How to Care for Engineered Wood Flooring
Keep your wood floor looking its best with these tips and tricks from the experts

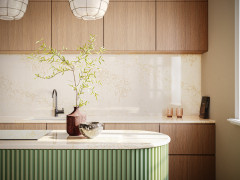
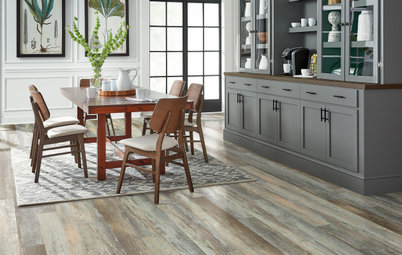
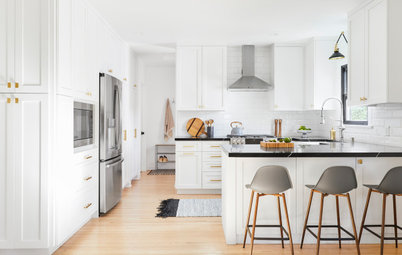
Strong, durable and often less expensive than solid wood, engineered wood flooring has been a staple in our homes for quite a while. To help you keep yours in tip-top condition, three experts share their advice on installation, protection, cleaning and repair.
Get the Basics Right
If you’re laying new engineered wood flooring, there are things you can do to ensure your boards stand the test of time. Uprimny emphasizes the importance of preparing the subfloor first. “Check the subfloor to ensure it’s clean and free of any dirt, paint, grease or glue residue that may affect adhesion,” he says. “Hire a professional [installer] to ensure the floor is level.”
He also says the subfloor needs to be perfectly dry and recommends using a moisture meter to test it accurately. “When protecting your newly laid floor during the remainder of the construction process, never use plastic to cover it, as this will trap moisture, which could affect the floor,” he says. “Instead, a good-quality felt covering can be laid and taped to the [baseboards] to allow the floor to breathe.”
Andrea Hewitt of Element 7 suggests using builder’s lining paper and then hardboard, “as these protect the floors while allowing them to breathe.”
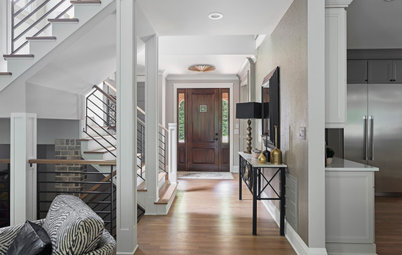
Wilkinson offers a tip for floors that are laid in a hallway. “Install a large inset coir doormat at external entrances — ideally to allow two steps across — to force feet-wiping, trapping grit and dirt. Grit acts like sandpaper on any wood floor finish.”
And what if you have some boards left over? Don’t throw them away. “Keep a few spare planks in case of any future damage,” Uprimny says.
Shop for flooring products on Houzz
If you’re laying new engineered wood flooring, there are things you can do to ensure your boards stand the test of time. Uprimny emphasizes the importance of preparing the subfloor first. “Check the subfloor to ensure it’s clean and free of any dirt, paint, grease or glue residue that may affect adhesion,” he says. “Hire a professional [installer] to ensure the floor is level.”
He also says the subfloor needs to be perfectly dry and recommends using a moisture meter to test it accurately. “When protecting your newly laid floor during the remainder of the construction process, never use plastic to cover it, as this will trap moisture, which could affect the floor,” he says. “Instead, a good-quality felt covering can be laid and taped to the [baseboards] to allow the floor to breathe.”
Andrea Hewitt of Element 7 suggests using builder’s lining paper and then hardboard, “as these protect the floors while allowing them to breathe.”
Wilkinson offers a tip for floors that are laid in a hallway. “Install a large inset coir doormat at external entrances — ideally to allow two steps across — to force feet-wiping, trapping grit and dirt. Grit acts like sandpaper on any wood floor finish.”
And what if you have some boards left over? Don’t throw them away. “Keep a few spare planks in case of any future damage,” Uprimny says.
Shop for flooring products on Houzz
Add Some Protection
“Prevention is the best way to protect engineered wood flooring,” Wilkinson says. Stick felt pads under all your furniture and remember to lift rather than drag heavy items. Make sure stiletto heels are in good repair and trim your pet’s claws.”
Uprimny emphasizes the importance of room temperature, both during installation and long-term. “Generally, the temperature shouldn’t vary drastically.” The ideal would be between 64 and 68 degrees Fahrenheit. “Don’t turn the underfloor heating off, just keep it on low,” he says.
“Sudden changes in temperature will shock the wood flooring and could cause lifting, or the top layer of engineered boards to delaminate. And bear in mind, carpets on wooden floors can add considerable heat to the temperature between floor and carpet.”
Check out our beginner’s guide to get started on your project
Keep Them Clean
When asked how you should clean your engineered wood flooring, Wilkinson says “As lightly as possible. Vacuum, sweep or dust frequently to collect dirt. Make sure you use a soft-bristle head if vacuuming to avoid accidentally scratching the floor.”
As for mopping, the key is to use a damp cloth with a little wood floor cleaner, rather than a mop soaked in water. “Wood is hygroscopic, so it acts like a sponge and will expand when it gains moisture and shrink when it dries out,” says Wilkinson. “This can cause splitting or cracks, so never drench your wood floor when mopping or use a steam cleaner.”
Uprimny adds, “The level of maintenance will depend on the level of traffic. Daily cleaning of the floor with a soft mop or vacuum cleaner will remove a lot of dust and/or sand particles.” He recommends you apply hard wax oil after six to nine months.
It’s a good idea to consult your supplier to make sure you’re using the correct brand of aftercare products. As Hewitt says, “Floor cleaners are specific to the floors, so don’t just go to a supermarket and buy a wood floor cleaner, as it may do more harm than good.”
What to Know About Engineered Wood Floors
Remove Stains
Accidents happen, but the key is to act fast. “Mop up wine spills or accidents immediately,” says Wilkinson. “Engineered wood floor finishes are extremely advanced and will protect your floor wonderfully well, but it’s always wise to err on the side of caution.”
Uprimny offers a recipe for stain success. “Try mixing water with talcum powder to a consistency similar to set yogurt — the less water in the mix, the faster it will dry. Add the mix to the stain, let it dry for a few hours, then wipe off. You can repeat this step more than once if the stain is stubborn.”
Wilkinson says, “Urine is a stain to be wary of — particularly dog urine — as it contains ammonia, which causes a nasty reaction, damaging wood and staining it black, so wipe it up immediately.” There are enzyme-based solutions available that, if you act fast and apply, will minimize the damage, he says.
Hewitt adds, “Only a wax floor will stain, but like some stone floors, this patina looks better with time. Anything varnished or oiled should be very resilient and shouldn’t stain.”
Fill Those Cracks
“Small cracks or scratches can easily be filled or remedied using a wood-colored wax stick in an appropriate shade,” Wilkinson says. “Repair kits containing several shades of wax stick, which can be used alone or mixed to create the color required, are available from DIY suppliers.”
Uprimny recommends you get an expert to do this for you. They will finish with a pigmented oil to revive the color. “In a worst-case scenario,” he adds, “it’s possible for an experienced installer to remove an individual plank and replace it with a new one.”
More on Houzz
Read more remodeling guides
Find design and remodeling pros
Shop for home products


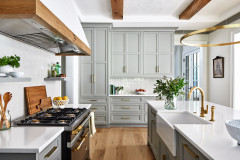
When you’re purchasing your flooring, Andres Felipe Uprimny of The New & Reclaimed Flooring Co. says it’s important to consider four main areas: construction, species, coating and finish.
For the subfloor, Uprimny recommends a high-quality plywood with a natural, formaldehyde-free glue.
If you’re going for an oak species, he suggests going with a slower-growing one because it “has a tighter grain and produces a more stable wood structure.”
He also advises choosing a wood with a UV-resistant, fire-retardant, hard-wearing coating to ensure a longer and safer life expectancy, and he suggests applying an oil finish with a high wax content.
Charlotte Wilkinson of Woodflooring Engineered says, “Hardwoods, such as American white ash and oak, are among the densest, hardest-wearing timbers and will not dent or mark easily.”
Wilkinson adds that softwoods such as Douglas fir and pine are not as durable and should be handled with care. “[L]eave your shoes at the door with this type of flooring.”
Find flooring professionals near you