


Before and After: A Kitchen Opens Up and Brightens Up
Removing a wall in the kitchen and faux brick in the dining room makes way for improved style and a better layout

Before: As you can see in this floor plan, the kitchen had a U-shape layout and was closed off from the dining and living rooms. The area in the kitchen with the dotted lines indicates a window-like opening in the wall separating the kitchen from the dining area.
Before: This photo shows the window-like opening between the kitchen and dining area prior to the renovation. As you can see, the dark and shiny wood cabinets in the existing kitchen did not create a bright and light feeling.
After: Here’s the new floor plan. Deck removed the wall separating the kitchen from the living room, and much of the wall separating the dining room from the kitchen. This floor plan shows a small black square to the left of what is the breakfast bar — this indicates a vertical structural beam that needed to stay in place.
Work with an interior designer near you
Work with an interior designer near you
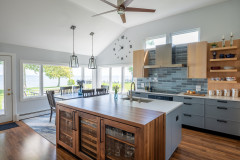
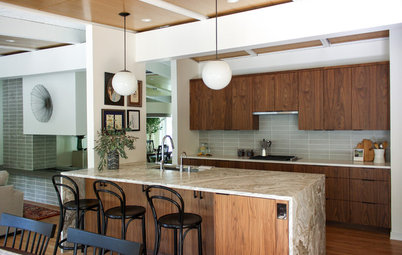
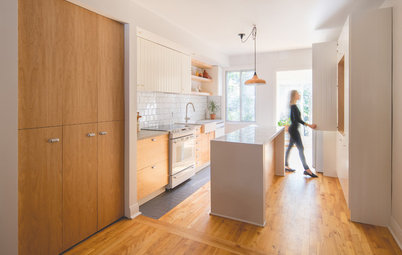
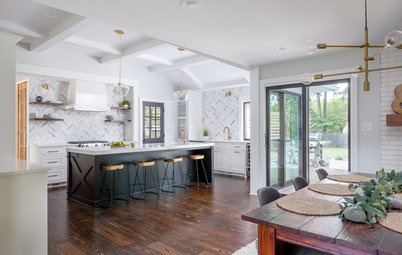
After: This shot shows an overview of the kitchen, with the breakfast bar at the left and the dining area beyond it. The woman in the photo could continue walking forward, toward the staircase that leads to the ground floor, or she could turn right and enter the dining and living rooms.
Deck had the trim around the sliding door and window mullions painted black (they used to be forest green).
Deck had the trim around the sliding door and window mullions painted black (they used to be forest green).
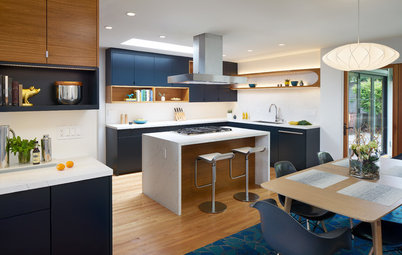
Here’s a close-up of the breakfast bar area. The sliver of white framing the right side of the breakfast bar is the structural beam that needed to be integrated into the design (it’s larger than the slice shown in this photo). This renovation was on a budget, so keeping the layout of the kitchen mostly the same helped to save on costs.
Of course, Deck needed to move the sink and dishwasher to this wall, as the wall where they had originally stood was removed as part of the remodel.
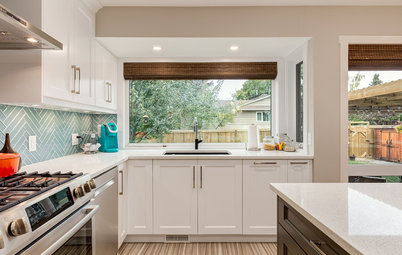
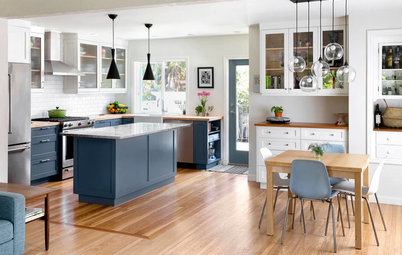
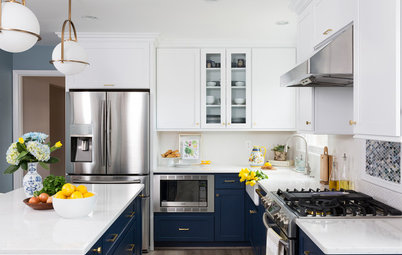
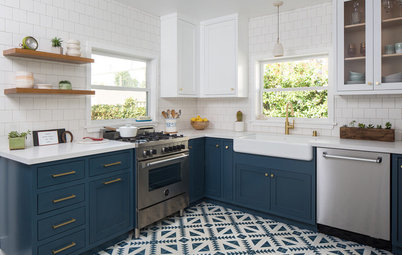
Deck chose simple flat-panel cabinets for a clean look, and cabinetmaker Sofo Kitchens, a company Shift Interiors works with regularly with, custom-made the cabinets. Choosing more doors than drawers also helped the homeowners save money on their cabinetry, as drawers are more difficult and costlier to make.
White was a great color choice, given the local climate. “We do live in Vancouver, and it’s gray,” Deck says. “We just basically chose white to open up the space and make it brighter.”
Hexagonal tile with dark grout adds pattern and interest, while the matte black faucet and cabinet pulls bring in contrast.
Find hexagonal tile in the Houzz Shop
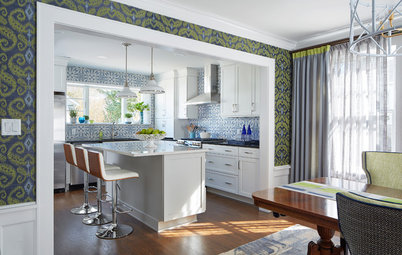
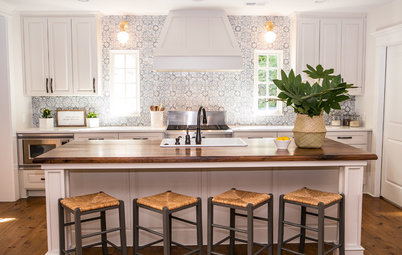
At the end of the cabinet run that leads out to the rooftop patio, Deck added black cabinets and open shelving. This area can be seen from the dining room and serves as a place to show off pretty cups and glassware.
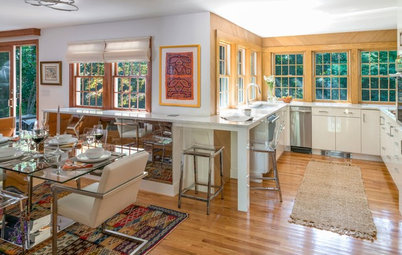
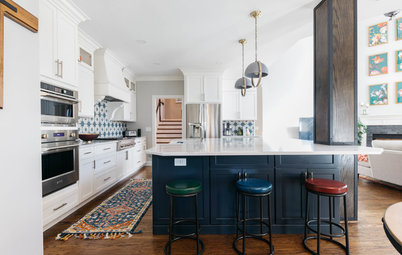
In the dining room, Deck had the faux brick removed from the wall and the window mullions painted black. Matte black pendant lights and black dining chairs contrast the white walls and light wood table. Shift Interiors designed the dining table and had it custom-made by Omega Custom Furniture. The flooring is 7-inch engineered white oak.
Underfoot: What to Know About Engineered Wood Floors
Underfoot: What to Know About Engineered Wood Floors
Before: Here’s how the living room leading to the rooftop patio area looked prior to the renovation. Notice the dark wood flooring, as well as the fireplace in the back-right corner of the room.
After: Deck made over the fireplace by framing around it and drywalling it, as well as adding a new surround. A new rug, sofa, coffee table and art, all chosen with budgetary constraints in mind, give the room a clean feel.
Pro tip: If your designer has a construction firm that he or she typically likes to work with, Deck advises trusting the designer and choosing that construction firm. “It is way more efficient when we work with our contractors. We trust them. We know how long it’s going to take,” Deck says. “It’s a cost savings for the client.”
Pro tip: If your designer has a construction firm that he or she typically likes to work with, Deck advises trusting the designer and choosing that construction firm. “It is way more efficient when we work with our contractors. We trust them. We know how long it’s going to take,” Deck says. “It’s a cost savings for the client.”
On the portion of the living room wall where the faux brick used to be, Deck added a wall cabinet and shelving to display the couple’s decorative items. The wood doors have touch latches and contain shelving with bottles and glasses and a space to make drinks. The chair is upholstered in a gray-blue felt.
Chair: Rove Concepts
Chair: Rove Concepts
Pro tip: When meeting with an interior designer you are considering working with, make sure you understand the designer’s process, Deck suggests. “We have an 18-step process we go through with them,” she says.
In her firm’s case, the first phase is programming, when the team asks about the client’s needs and inspirations. Next comes the concept phase, when the team produces layouts for the client to consider. That gets refined until there is “a clear, clear vision,” Deck says. Next come floor plans and sometimes elevation drawings, followed by the schematic design phase, in which the team completes the drawings and chooses finishes and materials.
With Shift there are more steps that follow, but these initial steps can give you a sense of how a design firm might spell out its process when you meet. Be sure to ask your designer about his or her process so you know what to expect.
More on Houzz
Designer Tips: How to Be a Good Client for Your Interior Designer
Find a pro to work with
Shop for furniture and decor


Kitchen and Living Area at a Glance
Who lives here: A couple with a 3-year-old daughter
Location: Fairview neighborhood of Vancouver
Size: 700 square feet (65 square meters)
Designer: Jamie Deck of Shift Interiors
Before: The owners of this newly purchased two-story home hired designer Jamie Deck of Shift Interiors to help them renovate. They wanted to open up the layout on the home’s top story, where the kitchen, dining and living areas are, and they wanted the changes to brighten and lighten the space. “They just wanted it to be new and fresh,” Deck says.