


DIY Backsplash Makeover: Get a New Tile Look for Less Than $50
Give old tile a painted faux-stone facade for a brand-new look at a superaffordable price

The dated floral pattern on the backsplash tiles in our kitchen was getting us down. We had just put dozens of hours into repainting the dreary, dark cabinets and changing out the hardware, so we weren’t up for another marathon do-it-yourself project. Besides, the crackled glass tiles that had caught our fancy were $17 per square foot. At 30 square feet, the job would have cost $600 in materials and saw rental fees. Add another 15 hours of labor, and the mother of invention took over.
With a bit of tinkering, we found that we could paint over the ugly existing tiles that we hated and create own decorative backsplash for a fraction of the cost. Here's how we did it for less than $50.
With a bit of tinkering, we found that we could paint over the ugly existing tiles that we hated and create own decorative backsplash for a fraction of the cost. Here's how we did it for less than $50.
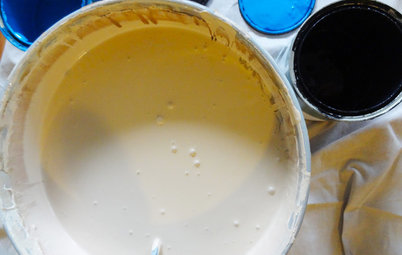
3. Apply the first glaze coat with a rag. We tinted ours with Payne’s Grey because it looks like stone. Many earth colors would work, including ochers, light browns and other grays. Have a sample of what you're after on hand to guide your selections.
Tip: Masking tape and brown paper on the countertop help confine drips.
Tip: Masking tape and brown paper on the countertop help confine drips.
4. Wipe off most of the first glaze coat with a rag, leaving a light blue-gray tint. (Several thin layers of glaze will look more realistic than heavy applications.)
5. When the first glaze coat is dry to the touch, use a crumpled rag (with plenty of folds exposed) to dab on a mix of Raw Umber (or your main color choice) and glaze.
Apply a second glaze coat to only about 60 or 70 percent of each tile. It should be thin enough so that some of the first glaze shows through or is even lifted off and replaced by the main color choice.
Apply a second glaze coat to only about 60 or 70 percent of each tile. It should be thin enough so that some of the first glaze shows through or is even lifted off and replaced by the main color choice.
6. To simulate veining or mineral streaks, drag a thin, long-bristled artist's brush (called a script brush) across the tile. It helps to thin the oil color with plenty of glaze when you're brushing on veins. You may also stipple accent colors on with a stippling brush or a toothbrush.
With a small artist's brush, dab on small spots of white-tinted glaze to cover mistakes or to lighten the effect.
With a small artist's brush, dab on small spots of white-tinted glaze to cover mistakes or to lighten the effect.
7. Paint the grout with a grout stain tinted to a shade you select from your trio of colors. A midtone works well.
Tell us: Please share your own tile fix with us in the Comments below!
Tell us: Please share your own tile fix with us in the Comments below!


- Palm sander with 100-grit sanding disks
- Pigmented shellac primer, such as B-I-N
- Roller, foam roller cover and paint tray
- Artist’s oil paints (we used Payne’s Grey, Raw Umber and Zinc White, but you can pick your own base, main and accent colors)
- 1 quart clear alkyd glaze, such as Benjamin Moore's 409
- Rags
- Sample tiles
- Masking tape
- Artist’s brushes
- Grout stain
- Disposable latex or vinyl gloves (optional, but they help you save time washing your hands)
1. Practice on sample tiles or other tiles you may have lying around the house. Prime, then play with various techniques using the glaze, artist’s oils and brushes to find colors and textures that appeal to you. We settled on a faux stone look after experimenting with a variety of color washes.2. Sand the existing tile backsplash and roll on three coats of primer. Use a palm sander with a 100-grit disk. The idea is to dull the glaze slightly to improve primer adhesion.