


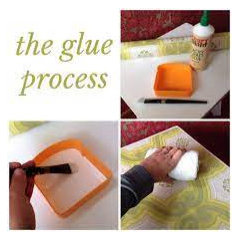
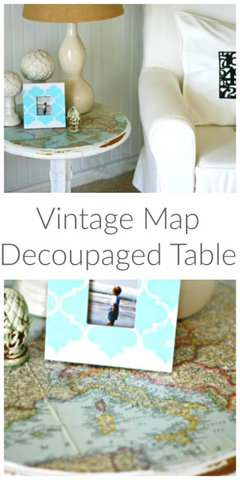
Best technique to apply a map to a tabletop
zazako
last year

Featured Answer
Sort by:Oldest
Comments (18)

Olychick
last yearRelated Discussions
What's the best way to learn photography?
Comments (19)Quote:"your area is so full of wonderful subjects" Years ago I drove 18 wheelers covering the entire U.S.A. Every year Labor Day seemed to open the flood gates as people began their annual vacation migration in search of something to see. But what I found most amazing is that for every person that heads out of your community there is another traveling vast distances to come see your town. To that end I used to offer people a challenge. Take out a road map of your state and locate where you live then take a simple drawing compass and scribe circles at 5, 10, 20, 30, 40 & 50 miles. Now locate all the communities within those circles and contact their chamber of commerce for information on sites to see in their community. You will find a vast wealth of sites to see, all within a short one hour commute of your house, and many of them are absolutely free of admission. Now consider how much money you can save in fuel, food and lodgings and you have just saved enough to pay for that camera or new lenses you been dreaming about, not mention that you can continue that project year around instead of trying to pack it all into two weeks. Now in regards to how long it takes to edit 1300 photos. Actually the problem is not as difficult as it might seem. I began my interest in photography with a Pentax Spotmatic, which was the first 35mm SLR to have a built in through the lens light meter. (The Nikon F offered a light meter in an accessory viewfinder and Canon had not yet got into the professional SLR market). Lenses were manual focus, manual aperture and exposure was controlled by manipulating the shutter speed and lens aperture to center a match needle indicator in the view finder. As if that was not enough, in those days most films had an ASA (ISO) rating ranging from 64 to 325. I can vividly remember when AGFA introduced a 1000 ASA B&W film for the first time, and Fuji film almost took over the industry with a 500asa high resolution color print film. In those days getting the correct exposure was at best a bit iffy so it was common practice amongst the pro's and advanced amateurs to use a technique called "Bracketing" In fact, Bracketing is an automatic feature on most DSLR's but most people fail to use it. Bracketing is a technique where you shoot one frame at the measured exposure, then a second frame one f-stop under and a third frame one f-stop over. We could then push or pull an additional f-stop in the darkroom if need be. In those days there was no "live view" or "instant replay" so that is how we could insure we would have a usable print when we processed the film. I still rely heavily on that technique when i am out in the field where it would be difficult to return and try again, especially when shooting birds or wildlife where the shots cannot be repeated. When shooting macro shots of plants & flowers on a windy day I often set the mode to "Sports" which is shutter priority mode keeping the shutter speed as high as possible. This has a two fold effect. 1. By keeping the shutter speed very high it assures stop action when the subject is moving in the wind and 2. it keeps the aperture open, limiting depth of field, which generally puts the background out of focus giving a nice soft pastel background that does not detract from the subject. Back in the days of film bracketing the exposures was rather expensive when you considered the cost of film and processing, but in this age of digital when i go in the field I carry 5 or 6 SD cards and 5 sets of batteries so I am not concerned about wasting a shot or two if I can be sure that I will ultimately have the shot i want. In addition, I generally do not take just one shot, but rather I like to shoot a series of shots that show different aspects of the subject. By example, I am attaching a series I took of the evolution of a Dandelion. My brother said i was as crazy as an outhouse rat for taking pictures of dandelions but I like the outcome. DANDILION PLANT IN BLOOM DANDILION BLOSSOM DANDILION IMMATURE SEED POD DANDILION MATURE SEED POD DANDILION MATURE SEED POD DANDILION SEEDS...See Moresearching for a paint dipping technique
Comments (25)In Jan. I'd gone on a trip to Mobile with a couple friends to a big flea market there. Before coming home we drove to Dauphin Island - we couldn't believe how badly they'd been hit. I talked with a lady at a convenience store there who'd had a paper route on the island and after the hurricane over half her route was gone, not only the houses, but the property itself was underwater in the Gulf. That's why most of these poor people are fighting with the insurance companies, the property/land itself is gone. As for the MS coast - it was truly difficult to grasp how massive the devastation was, and still is, there. When you only see a picture or camera view of one area, you don't really have any point of reference or landmark to orient yourself as to what area you're looking at. Then you get there, and you slowly begin to grasp the magnitude of it because there ARE NO landmarks left. The beaches themselves are slowly recovering, and of course most of the casinos are back, but as you said all the beautiful old homes are gone, all the businesses & restaurants are gone - amazing to me was that a few of the signs remained, but the actual buildings were levelled. A few of the hotels have come back, but most are either gone or still in shambles. Most all the debris has been cleared away, but it's just such an eerie feeling to be able to see inland for blocks from Hwy 90. As I said, we were returning from Mobile and got on 90 there in Biloxi (the Ocean Beach bridge is, or was at that time, still out) - my friend said the devastation was even worse further west toward Long Beach, but I had had all I could take by the time we reached Hwy 49 in Gulfport - I was in tears and trying to drive, so I headed up 49 toward home. As for my life history (a little of it I was telling PF about on the 'paint dipping' post)....I'll attempt to make a VERY long story short. I was born in Oakland, CA (biological father in the Navy), mom divorced then remarried another Navy man (my step-dad) who got transferred to Pensacola when I was 2. My step-dad retired there, so I lived there from age 2 to 14. At 14 my mom passed away from cancer and I went to live with my older sis whose (now ex)husband had been transferred to Jackson for his job. From there I moved back to FL briefly, met my ex-husband, moved with him to New Orleans, then San Diego, San Francisco, WA state (where he was originally from) and I finally decided to come back home (after 5 yrs. of h*ll)-fully intending to go back to FL. I stopped in MS to visit my sis and my brother (who had since also moved there from FL) and ended up staying there for the past 17 years. I finally got divorced from my ex and eventually found the love of my life (corny,I know)- his mom was born and raised in MS. He grew up in FL too from a Navy family and come to find out, had things been just a little different we probably would've at least gone to high school together. His father was just getting transferred out of Pensacola as mine was being transferred in. And, of course, you already know the reason for the GA move. When I first moved to MS, everyone told me, "If you stay 6 months, you'll never leave". I took it as you wouldn't 'want' to leave - little did I realize that the truth was that you can't AFFORD to leave! It's worse now because the cost of everything is going up, but wages there aren't. After 15 years of struggling there, we figured a change couldn't hurt. Besides, my brother and his family are now back in Jacksonville, so I'm closer to them and my oldest son is in the Marine Corps in NC so I'm closer to him now, too. My sis isn't happy about the whole thing since she's still in MS, but if things work out here, I'm gonna get her moved here eventually! LOL OMG... this is turning into a novel...DH took my 2 youngest to the dentist for me today so it's been quiet and I didn't realize how much I'd rambled on...Sorry - I warned PF about this earlier! :) I need to get some work done before they get back....See MoreShare your pics (and your techniques) of your painted furniture!
Comments (32)I say paint it. It's beautiful as is, but you've considered this for years and aren't making a hasty decision. It will definitely be transformed and in a sense given new life. It may respond well to the joy it brings you. I do agree with others that it's a good idea to try out your technique on a little test piece from a thrift store. Yours is big and a bit complex. I recently refinished a small student desk and I ran out of inconspicuous spots to test my colors. Even now, I open drawers and see splotches on the inside of the drawer fronts. Can someone point me to a link about chalk paint? At first I thought you all were talking about chalkboard paint and I thought, oh for love the love of God, no. Clearly it's something else....See MoreTalk to me about applying veneer
Comments (10)I've had good success with PVA glue applied, allowed to dry, and then ironed on. Now I use hot hide glue-- it's more exciting. ;-) If I had to do do a whole kitchen's worth of cabinets I'd set up a vacuum veneer press. See JoeWoodworker.com for how to do it for a reasonable price. I've never seen veneer applied with pressure sensitive adhesive that stayed stuck for more than a few years. Wouldn't touch the stuff. Plus, it stinks. Plus, you only get one shot at laying your veneer in the right place. This is a case where the thing that seems as if it might be the easiest is actually the hardest. I have not had success with commercial edge banding, either put on myself or on purchased cabinets. It seems to perpetually be falling off or getting damaged in ugly ways, so I don't do that any more, using instead solid wood ~1/4" thick on the edges. That way every nick at the edge doesn't show the substrate. In either event I've had the most success trimming with a block plane. Knives like to follow the grain and lead you astray, power tools are overkill and way too easy to go wrong with. A plane is quick and gives you precise control for a cut that needs to be right within a couple thousandth's of an inch. Remember you need to treat both sides of any substrate the same, lest you end up with a potato chip. You don't need to use your fanciest face veneer on the back side, but you need to put a layer on the back if you put one on the front. Veneering solid substrates is tricky, because you need to compensate for differential wood movement. Traditionally on a solid core one would lay one veneer at 45 degree angle to the grain before the finish veneer. You will see this referred to as crossbanding in your reading. You may want to consider a plywood core instead, or, depending on the application, MDF. I'd use MDF for a table top, but not for a cabinet door due to the weight. There is also a "combination core" plywood available that has MDF faces on a plywood core that might be the best of both worlds for veneer applications. Agree with the others that paperbacked is easy. With a press, raw veneer isn't very hard (and can be had significantly thicker). There are many excellent books and videos available...See More
zazako
last year PRO
PROBeth H. :
last yearlast modified: last yearUser
last yearlast modified: last year- PRO
Beth H. :
last year 
Sherry8aNorthAL
last year- PRO
Beth H. :
last year Paul F.
last yearptreckel
last yearOlychick
last year
Rachel Lee
last yearSherry8aNorthAL
last yearmaggieq
last yearzazako
last year- PRO
Beth H. :
last yearlast modified: last year zazako
last yearUser
last yearlast modified: last year


Related Stories
DECORATING GUIDESWhich Wallcovering Is Right for You?
Transform a Space With a Wall of Wood, Paper, Fabric, Maps and More
Full Story
ARTBring In a View Like You’ve Never Imagined
See how art photographers turn a plain white wall into a magical window with a centuries-old camera technique — and how you could try it too
Full Story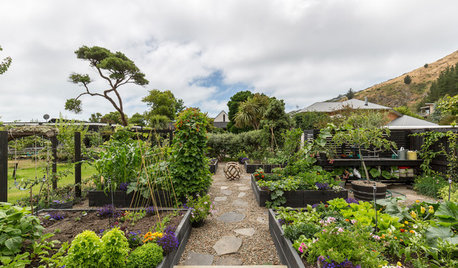
EDIBLE GARDENSNatural Ways to Get Rid of Weeds in Your Garden
Use these techniques to help prevent the spread of weeds and to learn about your soil
Full Story
HOUSEKEEPINGGot a Disastrously Messy Area? Try Triage
Get your priorities straight when it comes to housekeeping by applying an emergency response system
Full Story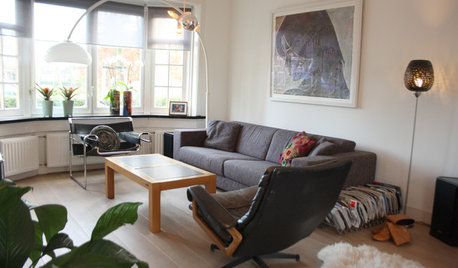
HOUZZ TOURSMy Houzz: Contemporary Character in a Dutch Suburb
Red accents, vintage maps and a classy color palette combine in a Dutch family's home
Full Story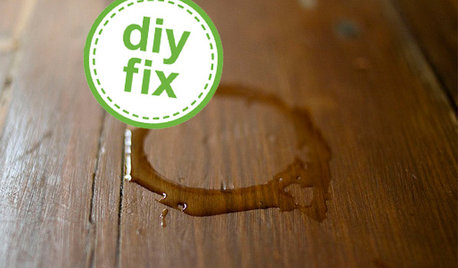
DECORATING GUIDESQuick Fix: Erase Water Rings from Furniture
A few household items can quickly rejuvenate tarnished wood tabletops
Full Story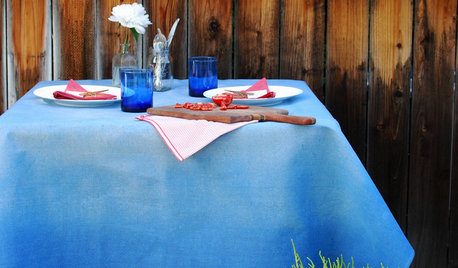
DIY PROJECTSMake a Fashion-Forward Ombré Tablecloth
Create a dashing dip-dye effect on a canvas drop cloth the easy way with this DIY project
Full Story
HOUSEKEEPINGHow to Remove Water Rings From Wood Tables
You may be surprised by some of these ideas for removing cloudy white water marks from wood surfaces
Full Story
MATERIALSAre You a Maker? Show Us Your Favorite Tool or Material
Houzz Call: A tool or material can be a maker’s best friend. We’d like to see your favorite — and what it helps you achieve
Full Story
PATTERN13 Creative Ways With Patterned Wallpaper
Treat your walls to captivating splashes of color or texture, for rooms that shut the door on boring
Full Story


apple_pie_order