


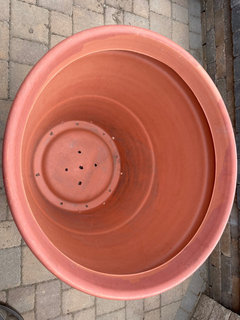
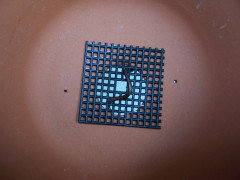
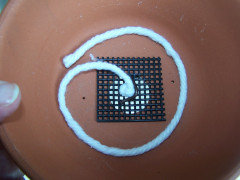
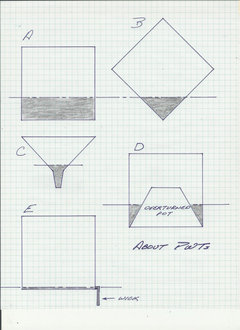
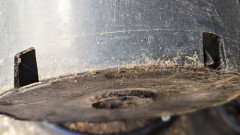
How Can I Create a Permanent Siphon Out of Container
westes Zone 9b California SF Bay
last year
Featured Answer
Sort by:Oldest
Comments (44)

ken_adrian Adrian MI cold Z5
last yearwestes Zone 9b California SF Bay thanked ken_adrian Adrian MI cold Z5Related Discussions
Roses in Permanent Containers
Comments (13)I use a private nursery blend that is composed of compost, builders course sand and finely ground pine bark mulch. I add Perlite because the pine bark mulch eventually breaks down and I still want a crumbly mix. Also it has been my experience with the Miracle-Gro pre-fertilized type products that they are usually stocked outside and are open to the eliments . The bags are perforated with small holes to allow air to get in. Good idea at first glance, but that also means that moisture from rain or the sprinkler systems can also get inside the bag causing the fertilzer to become active. If you look at the bags of Miracle Gro products left outside you will see that many of the fertilizer granules are already expanded. On annuals it's not that important, on my roses that I intend to get many many years out of I like to start out with the best potting mix available even if it is more expensive or more effort. BTW, I've used the Walmart brand (like Miracle Gro) potting mix on my annuals and it is every bit as good as Miracle Gro( and can also have the same problems). I have not checked out the ORGANIC type potting mix some have mentioned, but again I would double check to make sure that the fertilizer problem has been addressed....See MorePermanent leaf loss with container citrus?
Comments (8)Meyermike brings up a good point for anyone that irrigates their citrus with rain water, or even snow water for that matter. Both sources are a pure water source, that do not contain nutrients. If you use these sources of water you need to add about 10 percent of tap water, or some source of calcium and magnesium.Packaged fertilizers do not normally supply these nutrients. Without the addition the tree will soon begin to show a deficiency. - Silica...See MoreDo empty containers create false hope?
Comments (13)the thrilling moments of my life were when I could afford to buy the mos perfect organizing items to hold the things I had to have..and save..things that were important to me, after giving away about 80 % of my stuff.. I shopped until I found the most perfect 12' long wall unit to house my entertainment items and books, I totally love my books and wanted them around me to grab at a moments notice..these aren't novels, they are my reference books for gardens and interior design as well as others that i KEEP..the boring ones have already left..the unit had drawers for some throws and paperwork as well..and it has made life so perfect..i also got a coffee table with 2 cabints and 2 drawers, now the remote controls you have to have, and my note taking books and pens, etc..are neatly tucked away inside..as well as some art pencils and paints..that i can grab to be creative.. I feel that plastic containers shoved full of junk in a deep dark closet, is not the right place to store the things you love..sure, maybe a few things for crafts that you know you will work on, or some fabric for a sewing project or two..but who needs stuff they'll never use, hiding in those things all over the place..the best thing for shoeboxes ...even those plastic ones...is a few great pairs of shoes !...See MorePassiflora Caerulea in containers to create a screen?
Comments (3)Thanks Tim! Both the varieties you suggest are gorgeous. It would be amazing to have edible fruit... I think our climate is eqivalent to US zone 9 - do I need to protect the pots in winter? And would the Frederick and Ruby be likely to keep their leaves over winter in those temperatures?...See More
westes Zone 9b California SF Bay
last yearwestes Zone 9b California SF Bay
last yearlast modified: last year
tapla (mid-Michigan, USDA z5b-6a)
last yearwestes Zone 9b California SF Bay thanked tapla (mid-Michigan, USDA z5b-6a)westes Zone 9b California SF Bay
last yeartapla (mid-Michigan, USDA z5b-6a)
last yearwestes Zone 9b California SF Bay thanked tapla (mid-Michigan, USDA z5b-6a)westes Zone 9b California SF Bay
last yeartapla (mid-Michigan, USDA z5b-6a)
last yearwestes Zone 9b California SF Bay thanked tapla (mid-Michigan, USDA z5b-6a)tapla (mid-Michigan, USDA z5b-6a)
last yearwestes Zone 9b California SF Bay thanked tapla (mid-Michigan, USDA z5b-6a)westes Zone 9b California SF Bay
last yeartapla (mid-Michigan, USDA z5b-6a)
last yearwestes Zone 9b California SF Bay thanked tapla (mid-Michigan, USDA z5b-6a)tapla (mid-Michigan, USDA z5b-6a)
12 months agolast modified: 12 months agowestes Zone 9b California SF Bay thanked tapla (mid-Michigan, USDA z5b-6a)
tropicofcancer (6b SW-PA)
11 months agowestes Zone 9b California SF Bay thanked tropicofcancer (6b SW-PA)westes Zone 9b California SF Bay
11 months agotapla (mid-Michigan, USDA z5b-6a)
11 months agowestes Zone 9b California SF Bay thanked tapla (mid-Michigan, USDA z5b-6a)tropicofcancer (6b SW-PA)
11 months agowestes Zone 9b California SF Bay thanked tropicofcancer (6b SW-PA)westes Zone 9b California SF Bay
11 months agotropicofcancer (6b SW-PA)
11 months agowestes Zone 9b California SF Bay thanked tropicofcancer (6b SW-PA)tapla (mid-Michigan, USDA z5b-6a)
11 months agowestes Zone 9b California SF Bay thanked tapla (mid-Michigan, USDA z5b-6a)Michele Rossi
11 months agolast modified: 11 months agowestes Zone 9b California SF Bay thanked Michele Rossiwestes Zone 9b California SF Bay
11 months agolast modified: 11 months agowestes Zone 9b California SF Bay
11 months agotapla (mid-Michigan, USDA z5b-6a)
11 months agowestes Zone 9b California SF Bay thanked tapla (mid-Michigan, USDA z5b-6a)tropicofcancer (6b SW-PA)
11 months agowestes Zone 9b California SF Bay thanked tropicofcancer (6b SW-PA)tapla (mid-Michigan, USDA z5b-6a)
11 months agowestes Zone 9b California SF Bay thanked tapla (mid-Michigan, USDA z5b-6a)westes Zone 9b California SF Bay
11 months agotropicofcancer (6b SW-PA)
11 months agowestes Zone 9b California SF Bay thanked tropicofcancer (6b SW-PA)westes Zone 9b California SF Bay
11 months agotropicofcancer (6b SW-PA)
11 months agowestes Zone 9b California SF Bay thanked tropicofcancer (6b SW-PA)tapla (mid-Michigan, USDA z5b-6a)
10 months agowestes Zone 9b California SF Bay thanked tapla (mid-Michigan, USDA z5b-6a)tropicofcancer (6b SW-PA)
10 months agowestes Zone 9b California SF Bay thanked tropicofcancer (6b SW-PA)


Related Stories

THE POLITE HOUSEThe Polite House: What Can I Do About My Neighbors’ Trash Cans?
If you’re tired of staring at unsightly garbage way before pickup day, it’s time to have some tough conversations
Full Story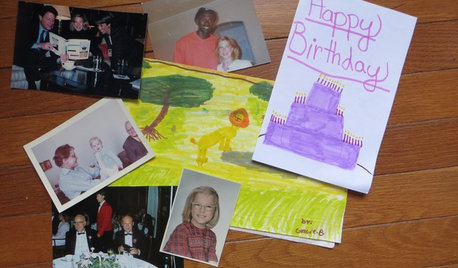
LIFEWhat I Learned While Cleaning Out My Junk Drawers
A homeowner finds some surprises on her journey to junk-free bliss
Full Story
GARDENING AND LANDSCAPINGOut in the Yard: Creating an Art-Inspired Garden
Add Interest and Character to Your Landscape With an Unexpected Eye-Catcher
Full Story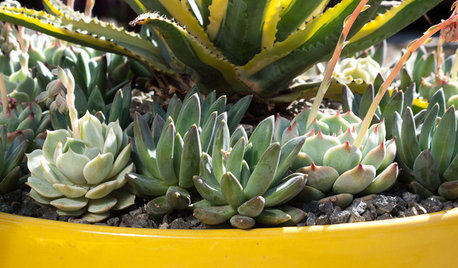
CONTAINER GARDENS3 Steps to Creating Quick, Easy and Colorful Succulent Containers
Take a bright container, add a colorful succulent or two and have a professional, summery design in minutes
Full Story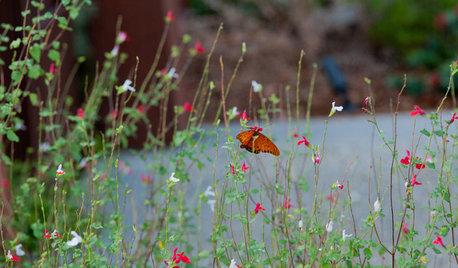
EARTH DAYCreate a Container Wildlife Habitat for Hummingbirds and Butterflies
Don’t let limited space prevent you from welcoming wildlife into your garden
Full Story
DECLUTTERINGCan’t Figure Out What ‘Sparks Joy’? Try This Question Instead
If you can’t decide whether to keep something or let it go, shift your perspective to find the answer
Full Story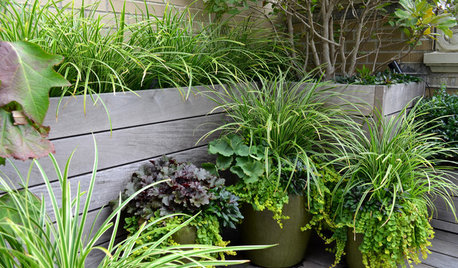
PLANTING IDEASCreate High-Impact Container Gardens With Grasses
When it comes to adding drama, texture and panache to a pot, these strappy species are hard to beat
Full Story
LIFEThe Polite House: How Can I Kindly Get Party Guests to Use Coasters?
Here’s how to handle the age-old entertaining conundrum to protect your furniture — and friendships
Full Story
LAUNDRY ROOMSWhere Can I Hide My Laundry Area?
It’s a case of now you see it, now you don’t with these 10 clever ways of fitting in a laundry zone
Full Story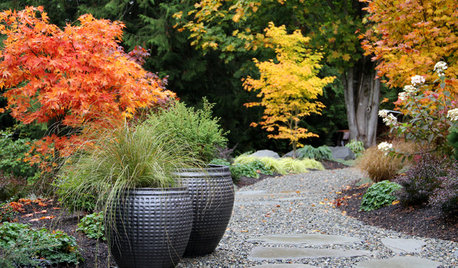
CONTAINER GARDENS9 Tips for Creating an Artful Container Garden
Make your potted plantings a beautiful sight with these ideas for container types, plant groupings and more
Full Story
tapla (mid-Michigan, USDA z5b-6a)